
Setting up Microsoft Entra SAML SSO
Follow these steps to set up single sign-on (SSO) using Microsoft Entra ID as your identity provider (IdP).
Prerequisites
- You must be a Global Administrator or Application Administrator in Microsoft Entra ID.
- You must have admin access in your EasyEviction account (Company Settings → SSO Configuration).
- Users must already have active, verified accounts in EasyEviction to be able to log on using SSO.
Step 1: Create a new Enterprise Application in Microsoft Entra ID
- Open a new tab or browser window.
- Log in to the Microsoft Entra admin center.
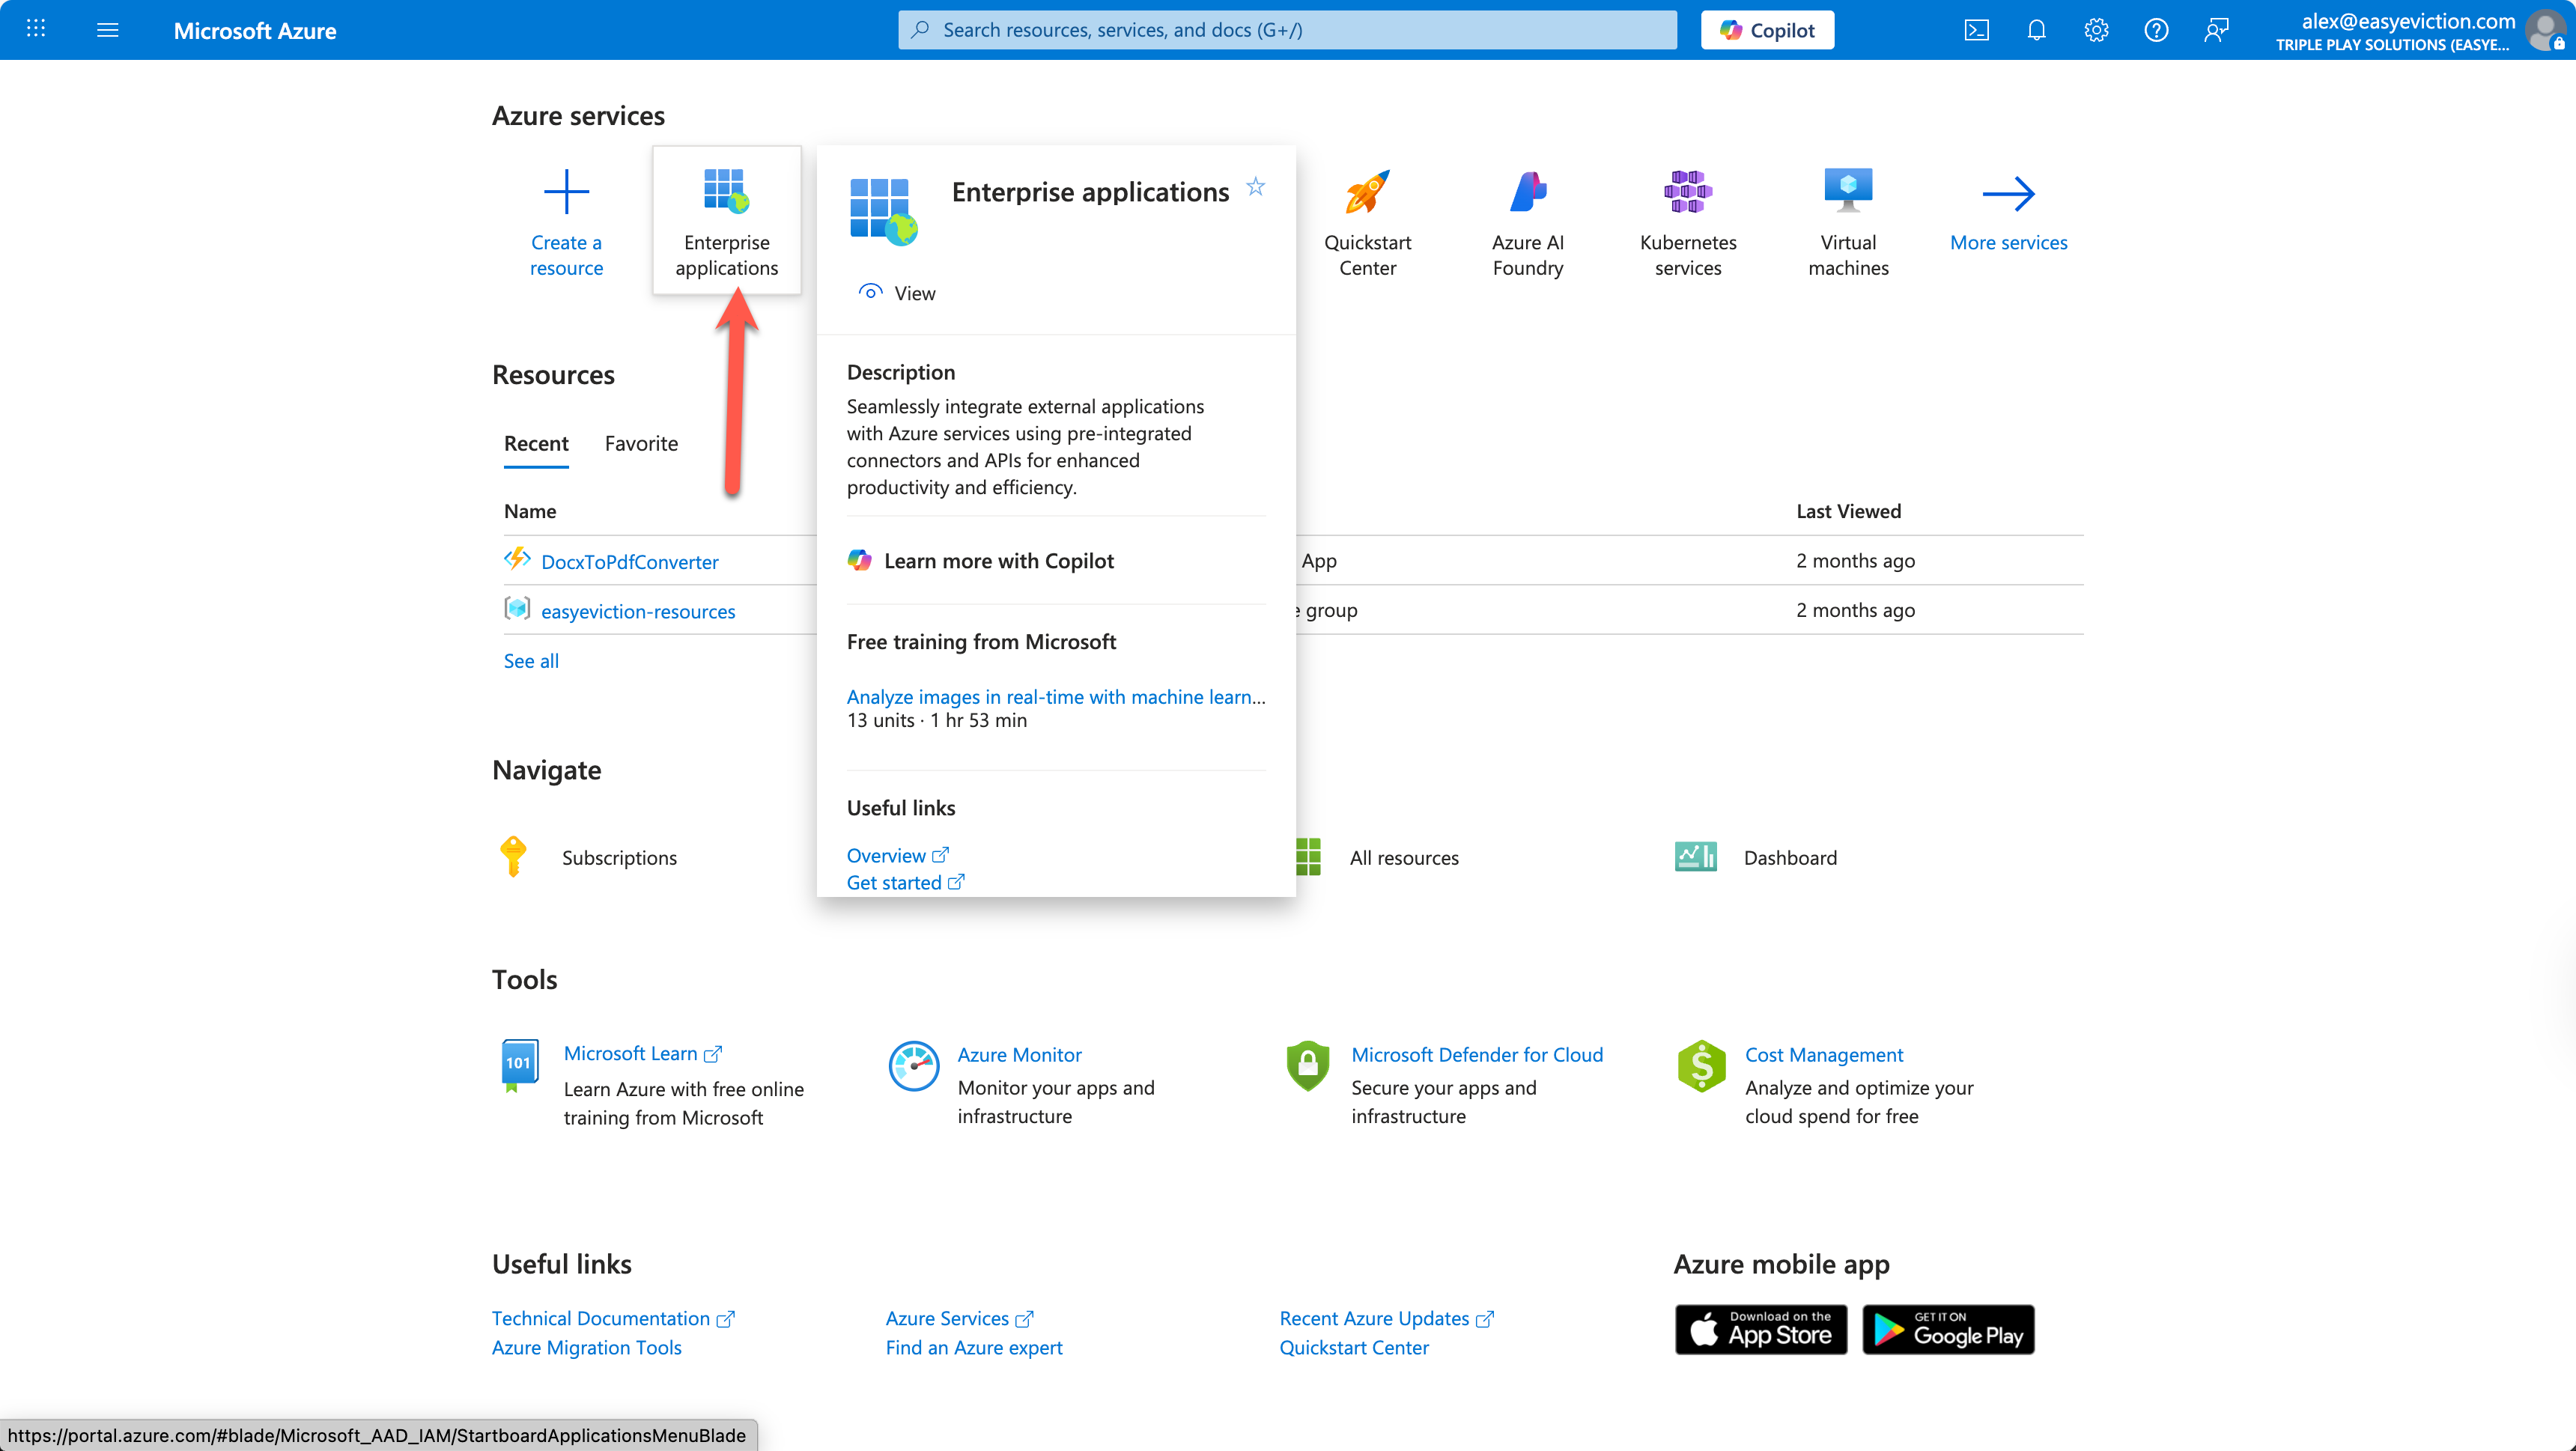
- Navigate to Enterprise applications → All applications.
- Click + New application → Create your own application.
- Name it EasyEviction SSO.
- Select Integrate any other application you don’t find in the gallery (Non-gallery).
- Click Create.

Step 2: Set up SAML SSO
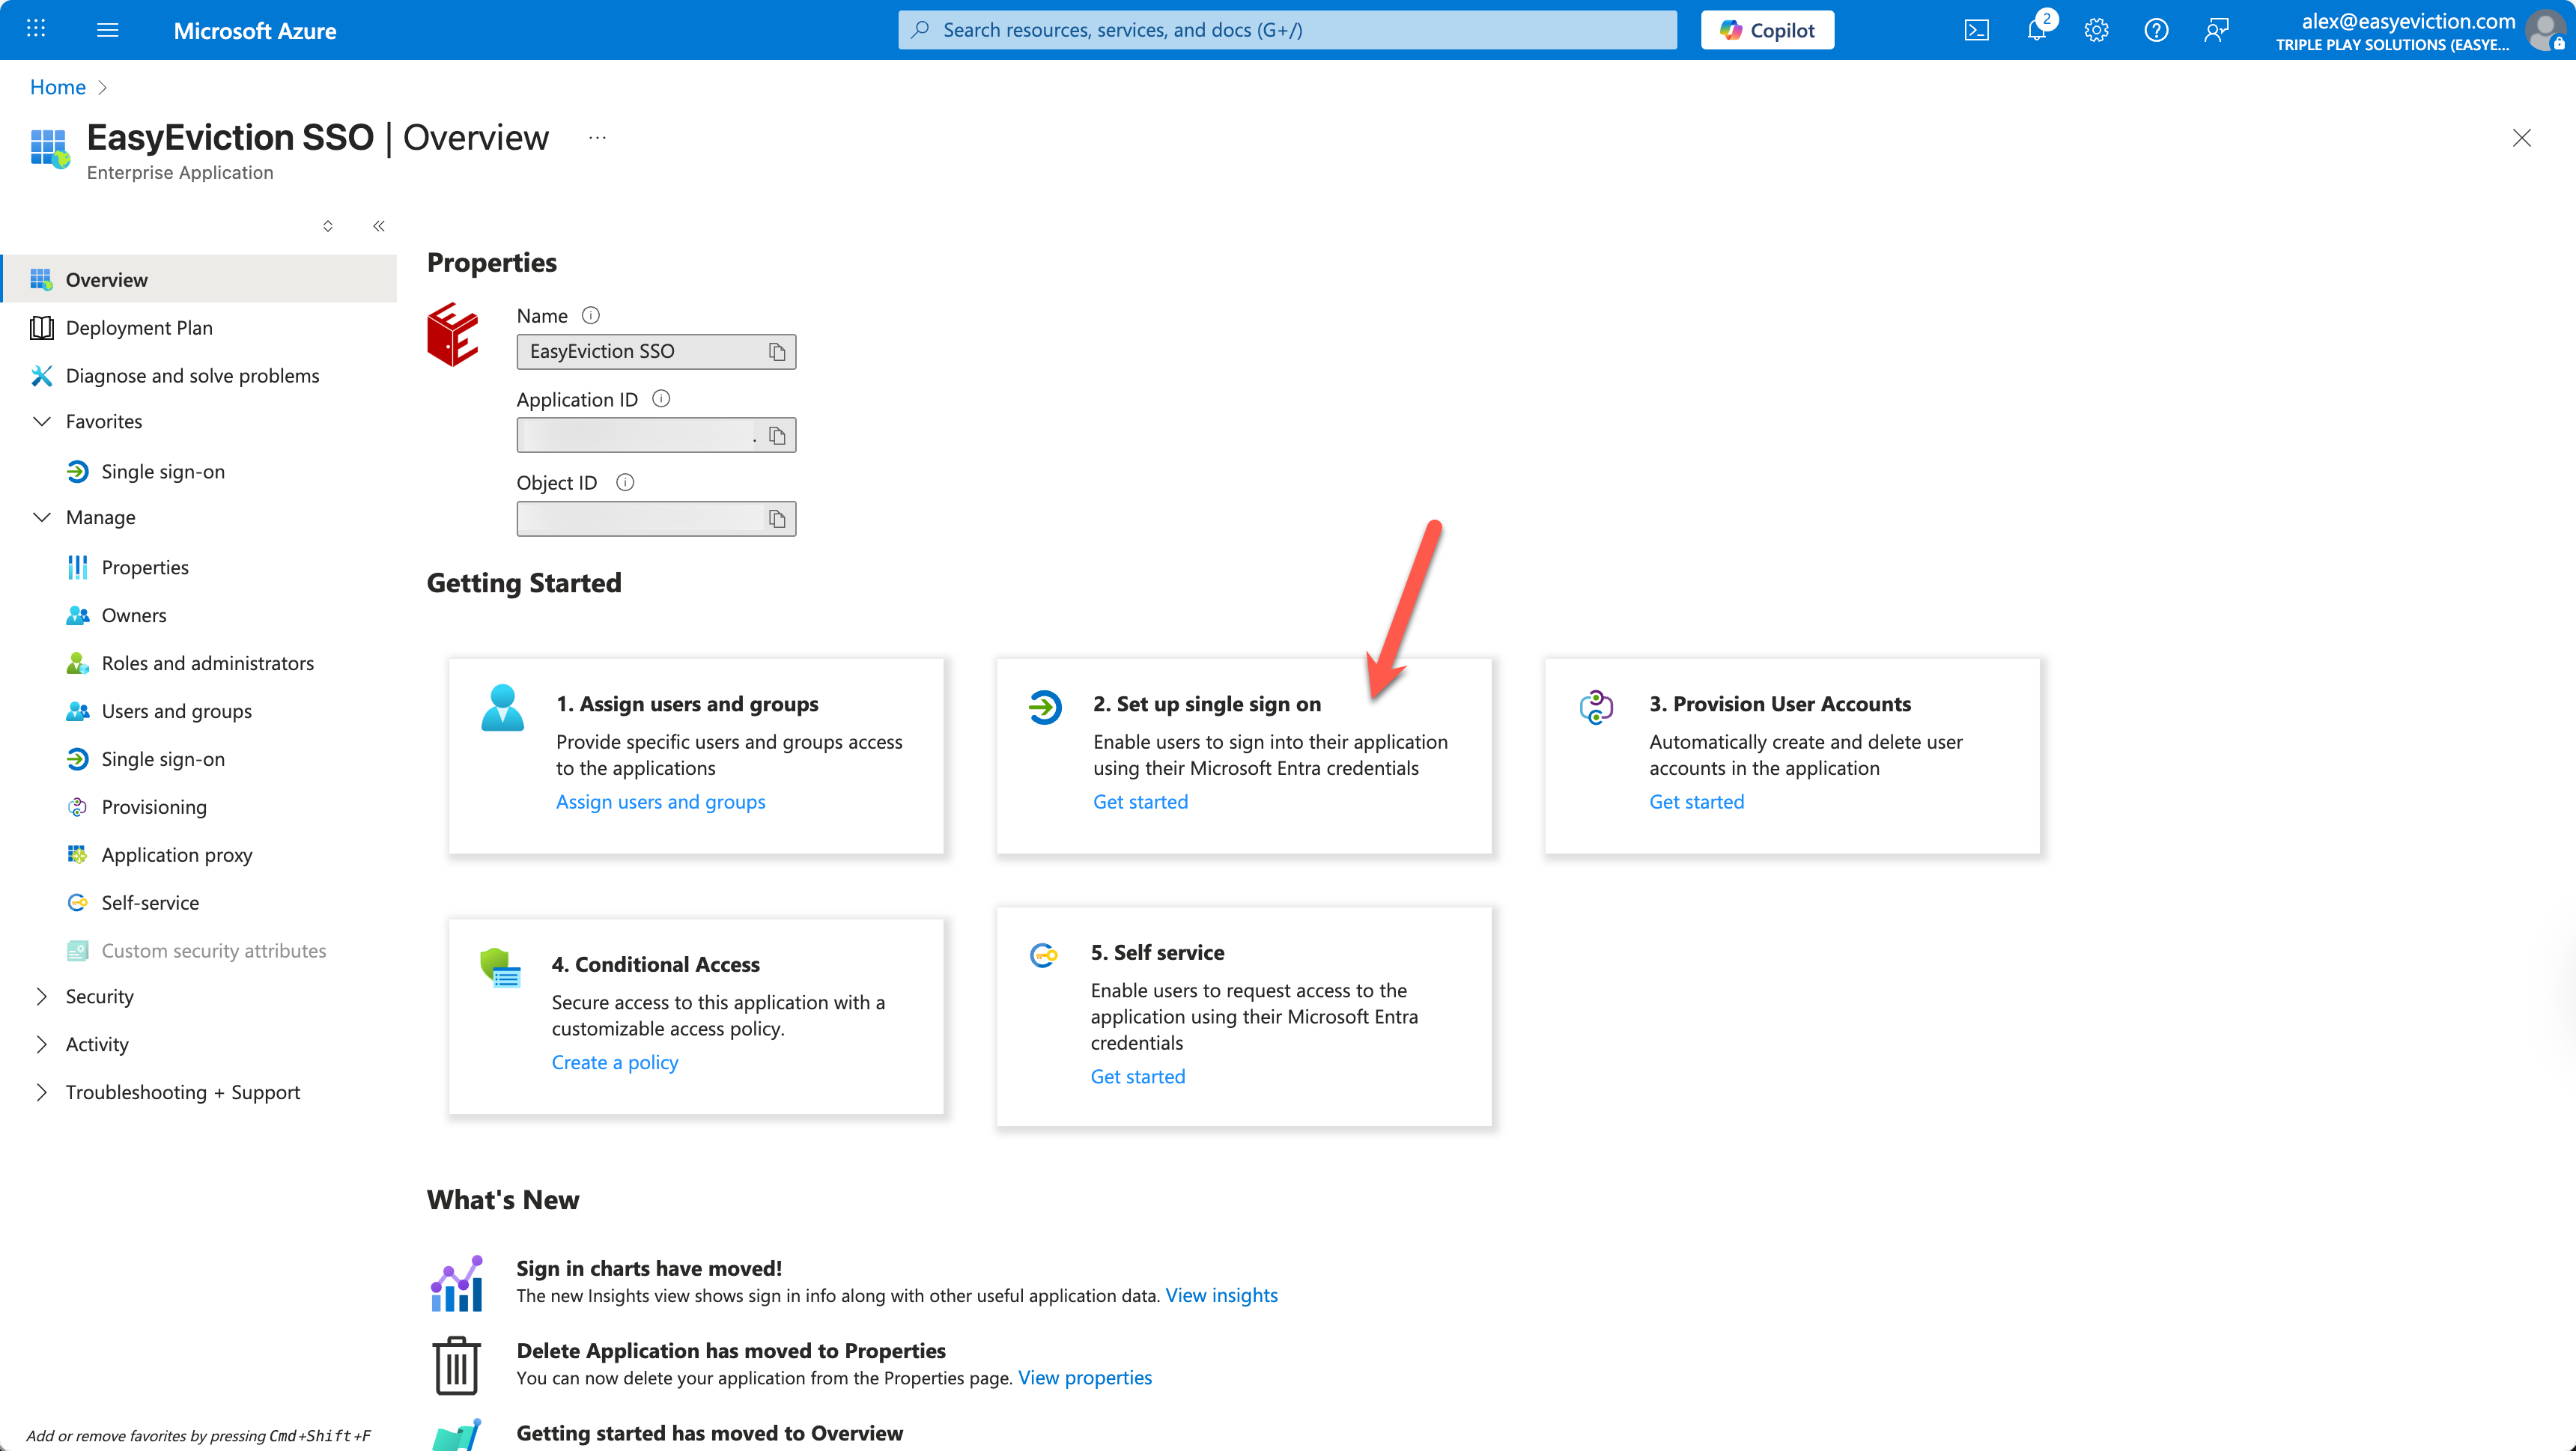
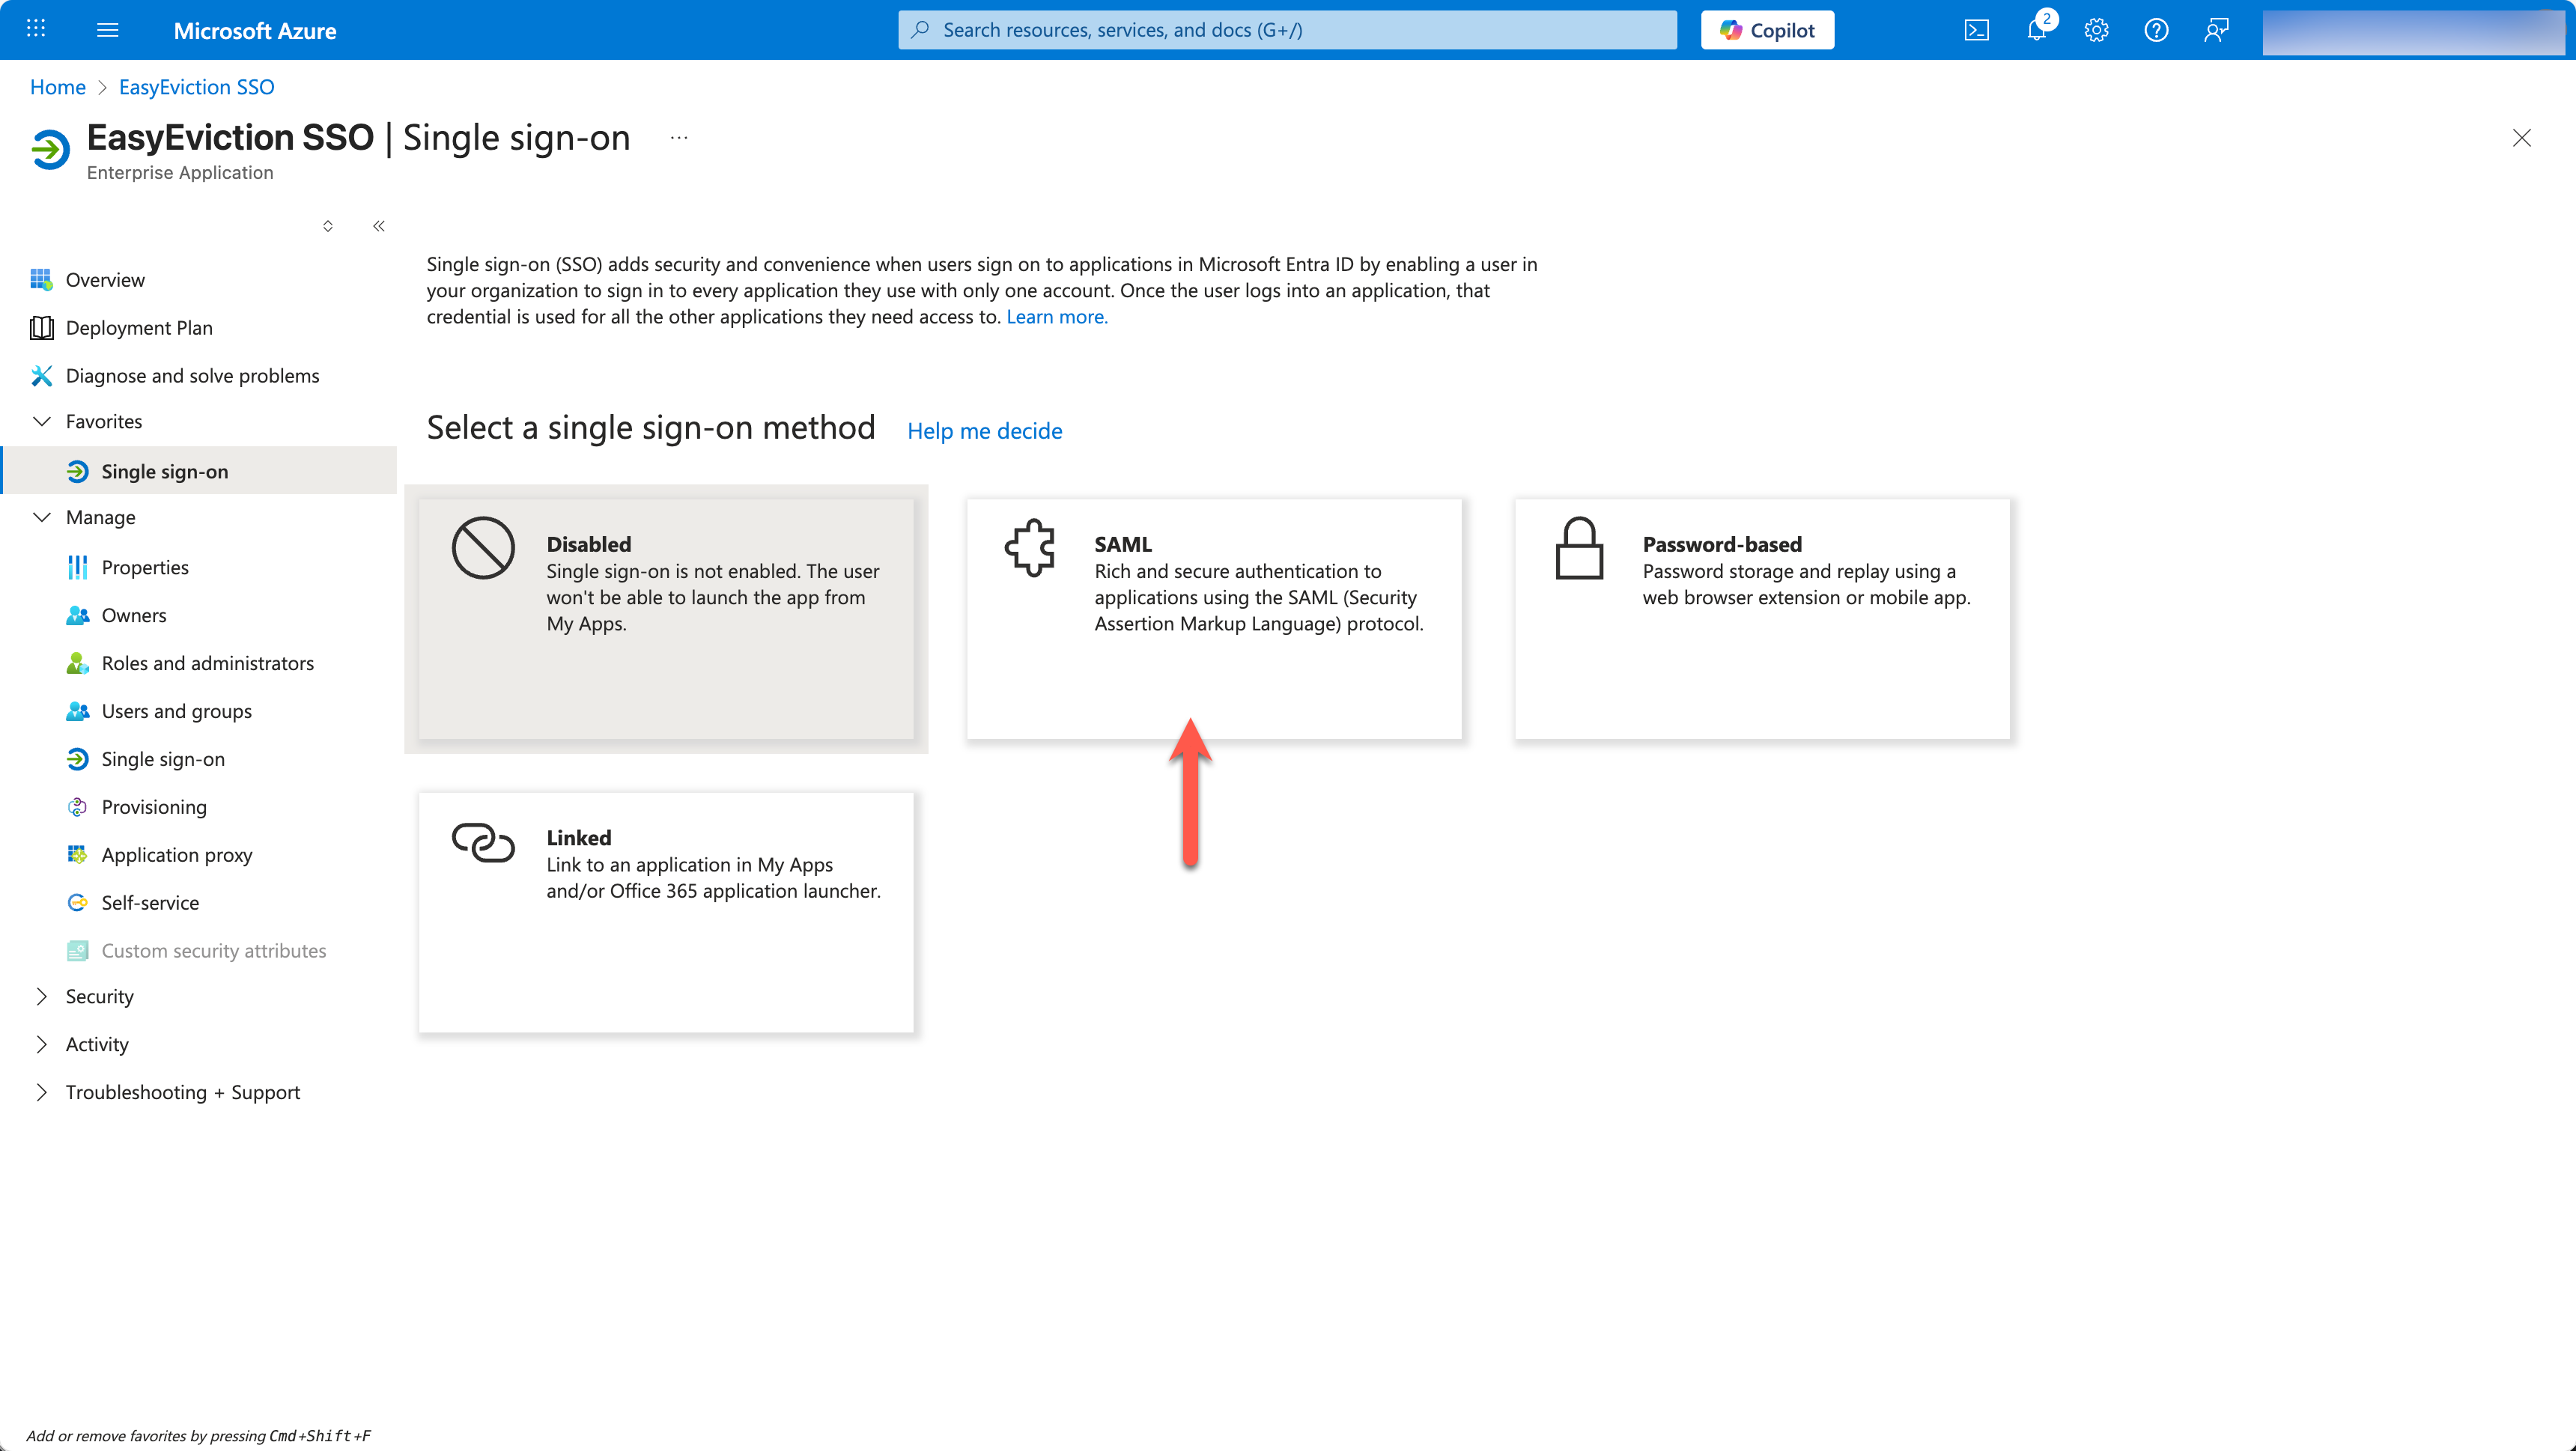
- In the new application, go to Single sign-on in the left menu.
- Choose SAML.
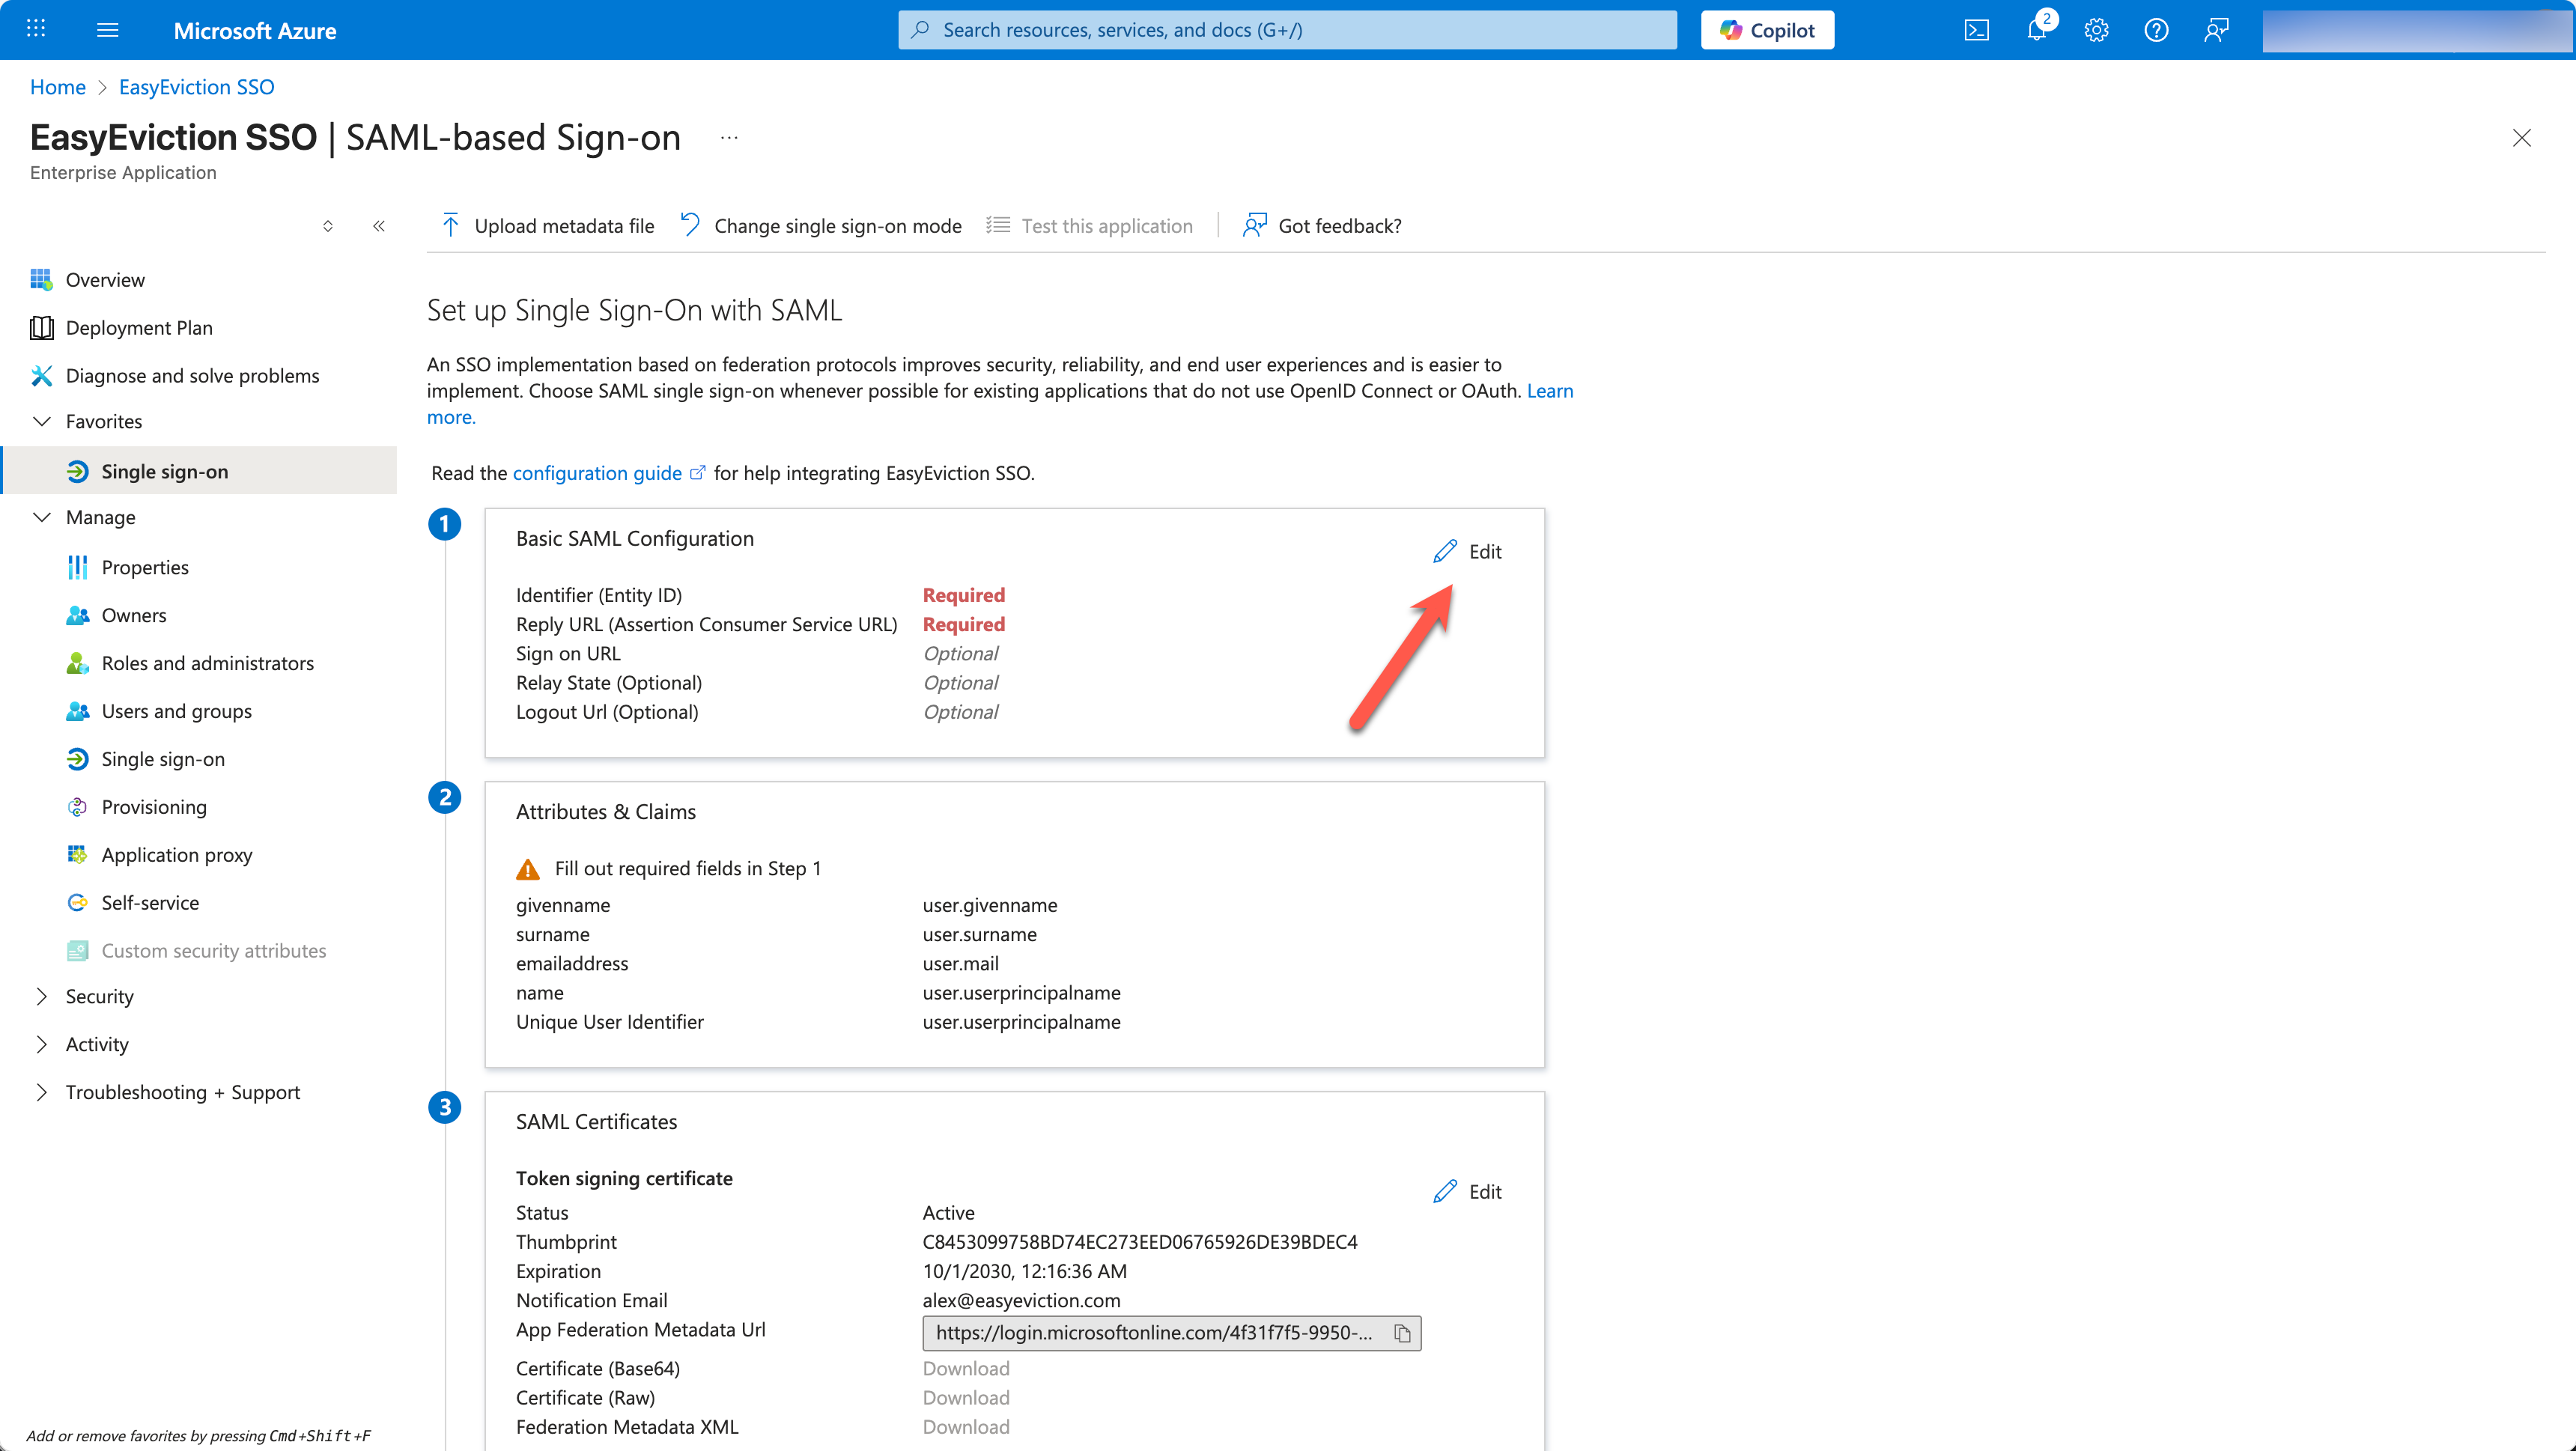
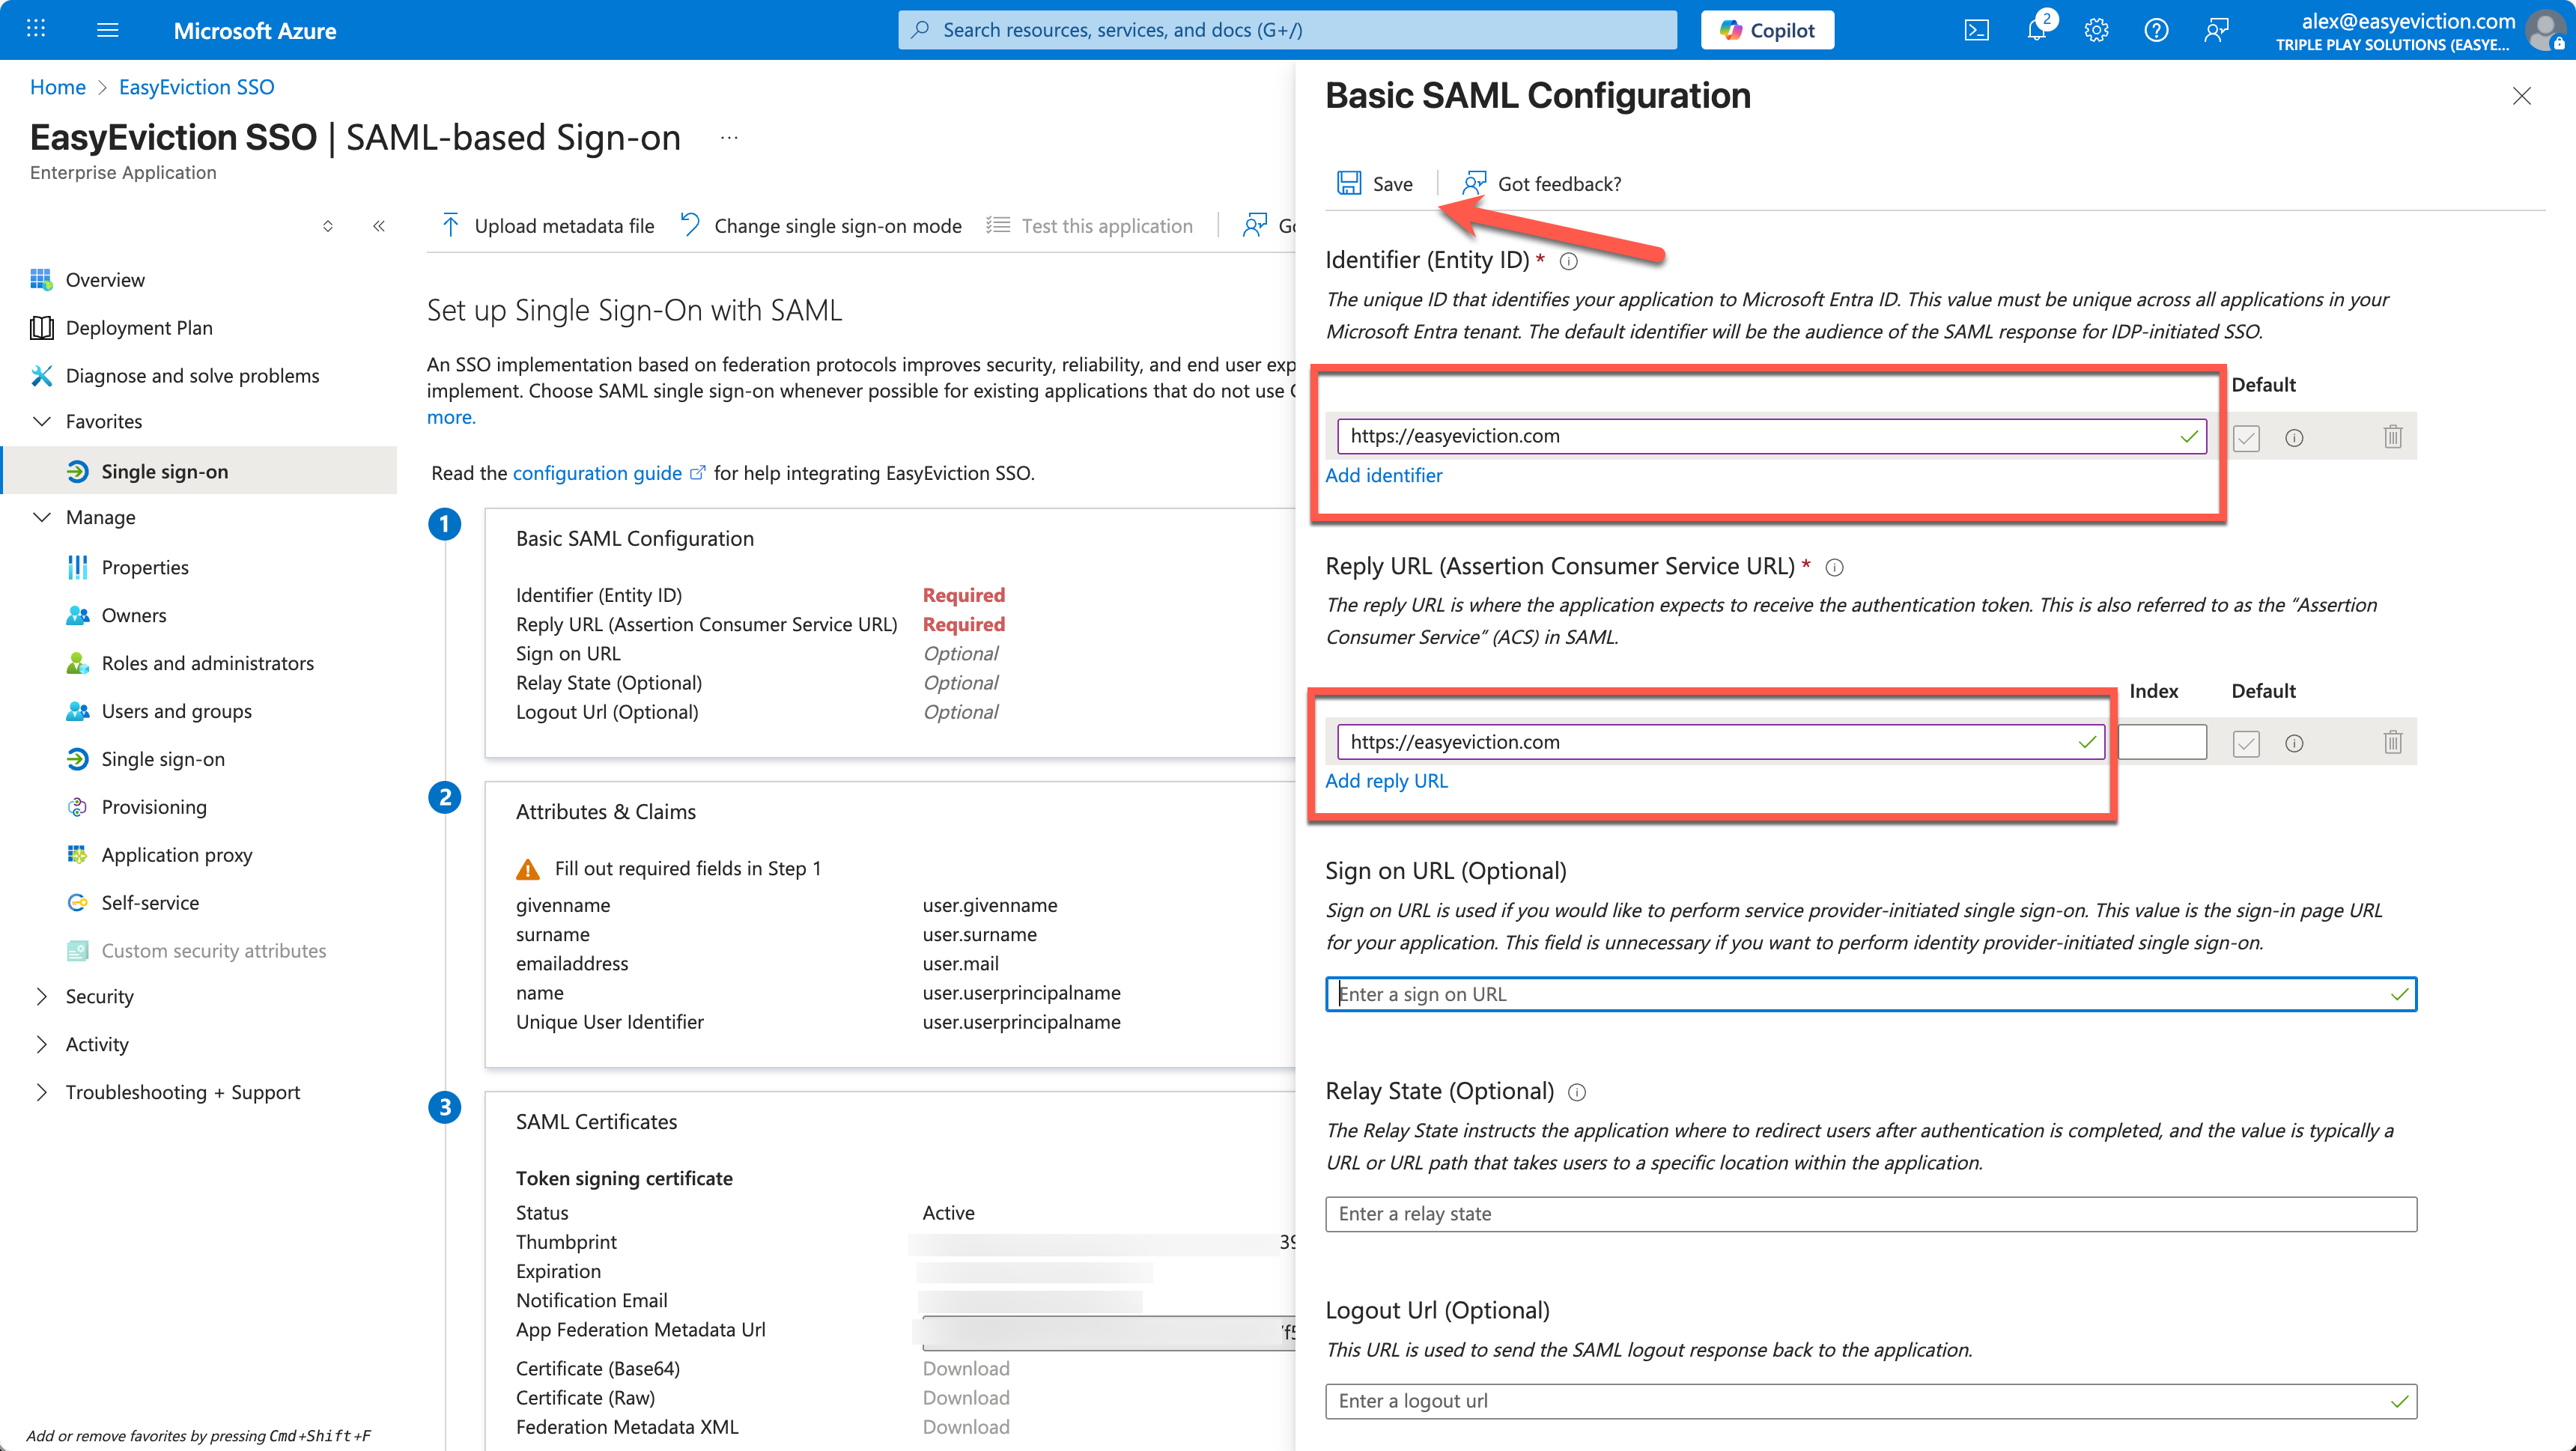
- On the Set up Single Sign-On with SAML page, click Edit in the Basic SAML Configuration section.
- Insert temporary information into the Basic SAML Configuration settings. We will be replacing these with actual values after setting up SSO within EasyEviction Admin section.
- Identifier (Entity ID): https://easyeviction.com
- Reply URL: https://easyeviction.com
- Click Save.
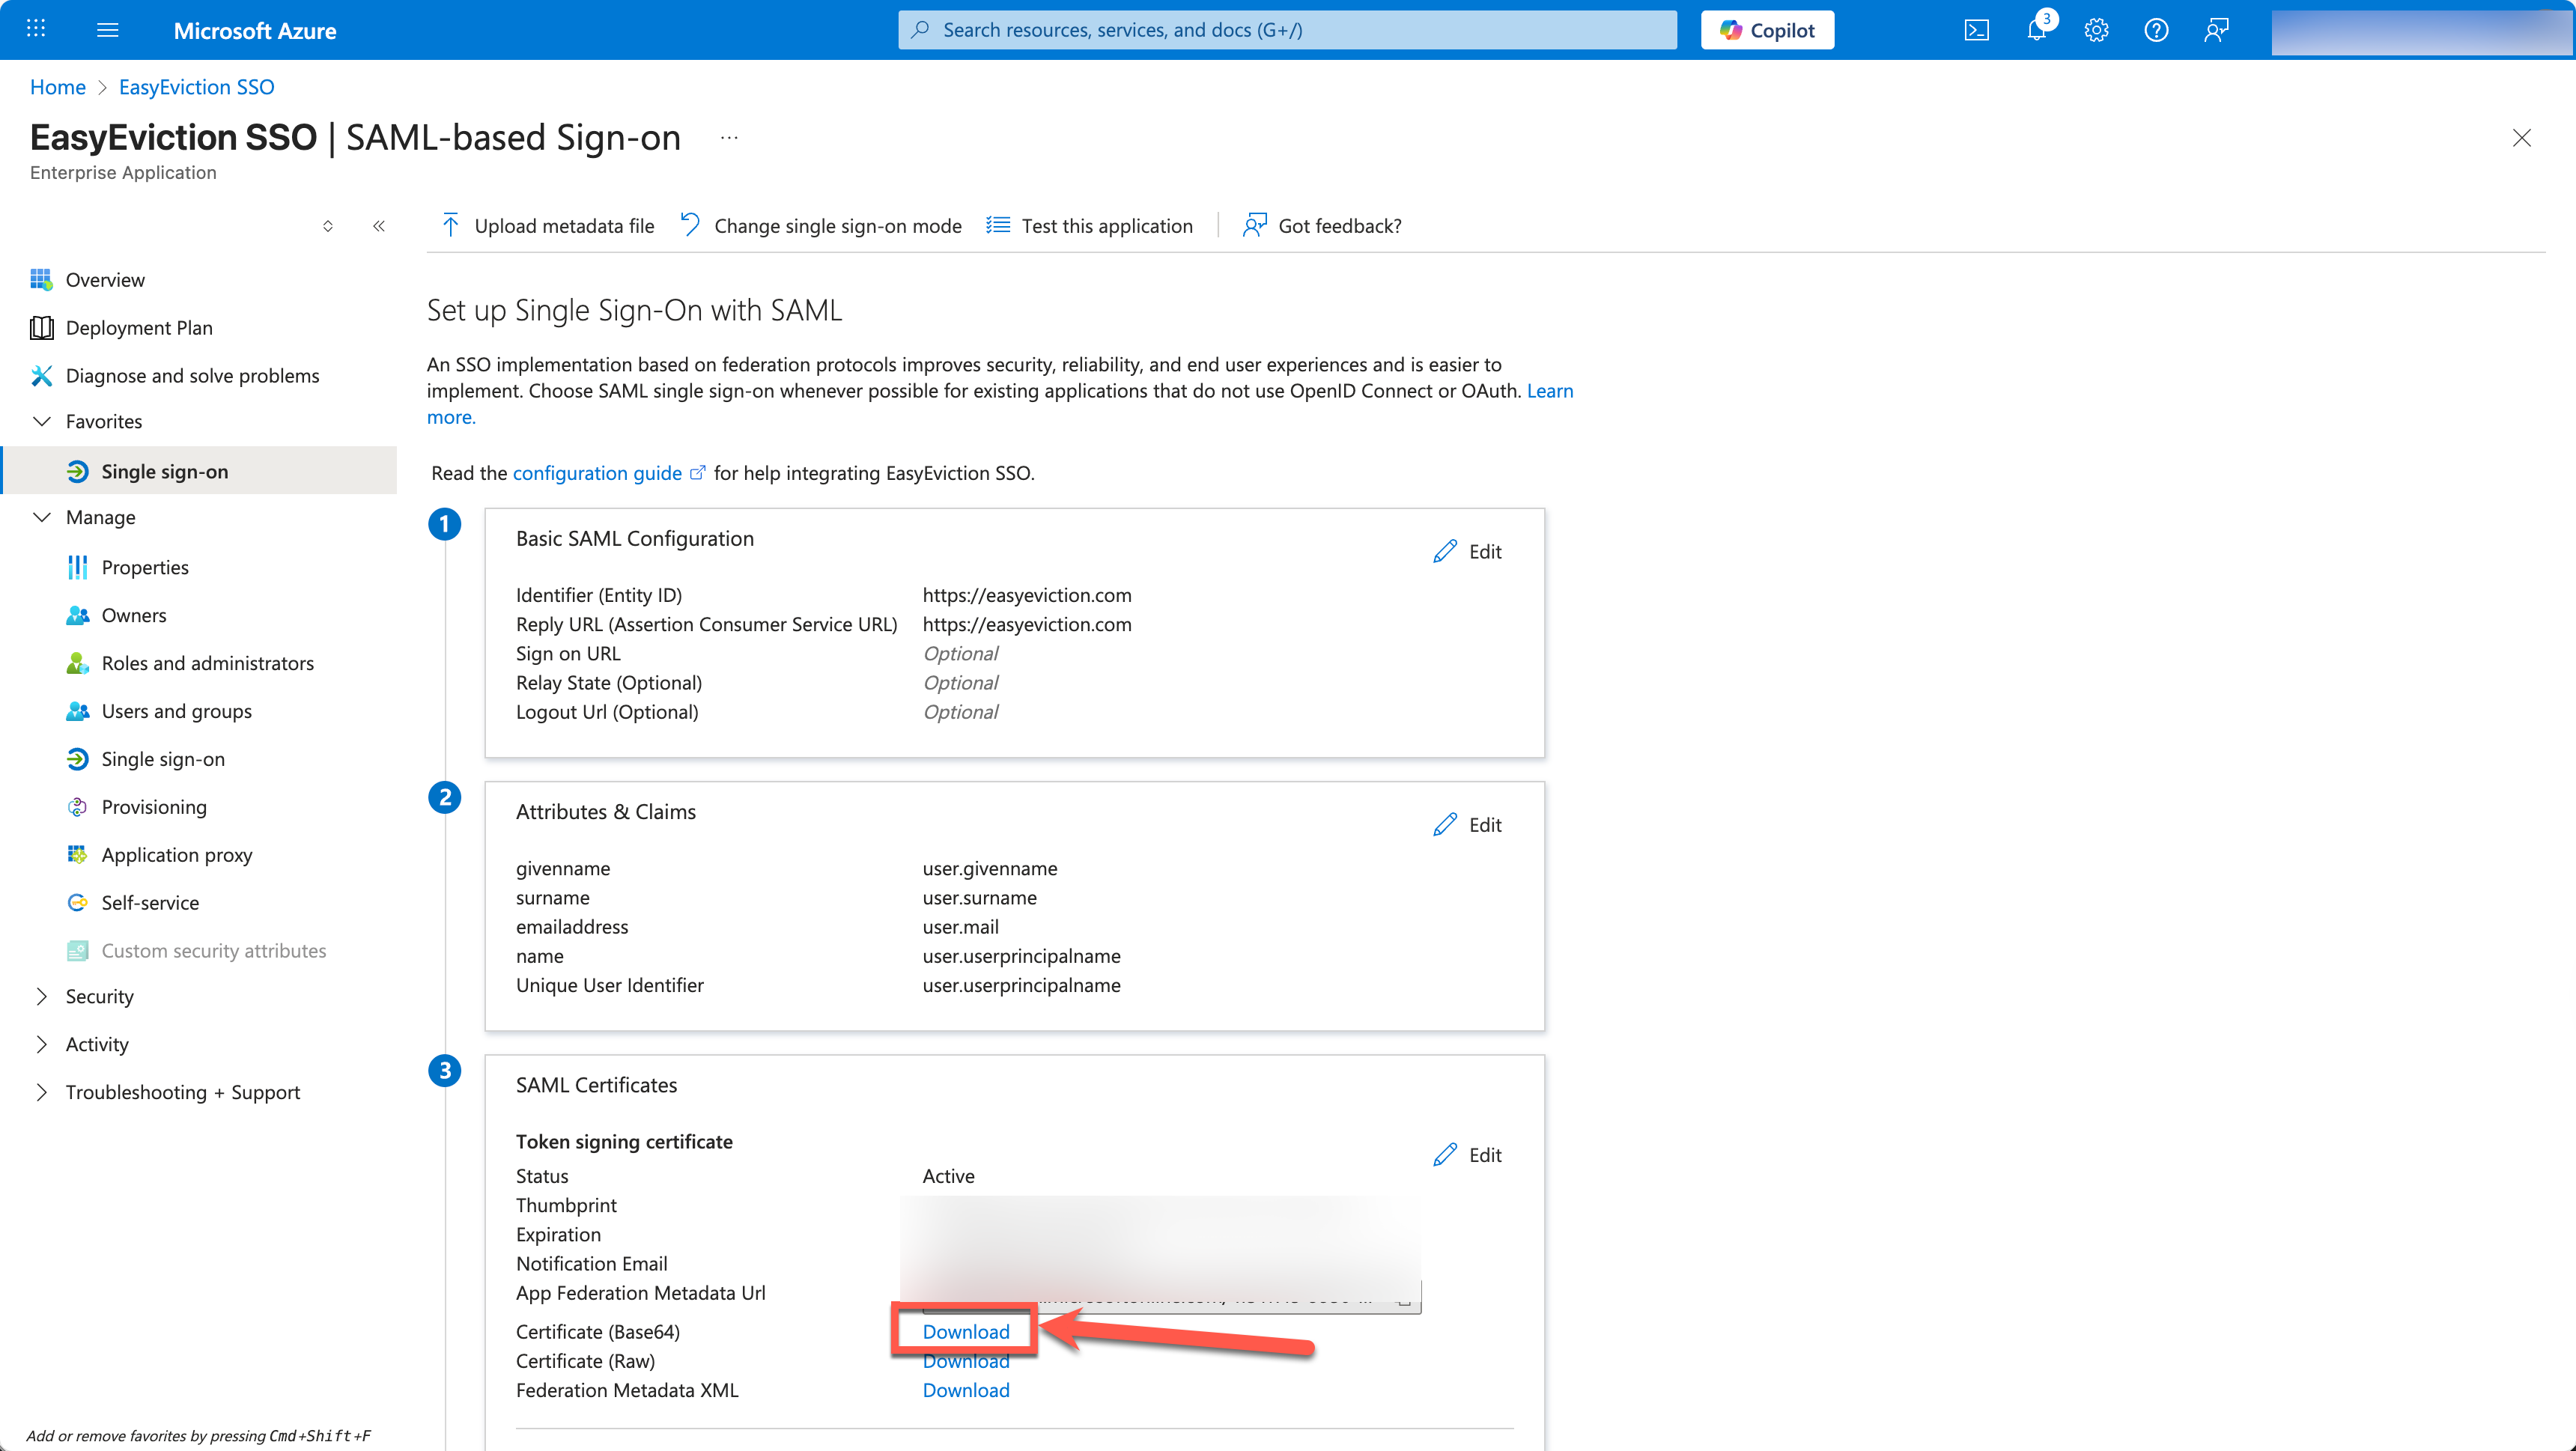
- The Download button should now be enabled under the SAML Certificates section. Click the one next to Certificate (Base64).
- Open the downloaded .cer file in a text editor
Step 4: Update settings in EasyEviction
- Open a new tab and navigate to https://portal.easyeviction.com
- Log on and click on Admin Settings in the navigation bar
- Click on SSO Settings in the sub navigation menu
- Under Configuration Method, select Manual Entry
- Copy the contents of the Certificate from the text editor (Step 3) into the Base64 Certificate (X.509) field. Do NOT include the first line and the second line:
-----BEGIN CERTIFICATE-----
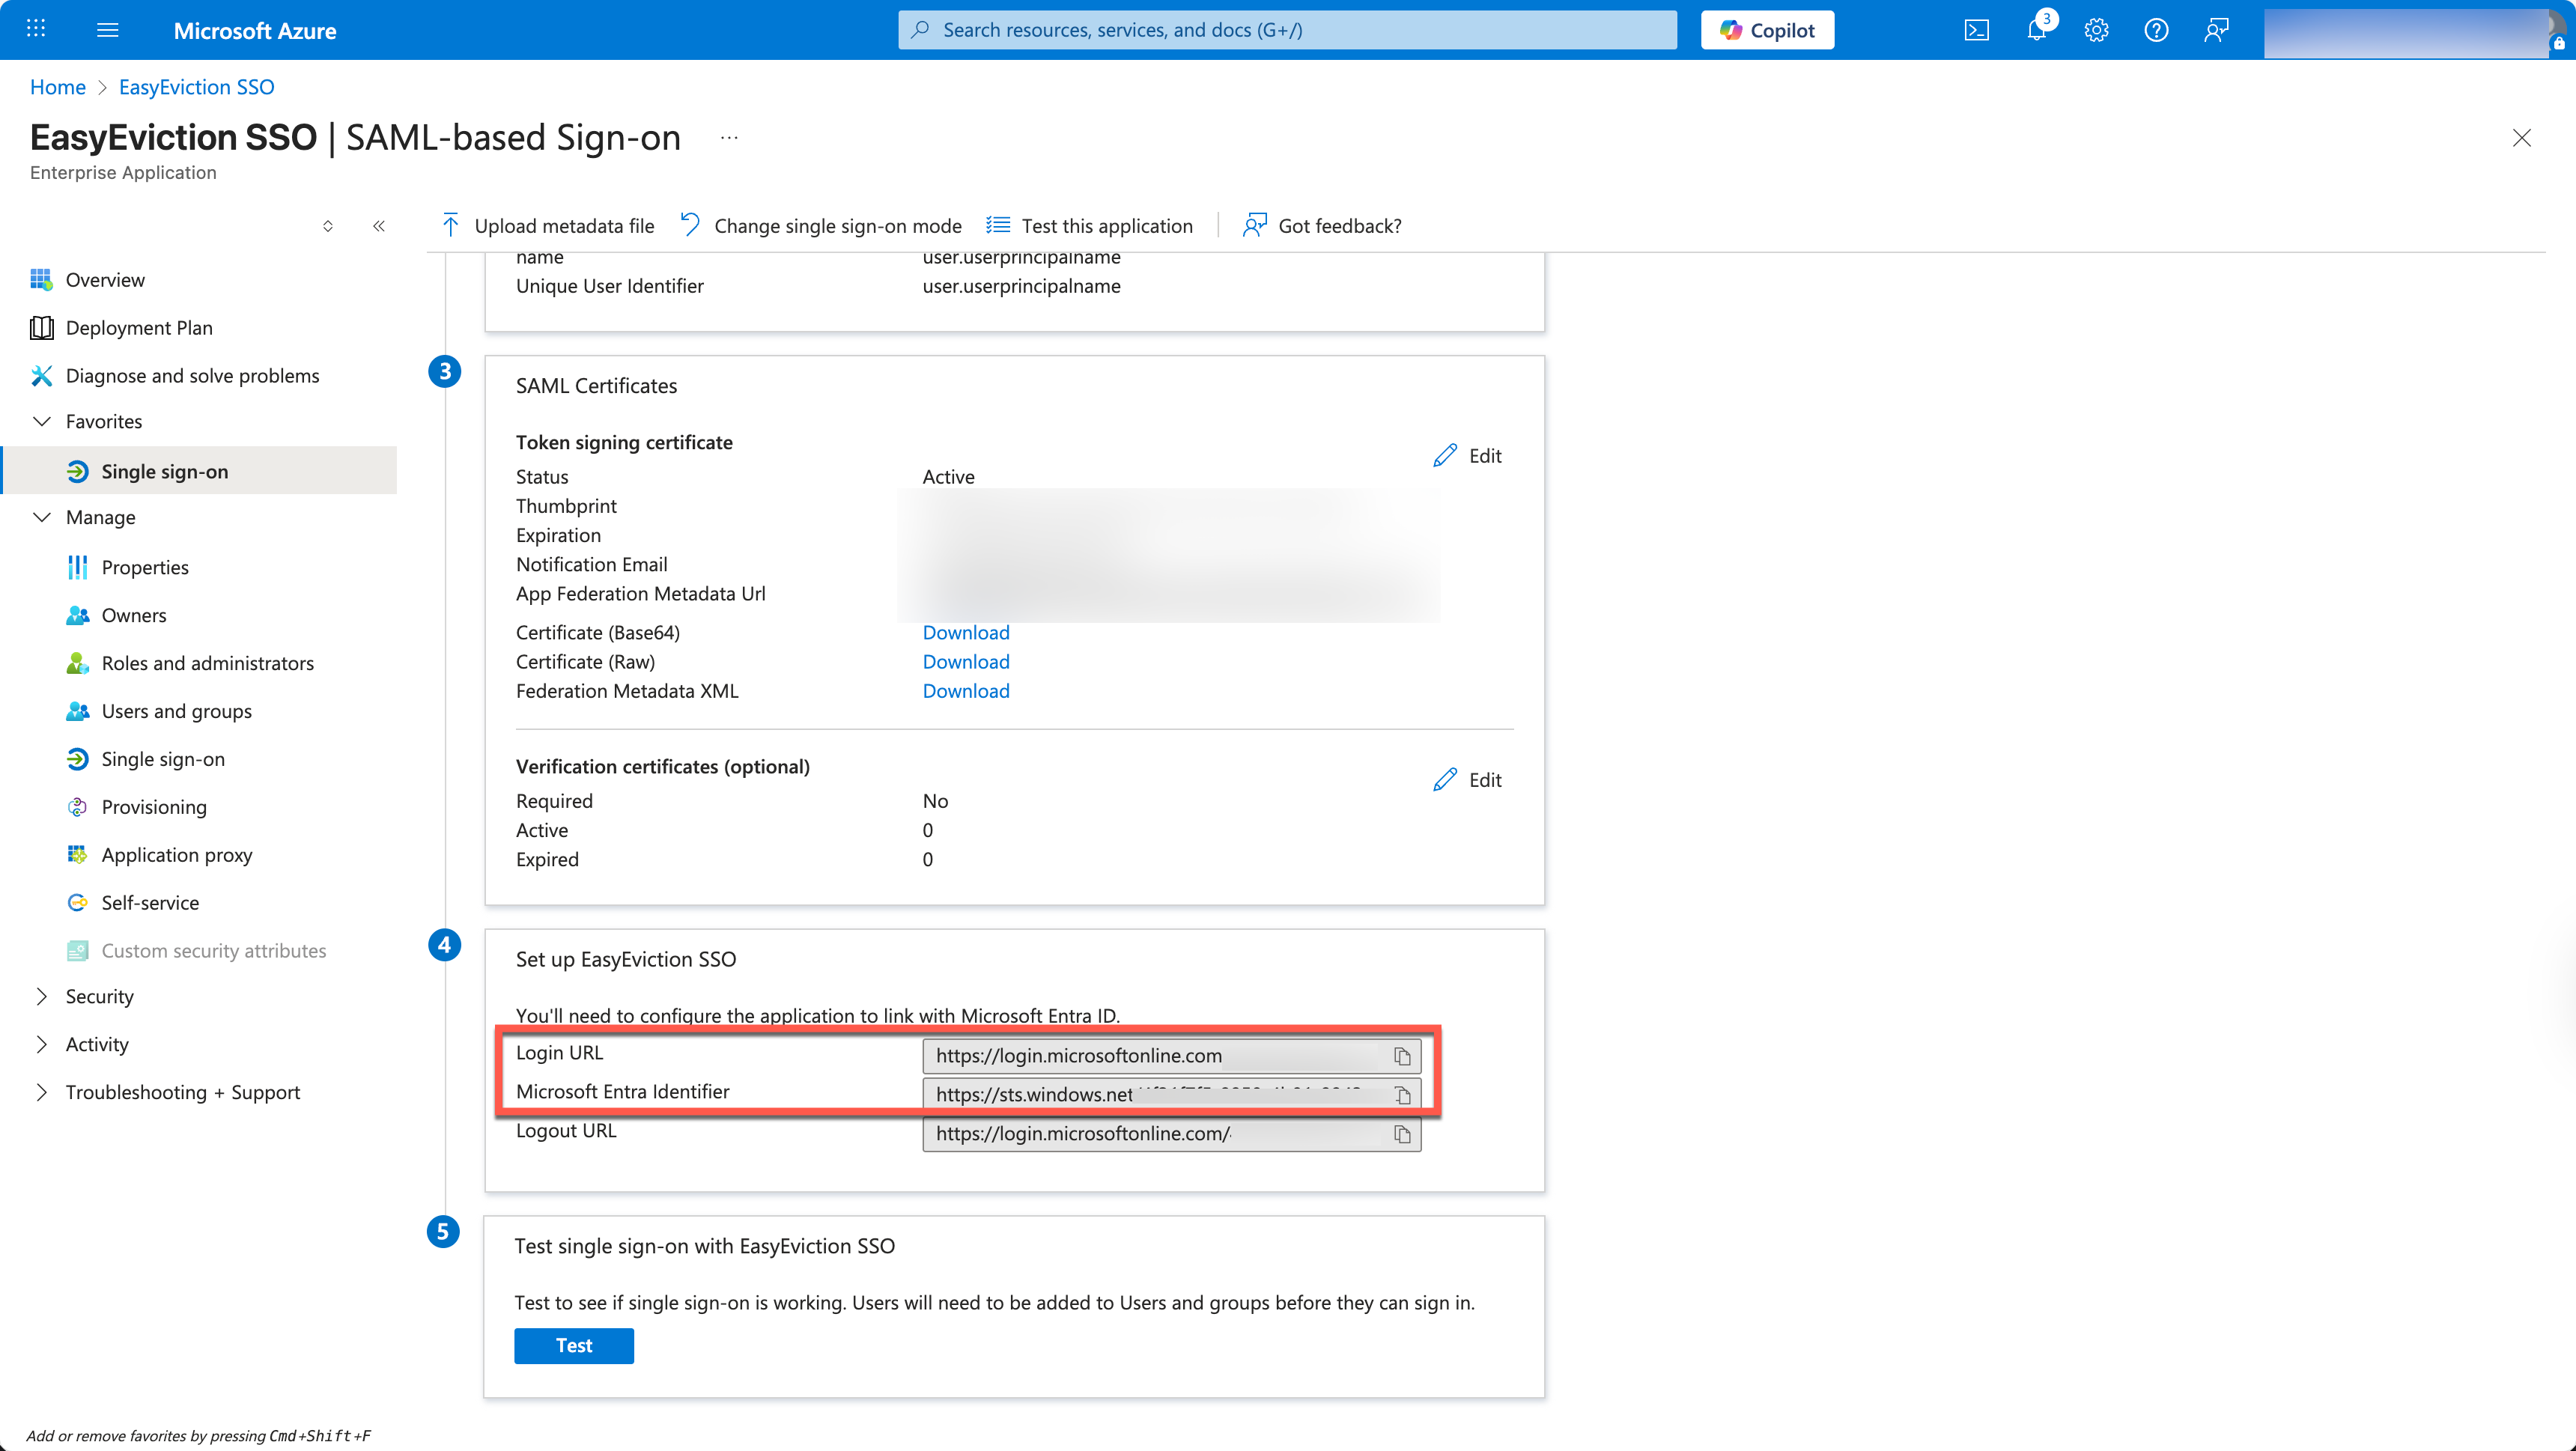
-----END CERTIFICATE----- - From the Entra settings screen, copy the following values:
- Login URL into Login URL (SSO Endpoint)
- Microsoft Entra Identifier into Issuer (Entity ID)
- Click Add Configuration
- After a successful save, the SSO Settings screen should display SSO Active and IdP configuration values should be displayed. Use these values back on the Microsoft Entra tab.
Step 5: Update Basic SAML Configurations
We previously copied temporary values -- we'll now copy actual values from the EasyEviction SSO Configuration page.
- Click Edit in the Basic SAML Configuration section again.
- Copy the values from the EasyEviction SSO Configuration page into the following fields:
- Identifier (Entity ID) into Identifier (Entity ID) (replace previous value)
- Reply URL (ACS URL) into Reply URL (Assertion Consumer Service URL) (replace previous value)
- Sign on URL (Optional) set to https://portal.easyeviction.com/auth/login
- Microsoft Relay State (Only for Entra ID) into Relay State (Optional)
- The Microsoft-specific Relay State must be used. Do not use just the non-Microsoft specific Relay State value when setting up Entra,
- Press Save
Step 6: Configure Attributes & Claims
Click Edit in the Attributes & Claims section.
Update only the Unique User Identifier (Name ID) Claim under the Required claim section:
- Click the Unique User Identifier (Name ID) claim
- Under Source attribute select user.mail
- Press Save
Leave all Additional claims and add any that may be missing (these are already pre-filled by Microsoft for most tenants):
Name | Source attribute |
|---|---|
givenname | user.givenname |
surname | user.surname |
emailaddress | user.mail |
name | user.userprincipalname |

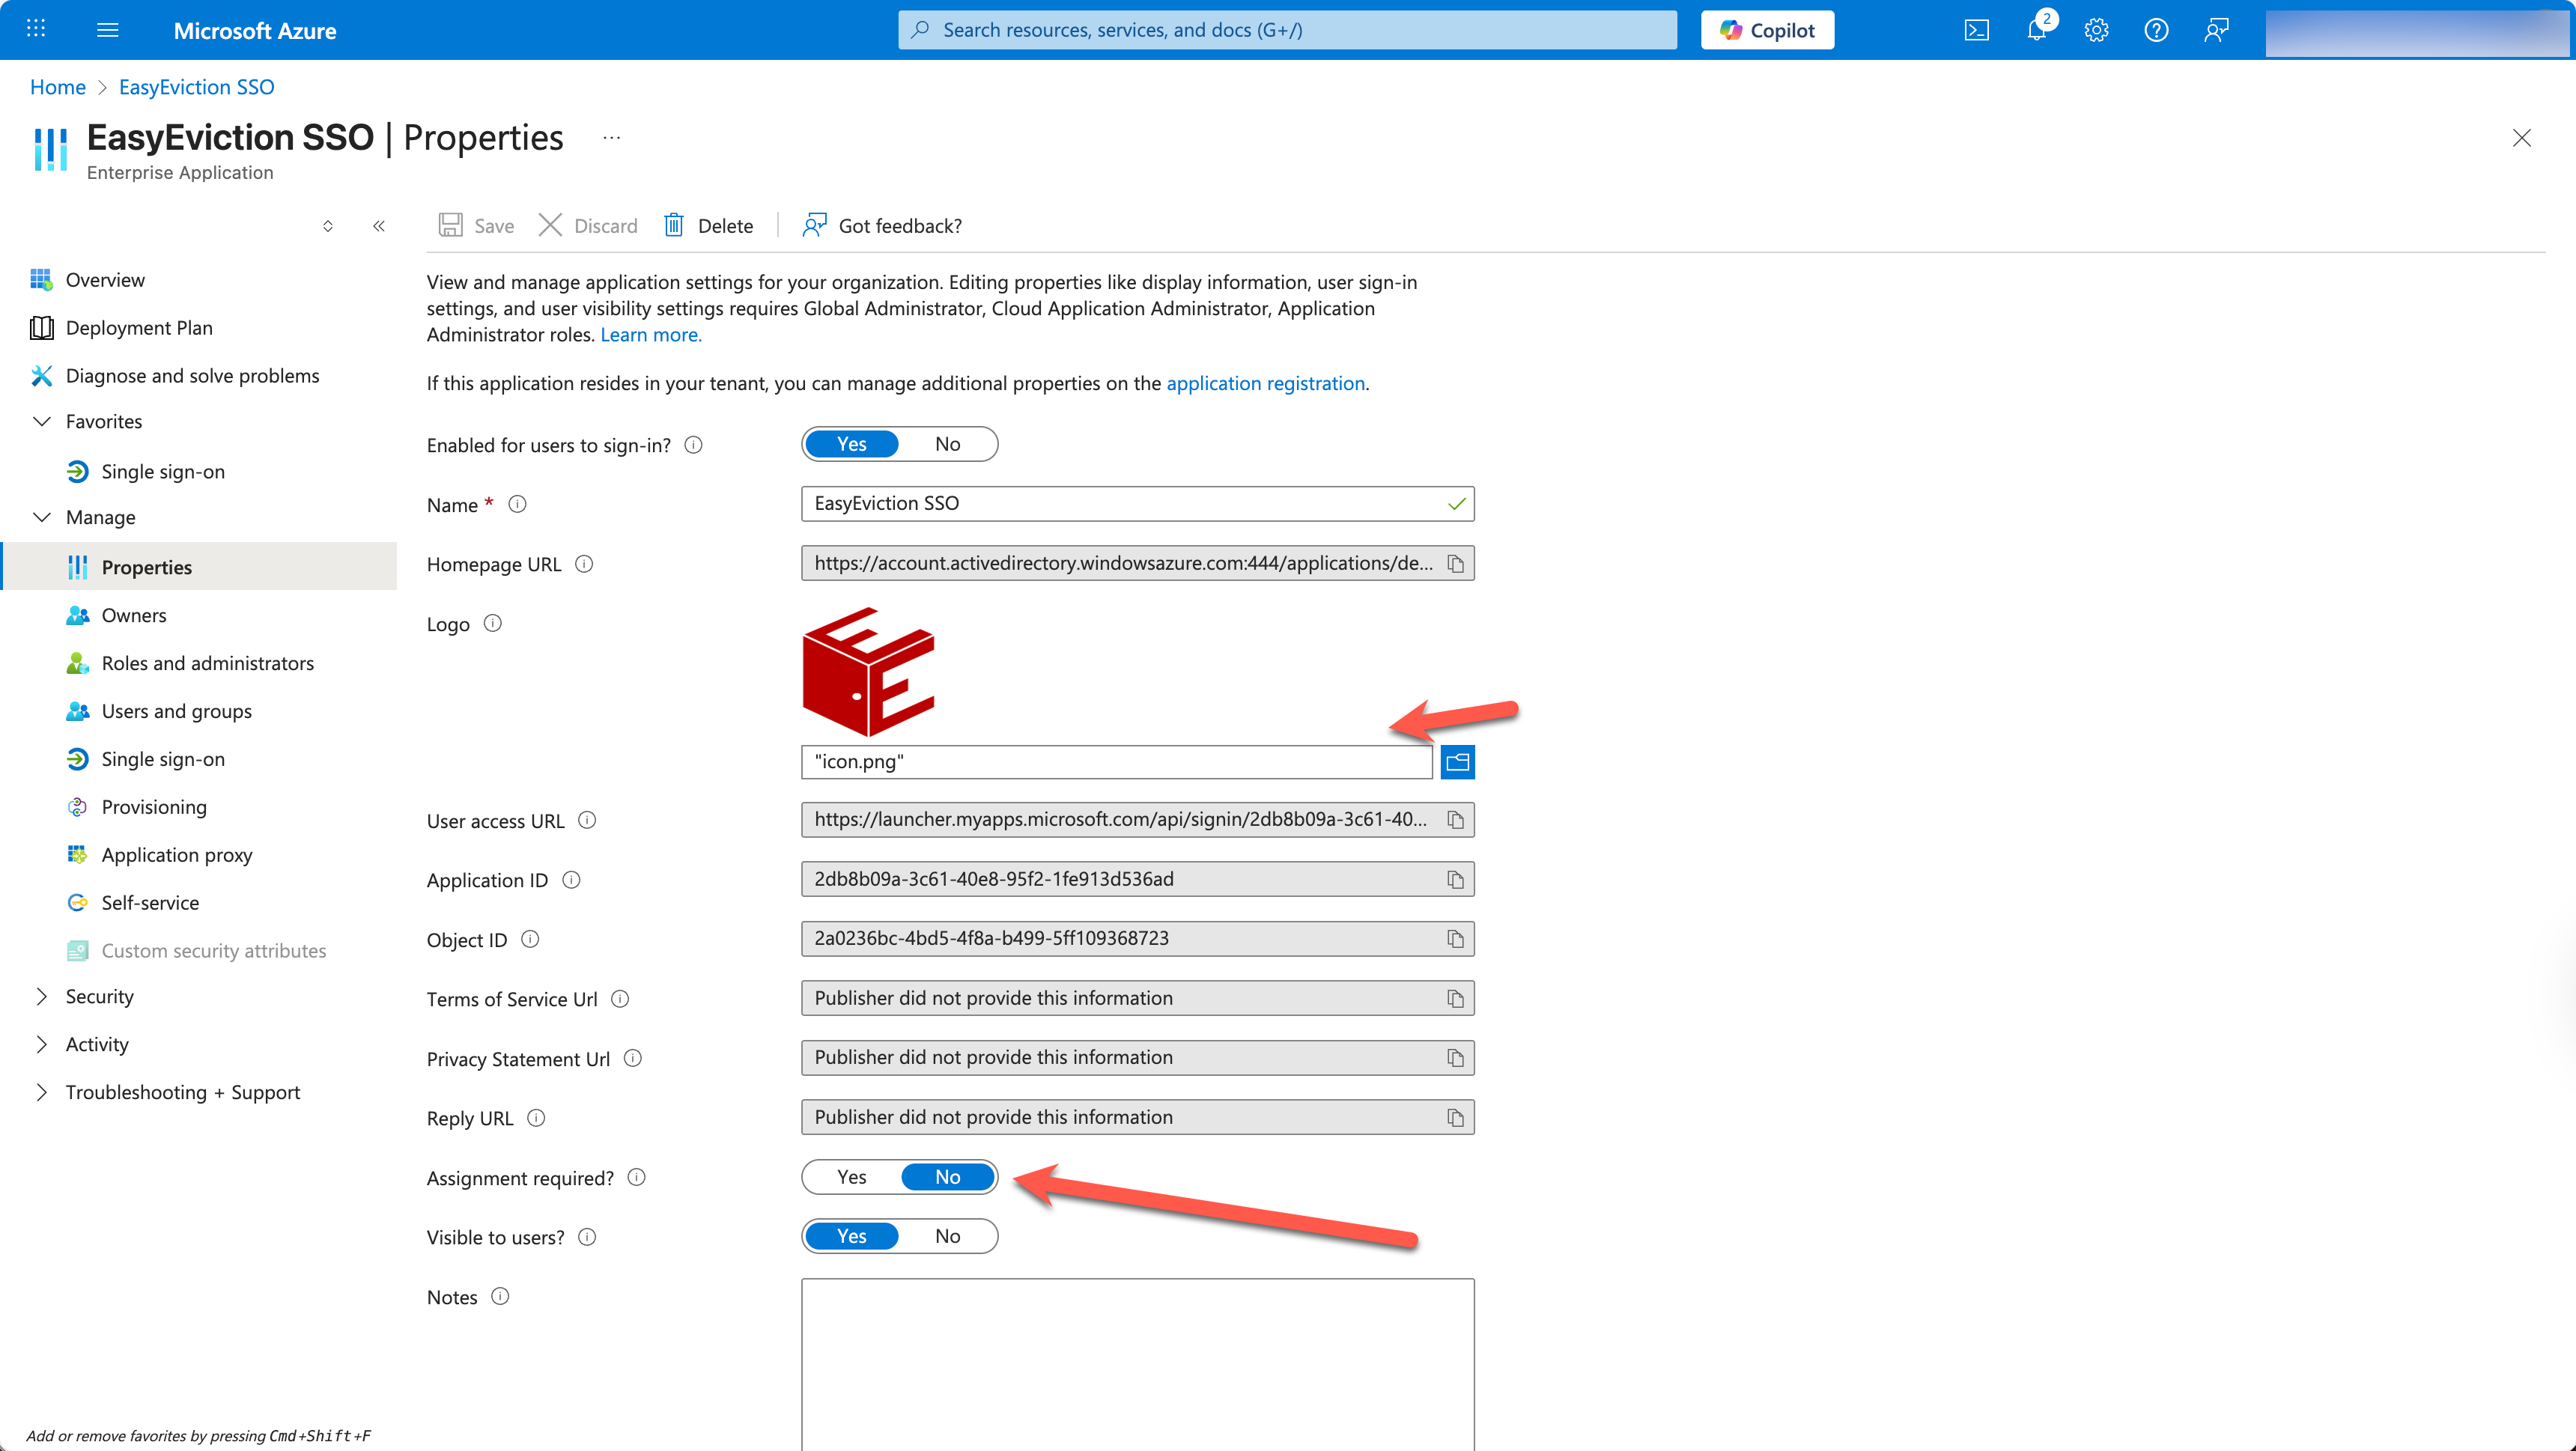
Navigate to the Entra Application's Properties page and update the following settings:
- Toggle the Assignment Required setting to No to ensure all users can access the site. Otherwise, you can assign users to this application to enable access individually.
- Alternatively, navigate to Users and groups and assign which users should have access to EasyEviction.
- Upload the following logo to distinguish this application from other applications:

Step 8: Contact EasyEviction Support
Once your SAML SSO is set up, contact EasyEviction Support for next steps.
You’re done! Once EasyEviction Support confirms and completes changes, your users can now log in to EasyEviction using their Microsoft 365 credentials.
Need help?
If you run into issues:
- Double-check that the Identifier (Entity ID) and Reply URL match exactly (including https:// and no trailing slash).
- Confirm that the Microsoft Relay State (Only for Entra ID) settings were copied to Entra and NOT the Relay State value.
- Ensure the metadata XML or certificate is uploaded correctly (no extra spaces or line breaks). Make sure not to include the first and last lines.
- Contact support@easyeviction.com with a screenshot of your Entra ID SAML configuration page.
That’s it — your SSO integration is now complete and secure!