
How to Tag and Search Cases in EasyEviction
Tagging cases in EasyEviction helps you stay organized by labeling your eviction files with keywords. By adding tags, you can quickly categorize cases, search for them using the search box, and filter or report on them efficiently. This process is especially useful when managing multiple properties or clients.
Follow the steps below to be guided through the process.
Step 1: Log in to EasyEviction
Go to your EasyEviction dashboard and sign in with your user credentials.
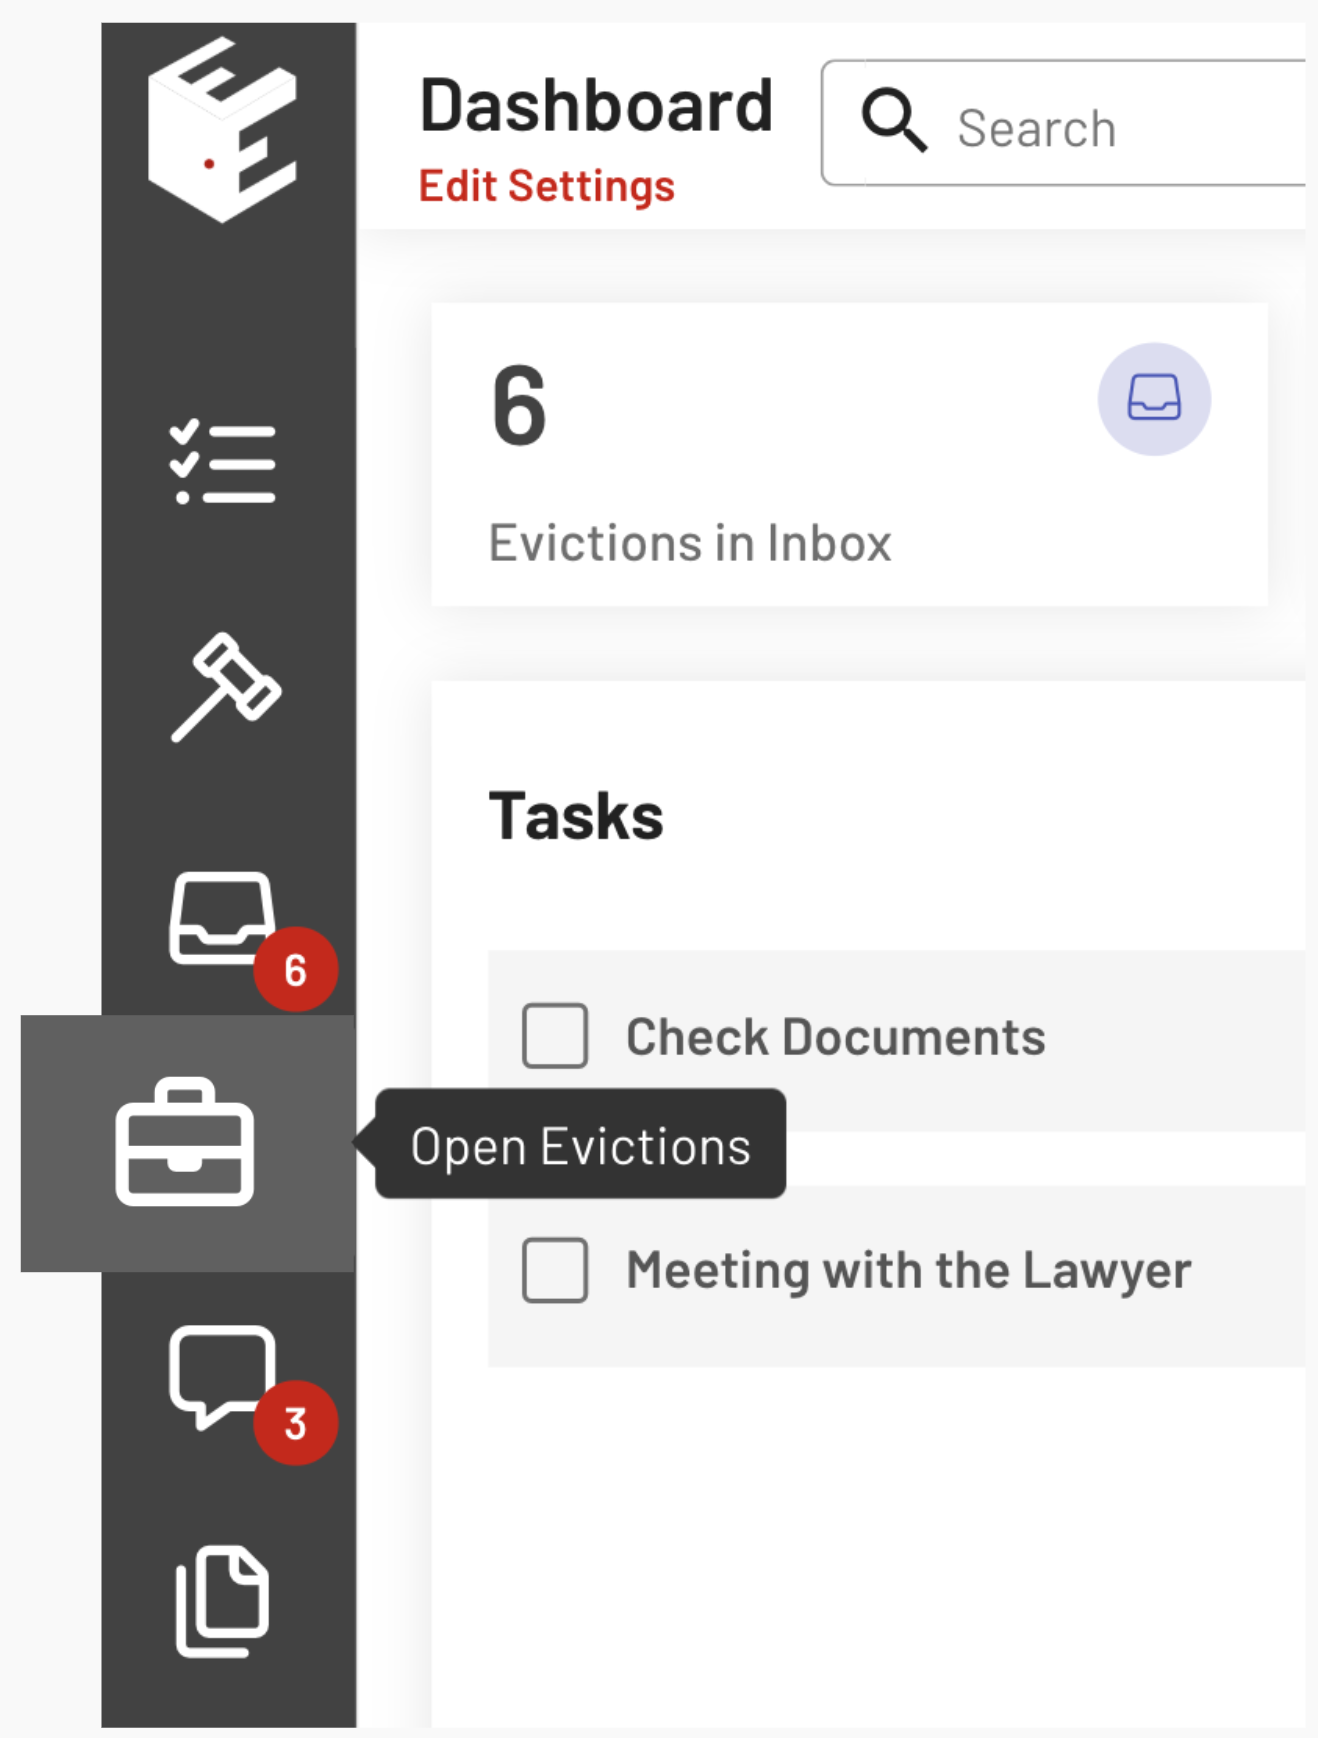
Step 2: Go to Open Evictions
Click the Open Evictions widget on the left panel, then use the search bar or filters to locate the case you want to tag.
Step 3: Access the Case Details (Eviction Details Page)
Click on the case name or case ID to open its detailed view.
Step 4: Find the Tag Field on the Right
In the Eviction Details page, the Tag field appears on the right side, below Invoiced Billable Amount.
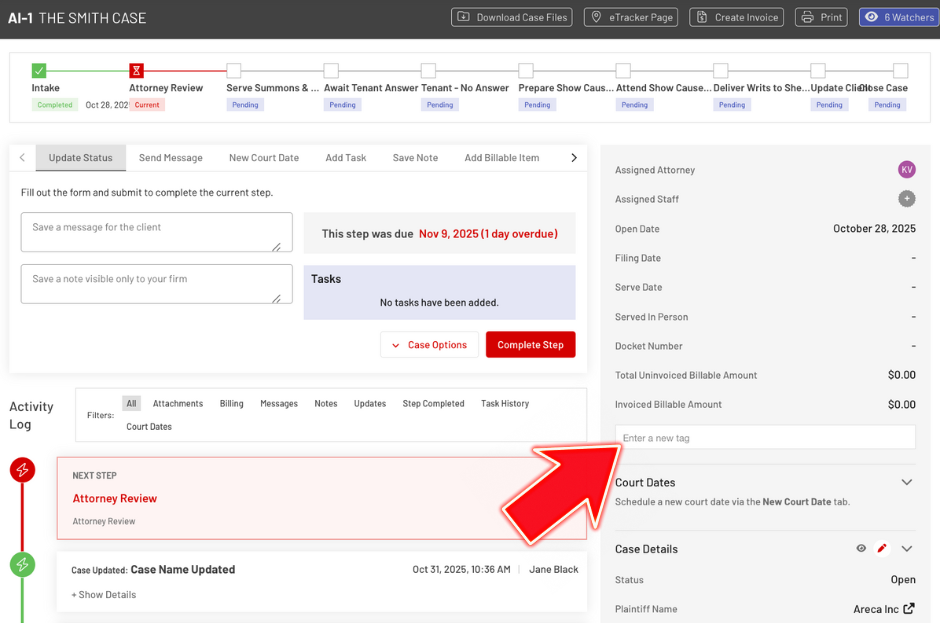
Step 5: Add or Select a Tag
In the tag field, Type your desired tag, then press Enter to save it.

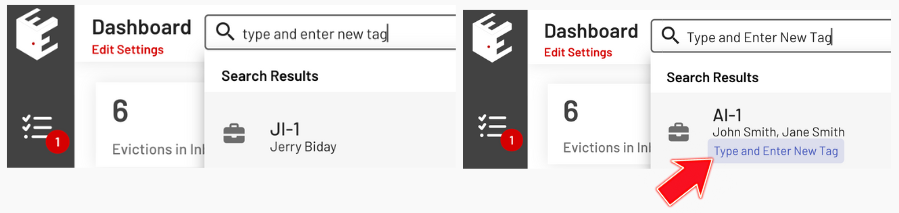
Searching Cases by Tag
After tagging, you can search for cases using the Search box in the top-left corner.
Take note that searches are case-sensitive, so it is easier to use all lowercase letters when creating tags.
Clients also have the search box, but they only see their own tags.
You’ve now learned how to tag a case in EasyEviction for better tracking and organization.
Related Article:
How to Search Cases by Tag in Reports
If you have any questions or need further assistance, please don’t hesitate to contact our support team.