
Multiple Court Dates
Discover simple techniques for adding, managing, and tracking multiple court dates along with their history using this guide. See how you can switch to a user-friendly array of court dates, complete with descriptions, for a simpler and more organized case.
Follow the guide below:
Select a case in the 'Eviction Inbox' to open the 'Eviction Details Page'
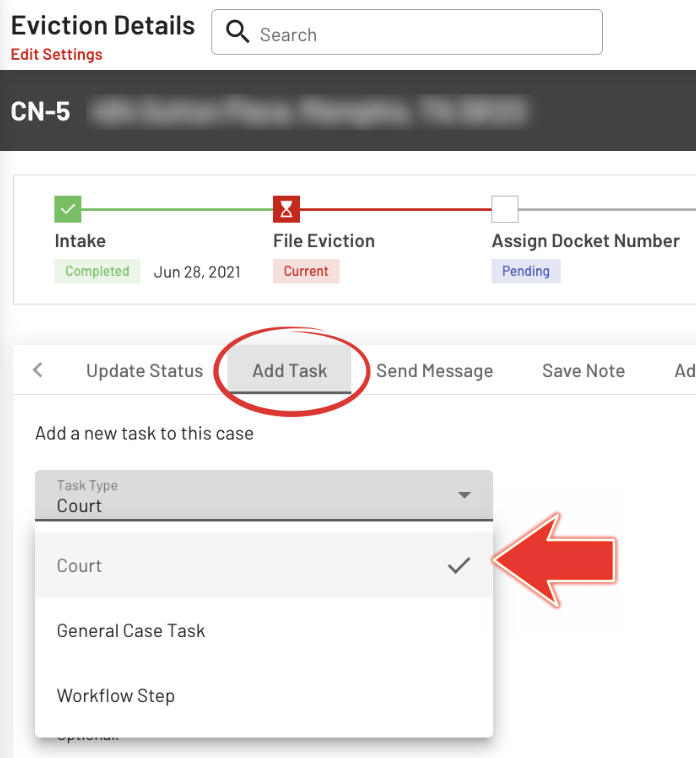
Click the "Add Task" tab, then select "Court"
Select 'Court' upon clicking the Task Type bar.
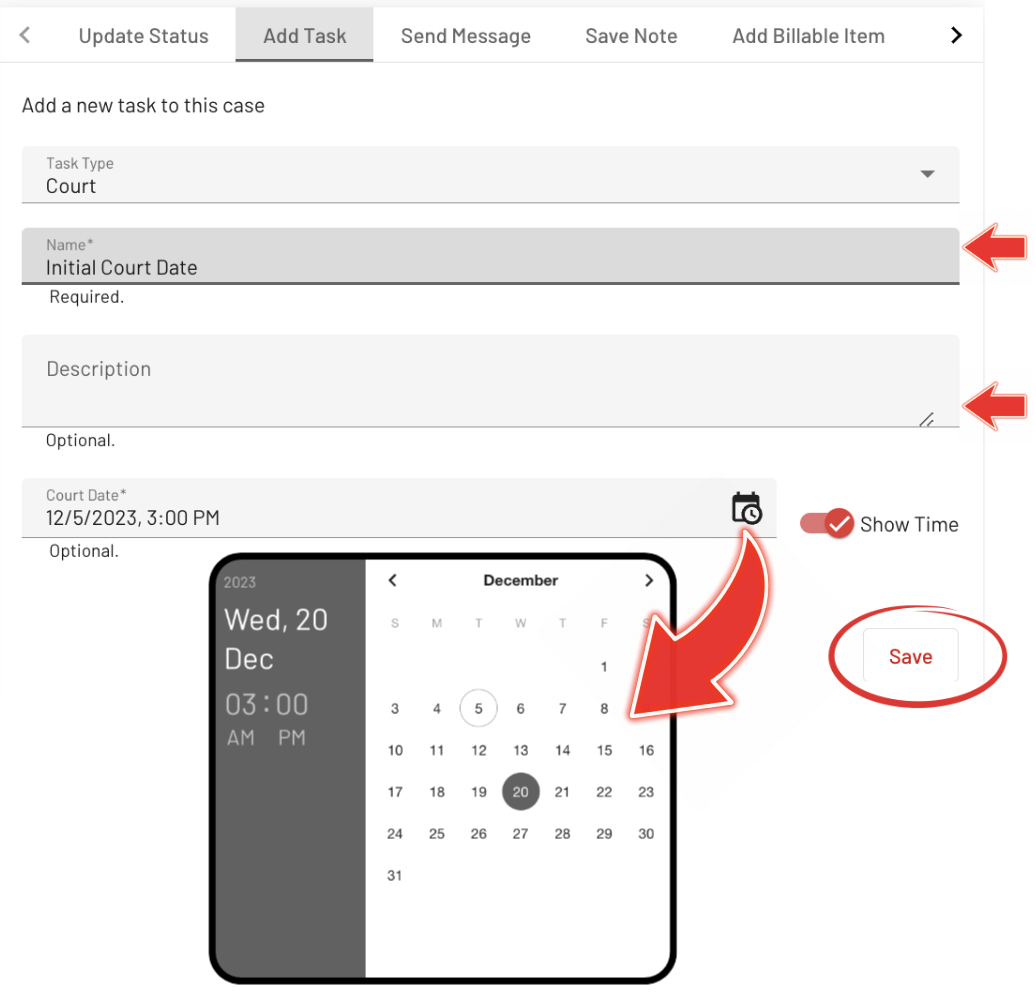
Edit the fields
Enter the Name, edit the Description (Optional), and adjust the Court Date and Time. Click the Save button to preserve the changes.
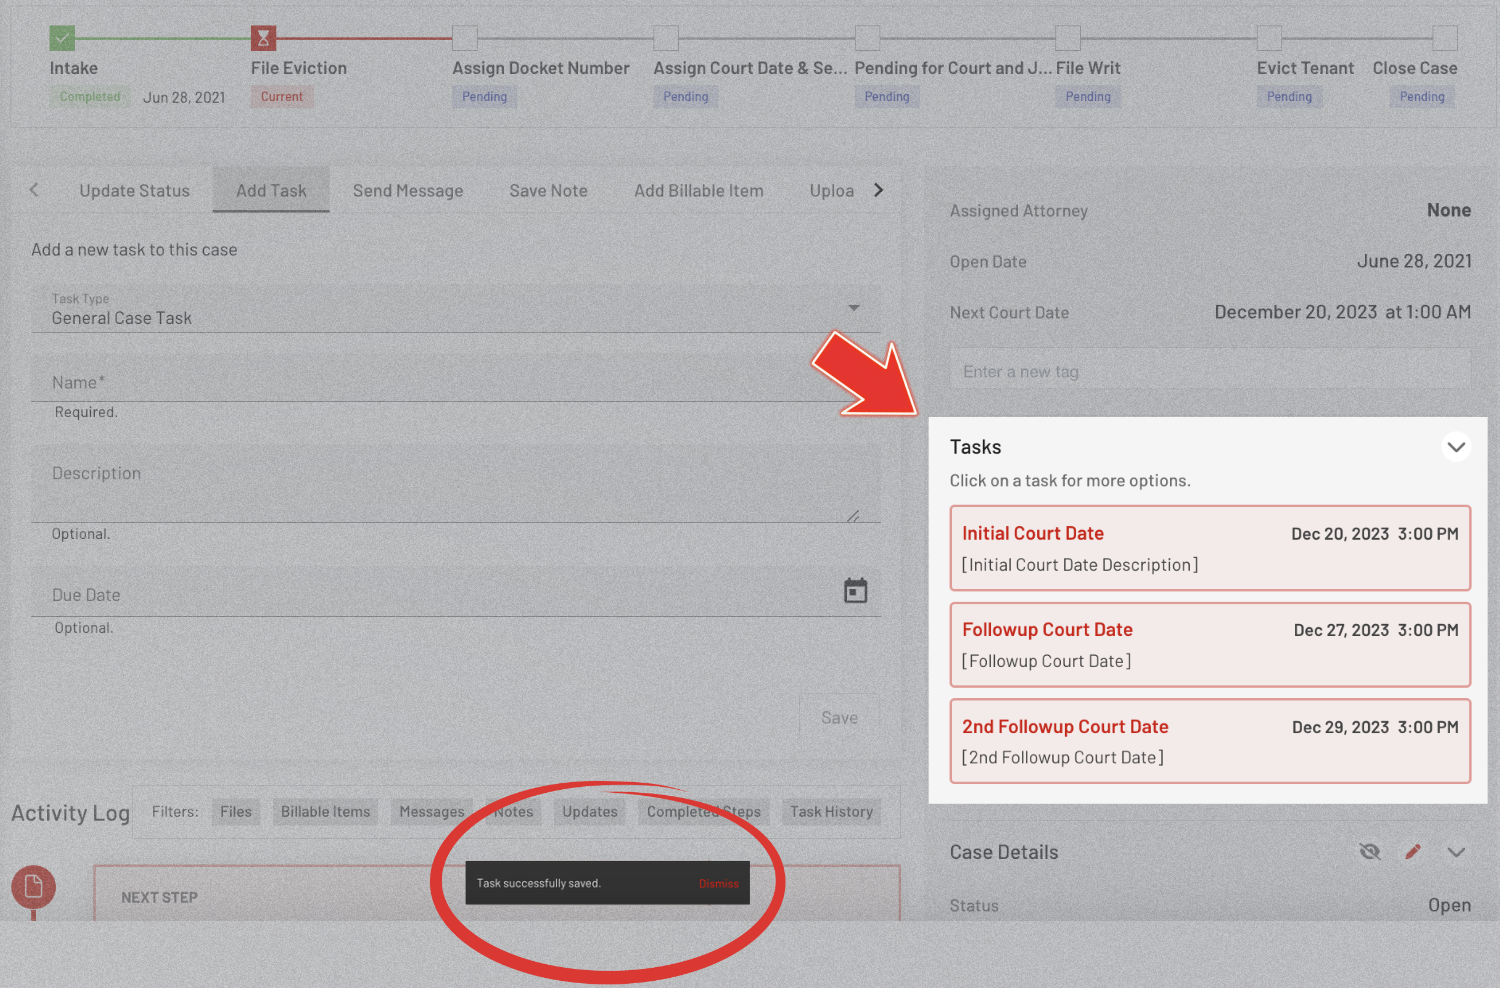
Follow the same steps outlined above to generate Numerous Court Dates.
Array of Court Dates: Right-Side Display
A success message ("Task successfully saved.") will appear at the bottom of the page to confirm that the added task has been entered into the system.
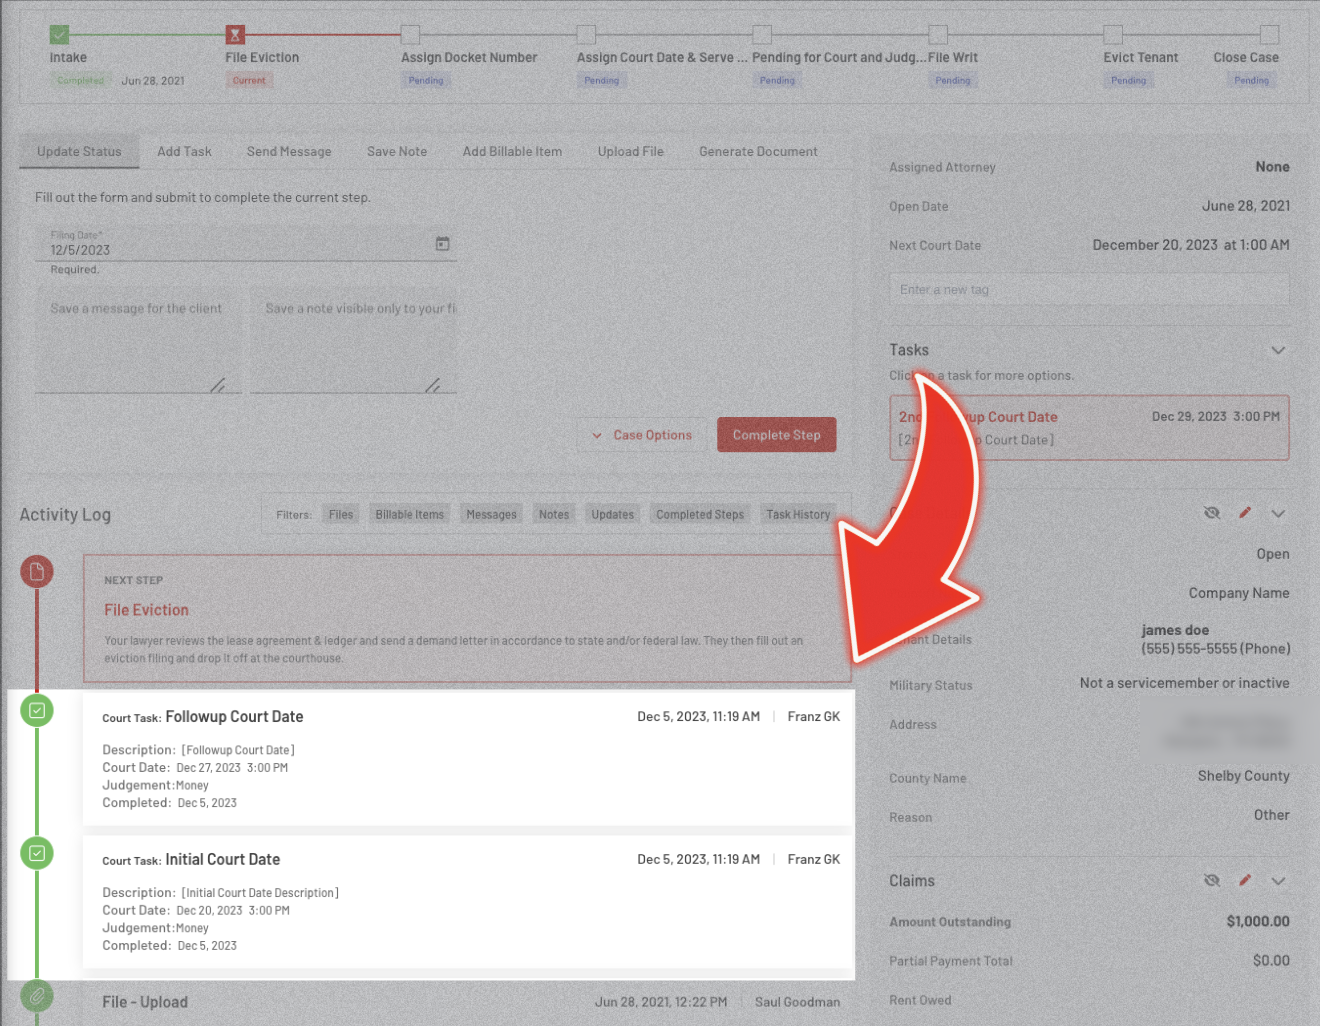
Saved tasks or multiple generated court dates will be displayed on the right side of the page.
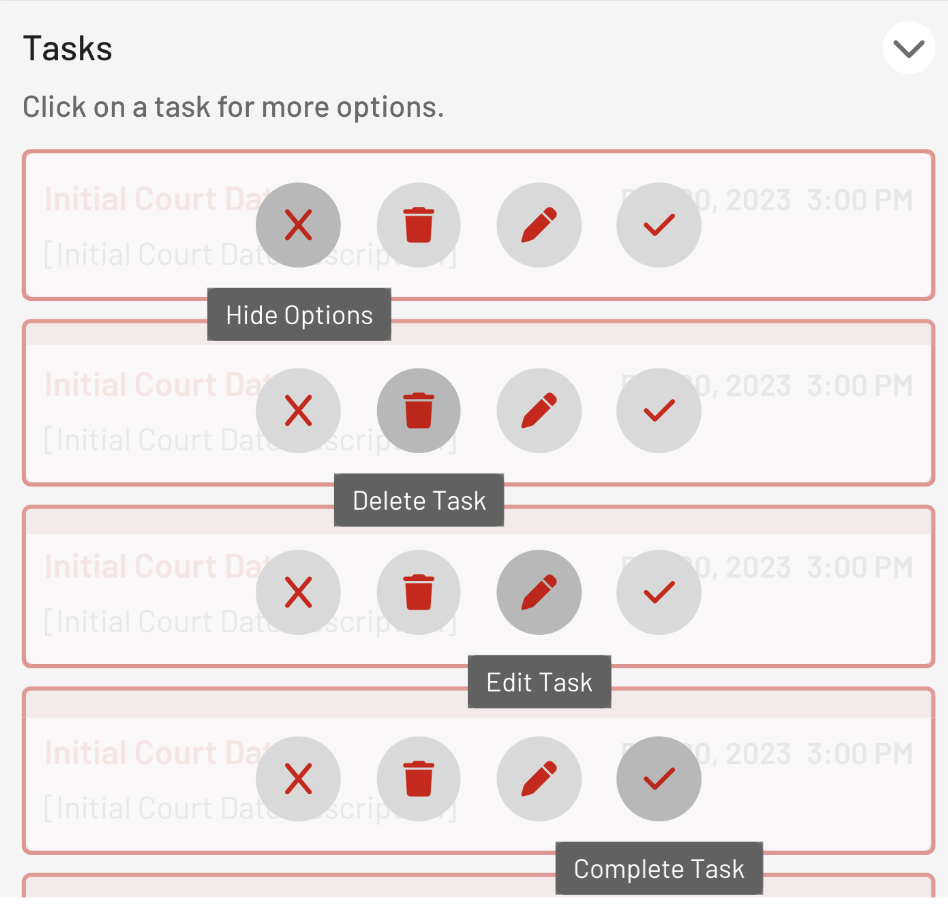
Manual Edit Feature
Activity Log: Display of Completed Tasks
View the completed tasks in the Activity Log section.
With this guide, you'll learn how to easily manage and track multiple court dates, helping you keep your cases more organized and straightforward.
If you have any concerns or need help, please don’t hesitate to reach out to our support team.