
How to Use the Survey Page for Clients
The Survey Builder in EasyEviction is designed to help users easily create and customize surveys for collecting client information, feedback, or case details within the platform. Its purpose is to simplify data gathering and improve communication by allowing surveys to be built, shared, and managed directly through integrated workflows.
The following outlines the features of the Survey Editor page and provides guidance on how to begin and navigate within it.
1. Access the Survey Builder
Go to Admin Settings, then click on Surveys.
Survey Sidebar Features:
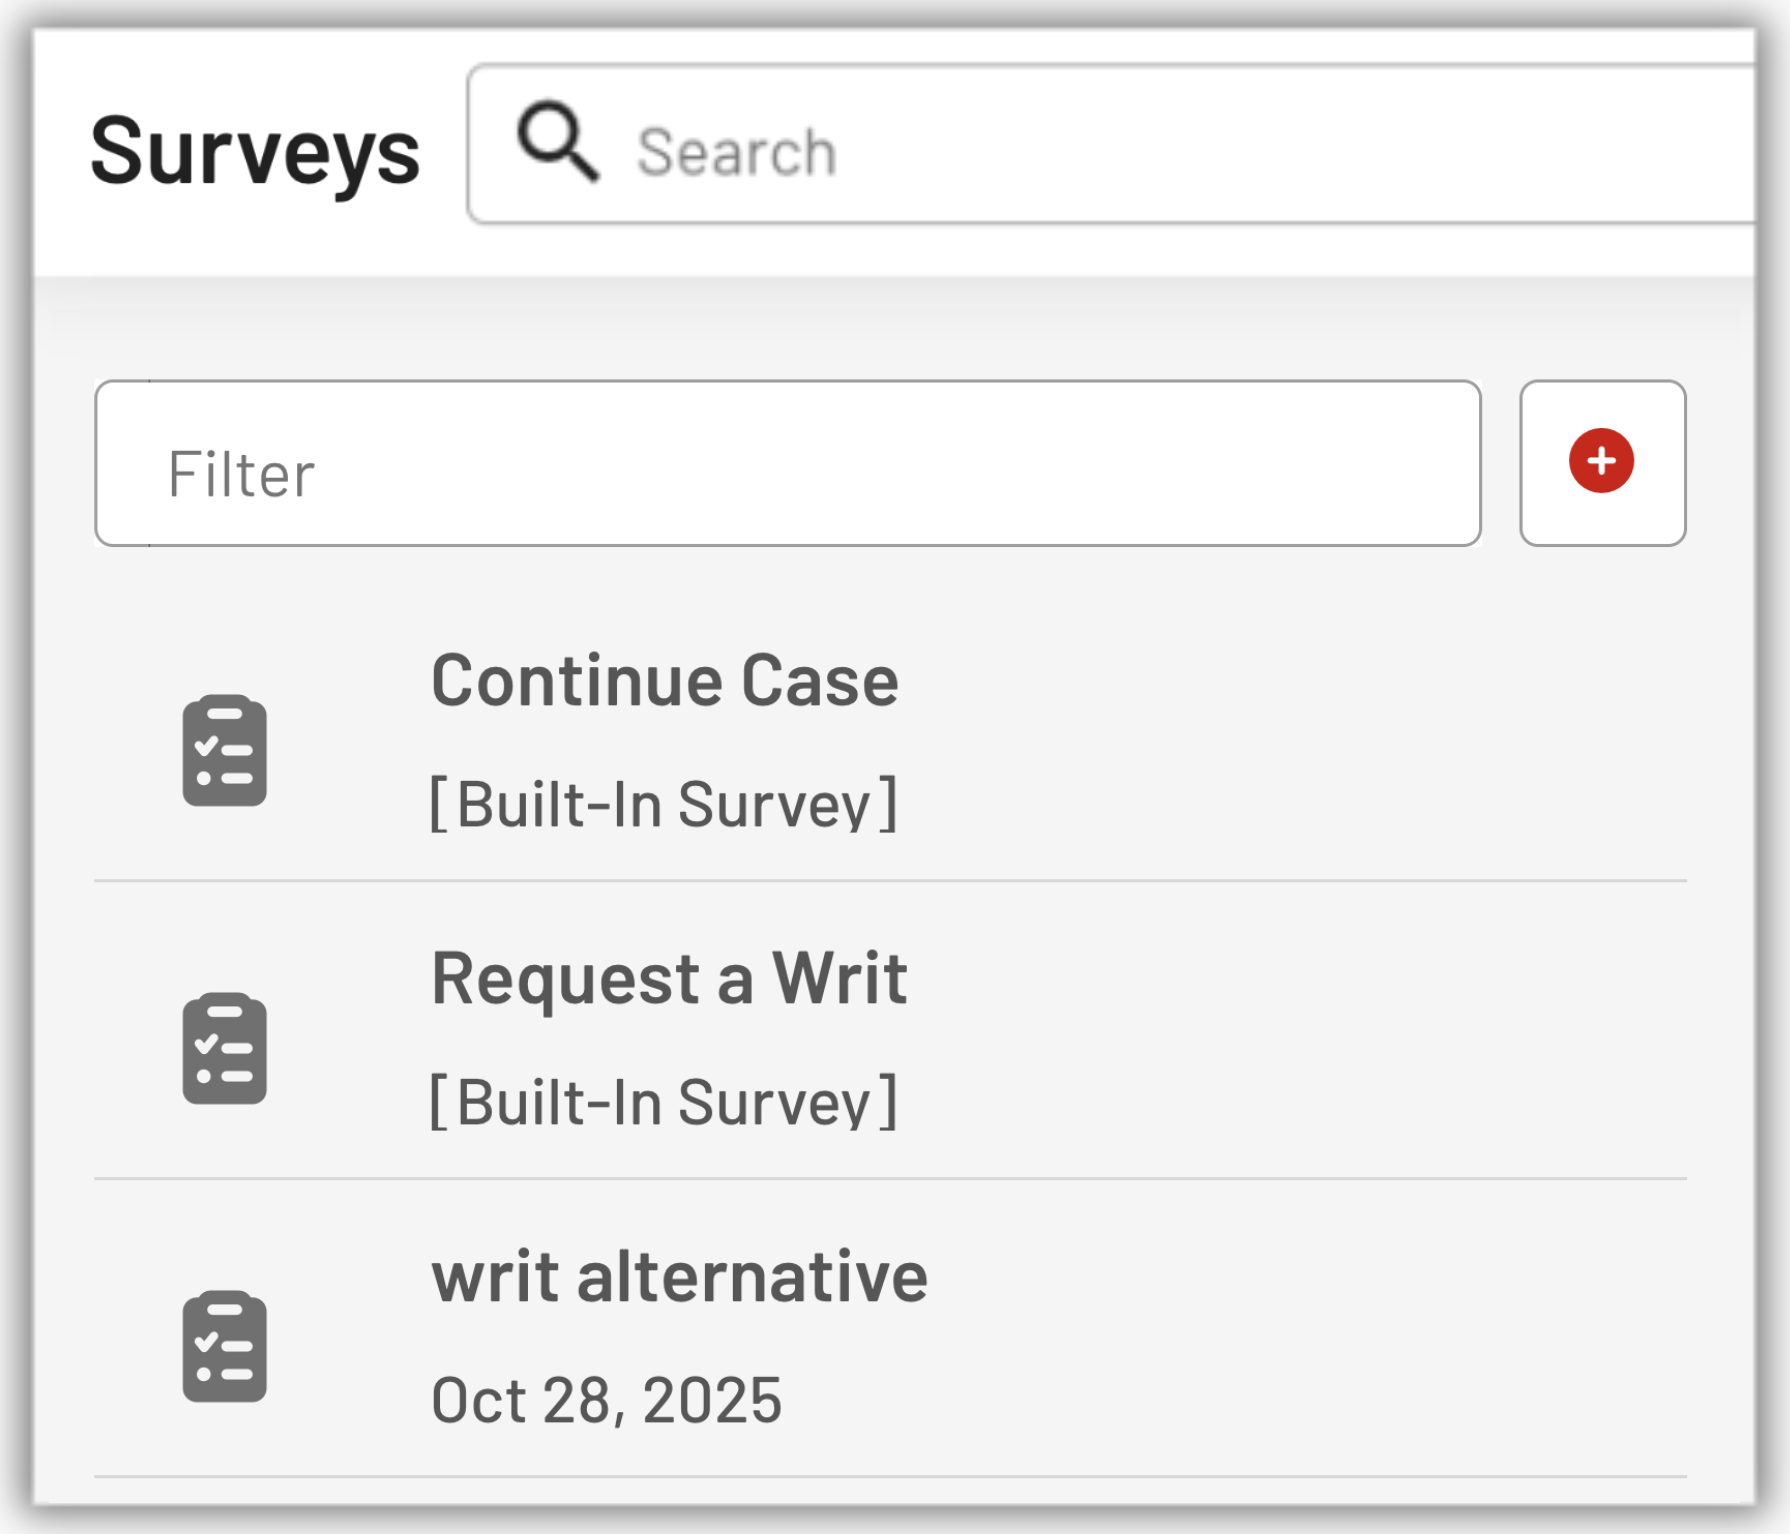
i. Filter Box: The left side contains a filter box where you can type to search or filter existing surveys.
ii. Add Button: Next to the filter box, there is a red Add (+) Button to create a new survey.
iii. Survey List: On the left panel, you can view and select existing surveys such as:
- Continue Case [Built-In Survey]
- Request a Writ [Built-In Survey]
- writ alternative (with creation date)
2: Create a New Survey
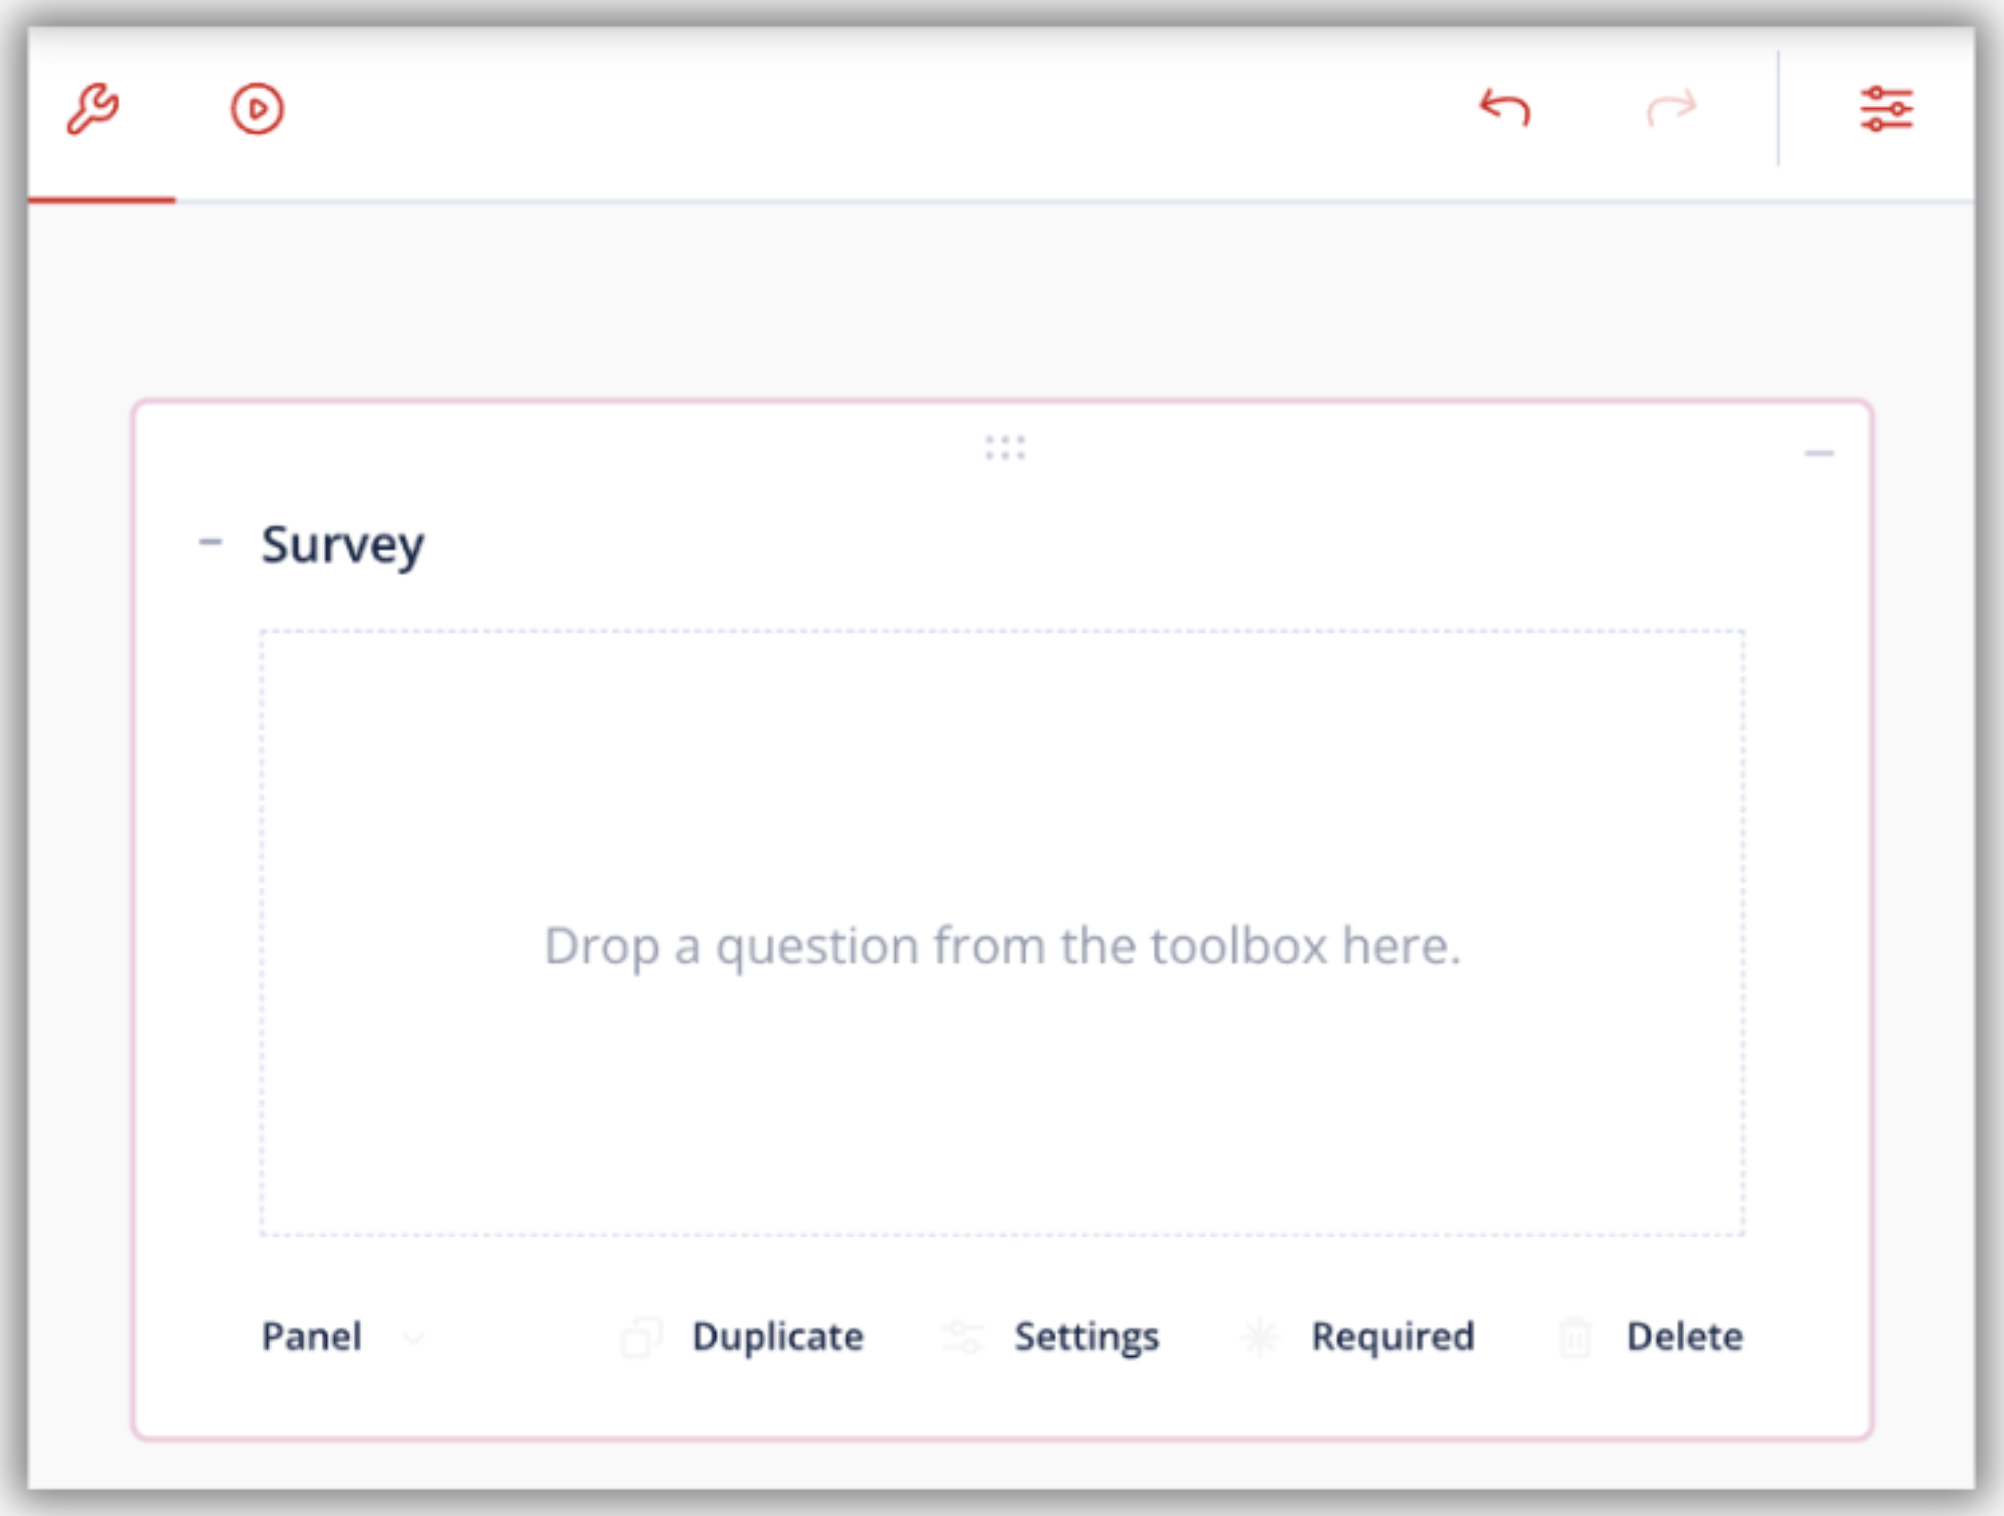
i. Click the red Add (+) Button to open the Survey Editor.
The red add button is the first step to begin creating a survey. This is where new surveys are created and existing ones open for editing.
ii. Enter a name for your survey by editing the field in the upper-right corner.
In the center of the screen, you will see a message that says “Drop a question from the toolbox here.” This is where you drag and drop question types to start building your survey.
3. Add and Customize Fields
The EasyEviction survey builder includes a drag-and-drop interface that makes it simple to design your survey layout.
Left Designer Toolbar:
Use the Left Designer Toolbar is a panel containing all the available question types and input fields that can be added to the survey. Users drag and drop icons from the Toolbox onto the Center Canvas to build and customize their survey, allowing for quick creation of structured forms for client or case data collection.
Note: You can place up to three questions per row for a cleaner layout.
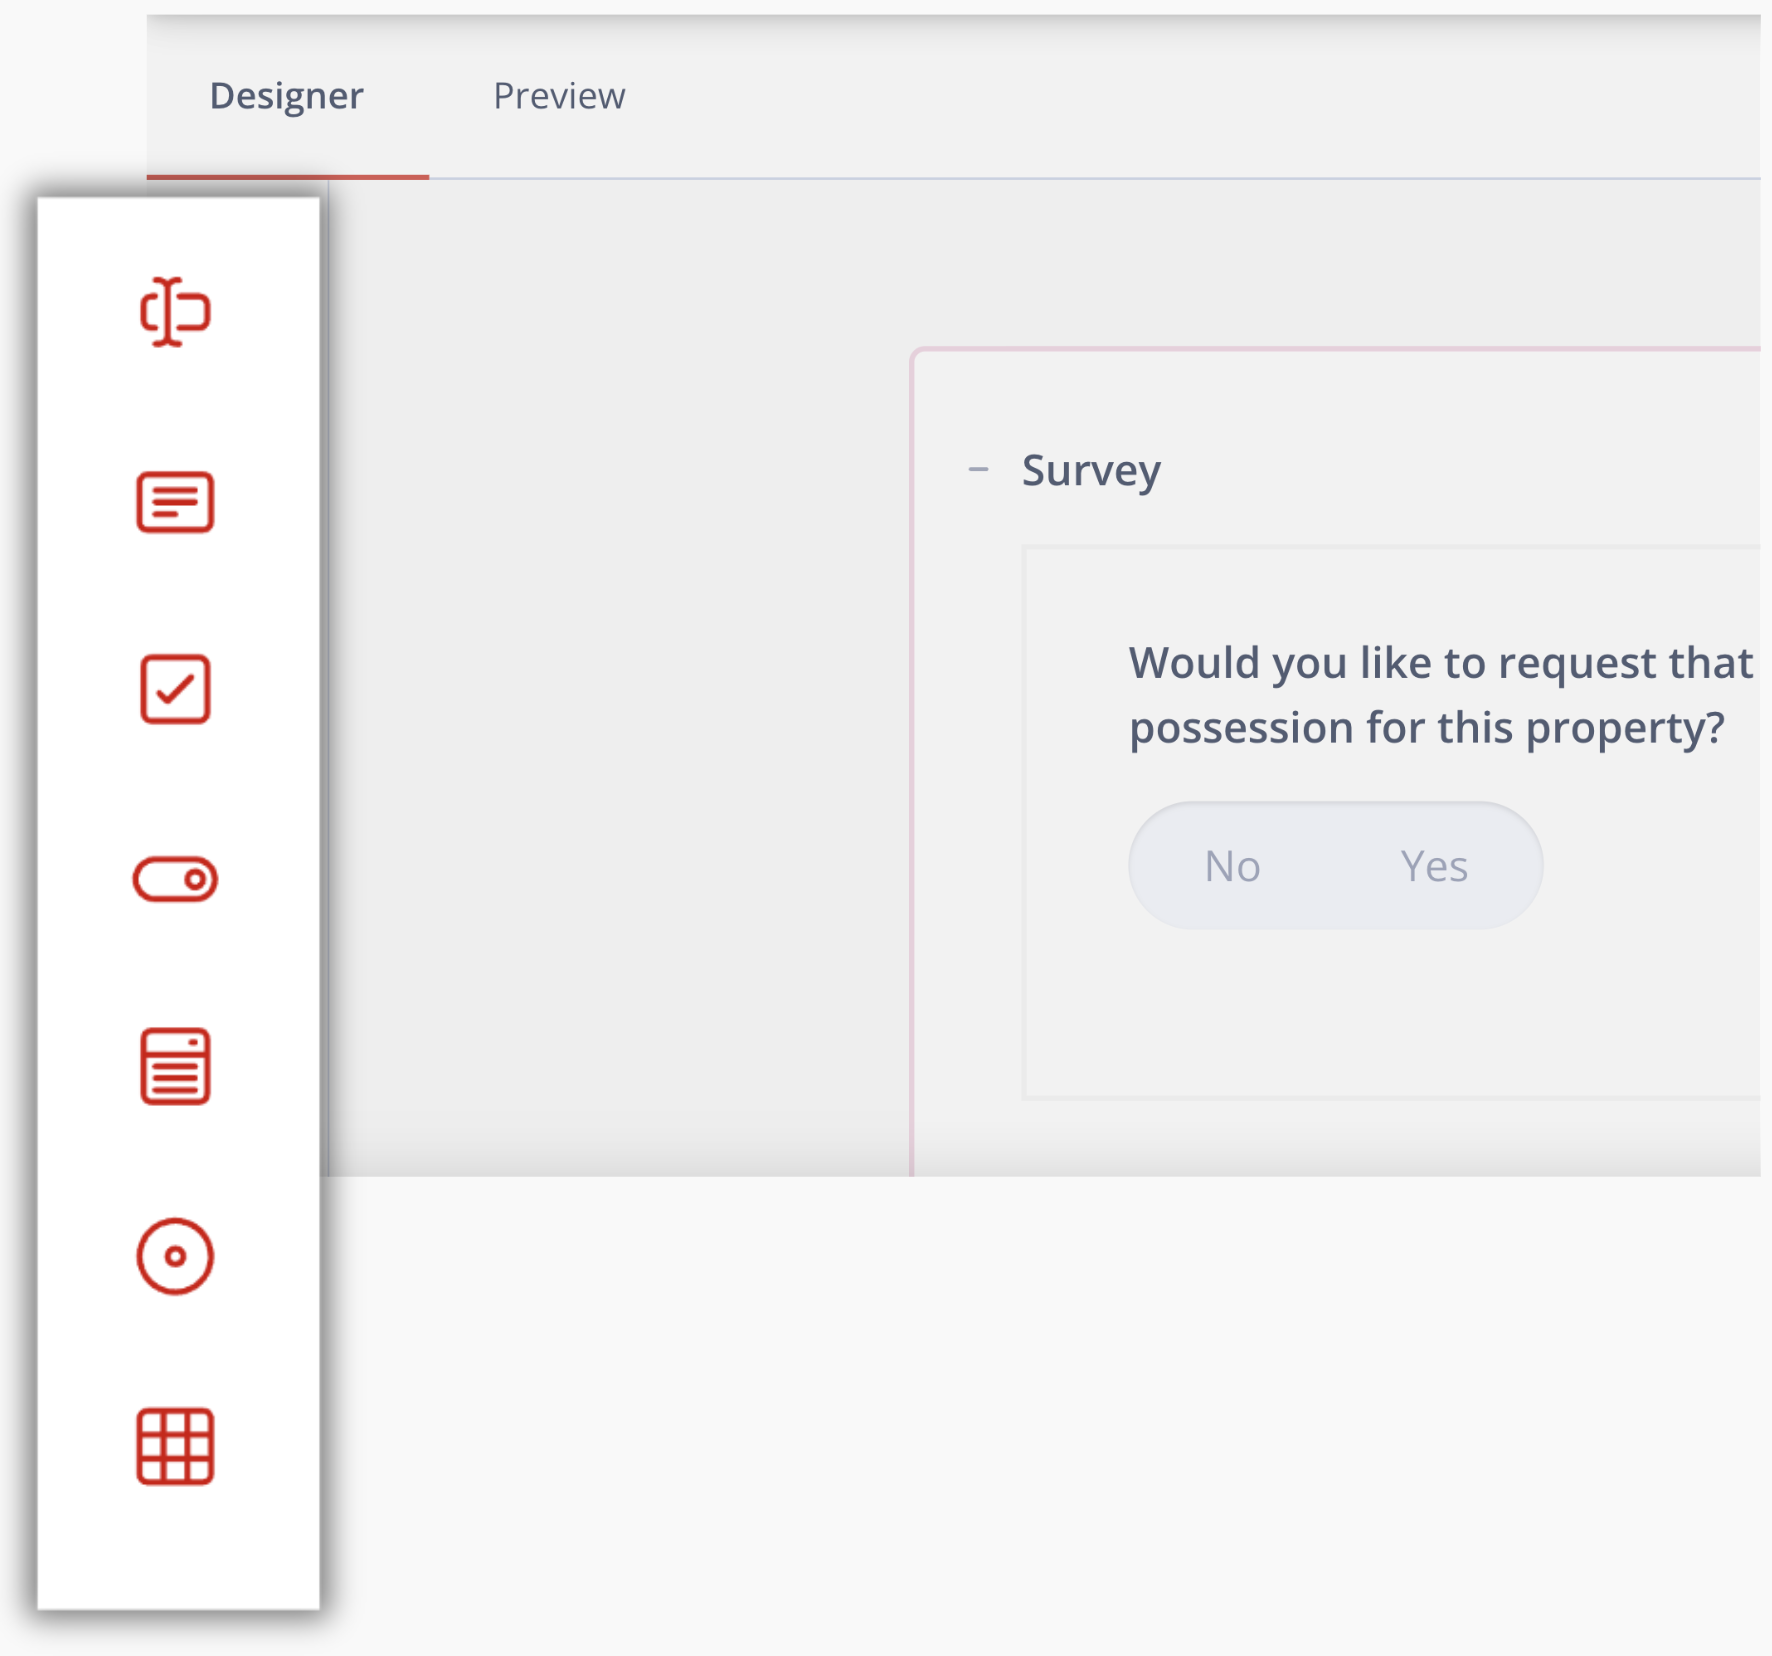
i. Single Line Input: Adds a short-text question.
ii. Long Text: Adds a long-text question.
iii. Checkbox: Adds predefined choice questions. E.g., “Type of Property: Apartment / House / Condo.”
iv. Toggle (Yes/No): Adds binary choice questions like “Would you like to request a writ of possession?”
v. Dropdown: Adds a drop-down list so the client or staff can choose one option from a predefined list. Useful when you want to standardize responses or avoid typing errors. E.g. Choosing Reason for Eviction (Nonpayment, Lease Violation, Holdover)
vi. Radio Group: Adds a set of radio buttons (mutually exclusive choices). The user can pick only one option. Ideal when you need a clear yes/no or either/or answer. E.g. “Select tenant type” → Individual / Business.
vii. Date: Allows the user to enter or select a date from the calendar. Ensures date format consistency for court filings and document timelines.
Right Settings Toolbar:
The Right Settings Toolbar appears when you click the Center Canvas, offering icons to adjust panel layout, question settings, conditional logic, numbering, and validation for your survey.
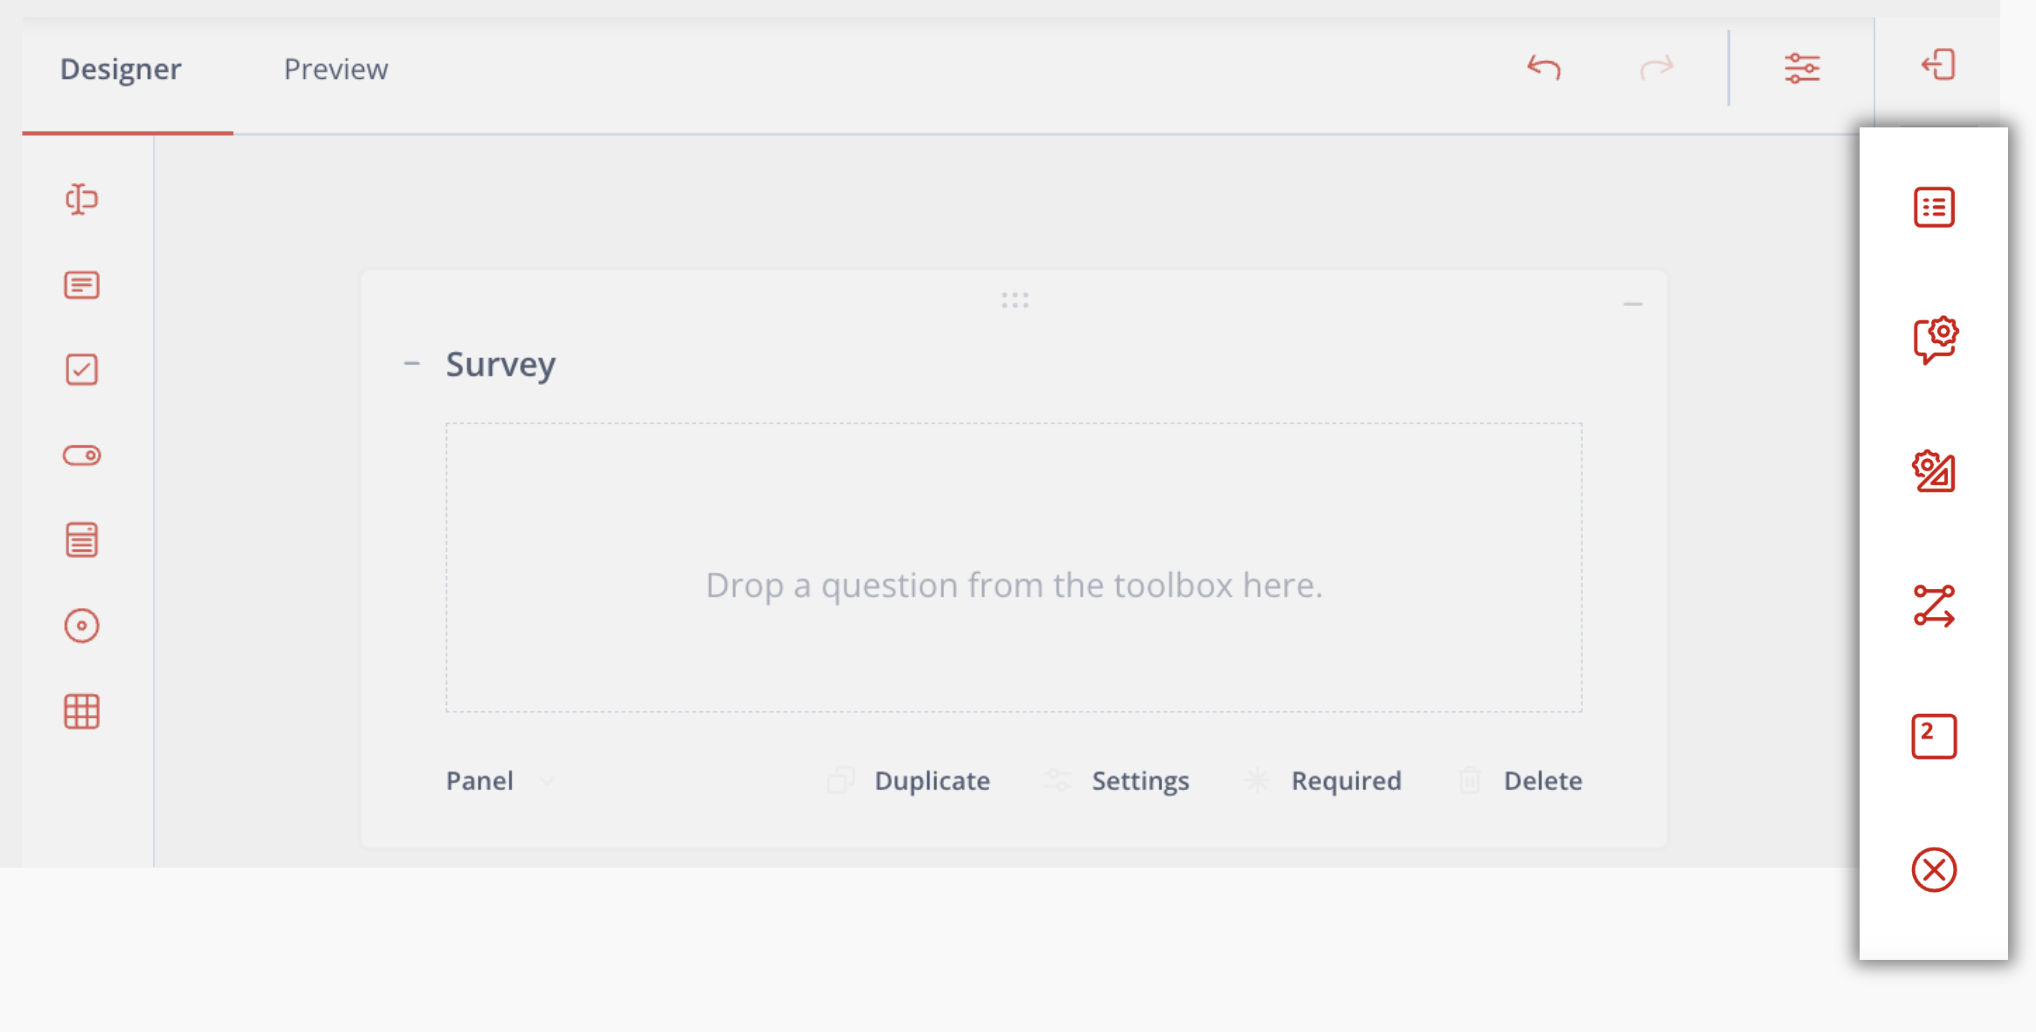
i. General Layout: Opens Panel Structure. Lets you edit panel name, title, and description.
ii. Question Settings: Adds space or margin between the panel content and the left border of the panel box.
iii. Panel Layout: Lets you place the panel on a new line, adjust its collapsed or expanded state, and set minimum and maximum width limits.
iv. Conditions: Enables you to specify conditional logic to override read-only mode or enforce panel requirement status.
v. Numbering: Numbers the current panel.
vi. Validation: Input error message for required questions.
Note: Validation rules are optional. The most common one is marking a field as required so the respondent must fill it out.
Click Save to keep your changes.
3. Integrating Surveys into the EasyEviction Workflow
Currently, surveys are designed to be used within workflows.
i. Go to Admin Settings then Select Workflow.
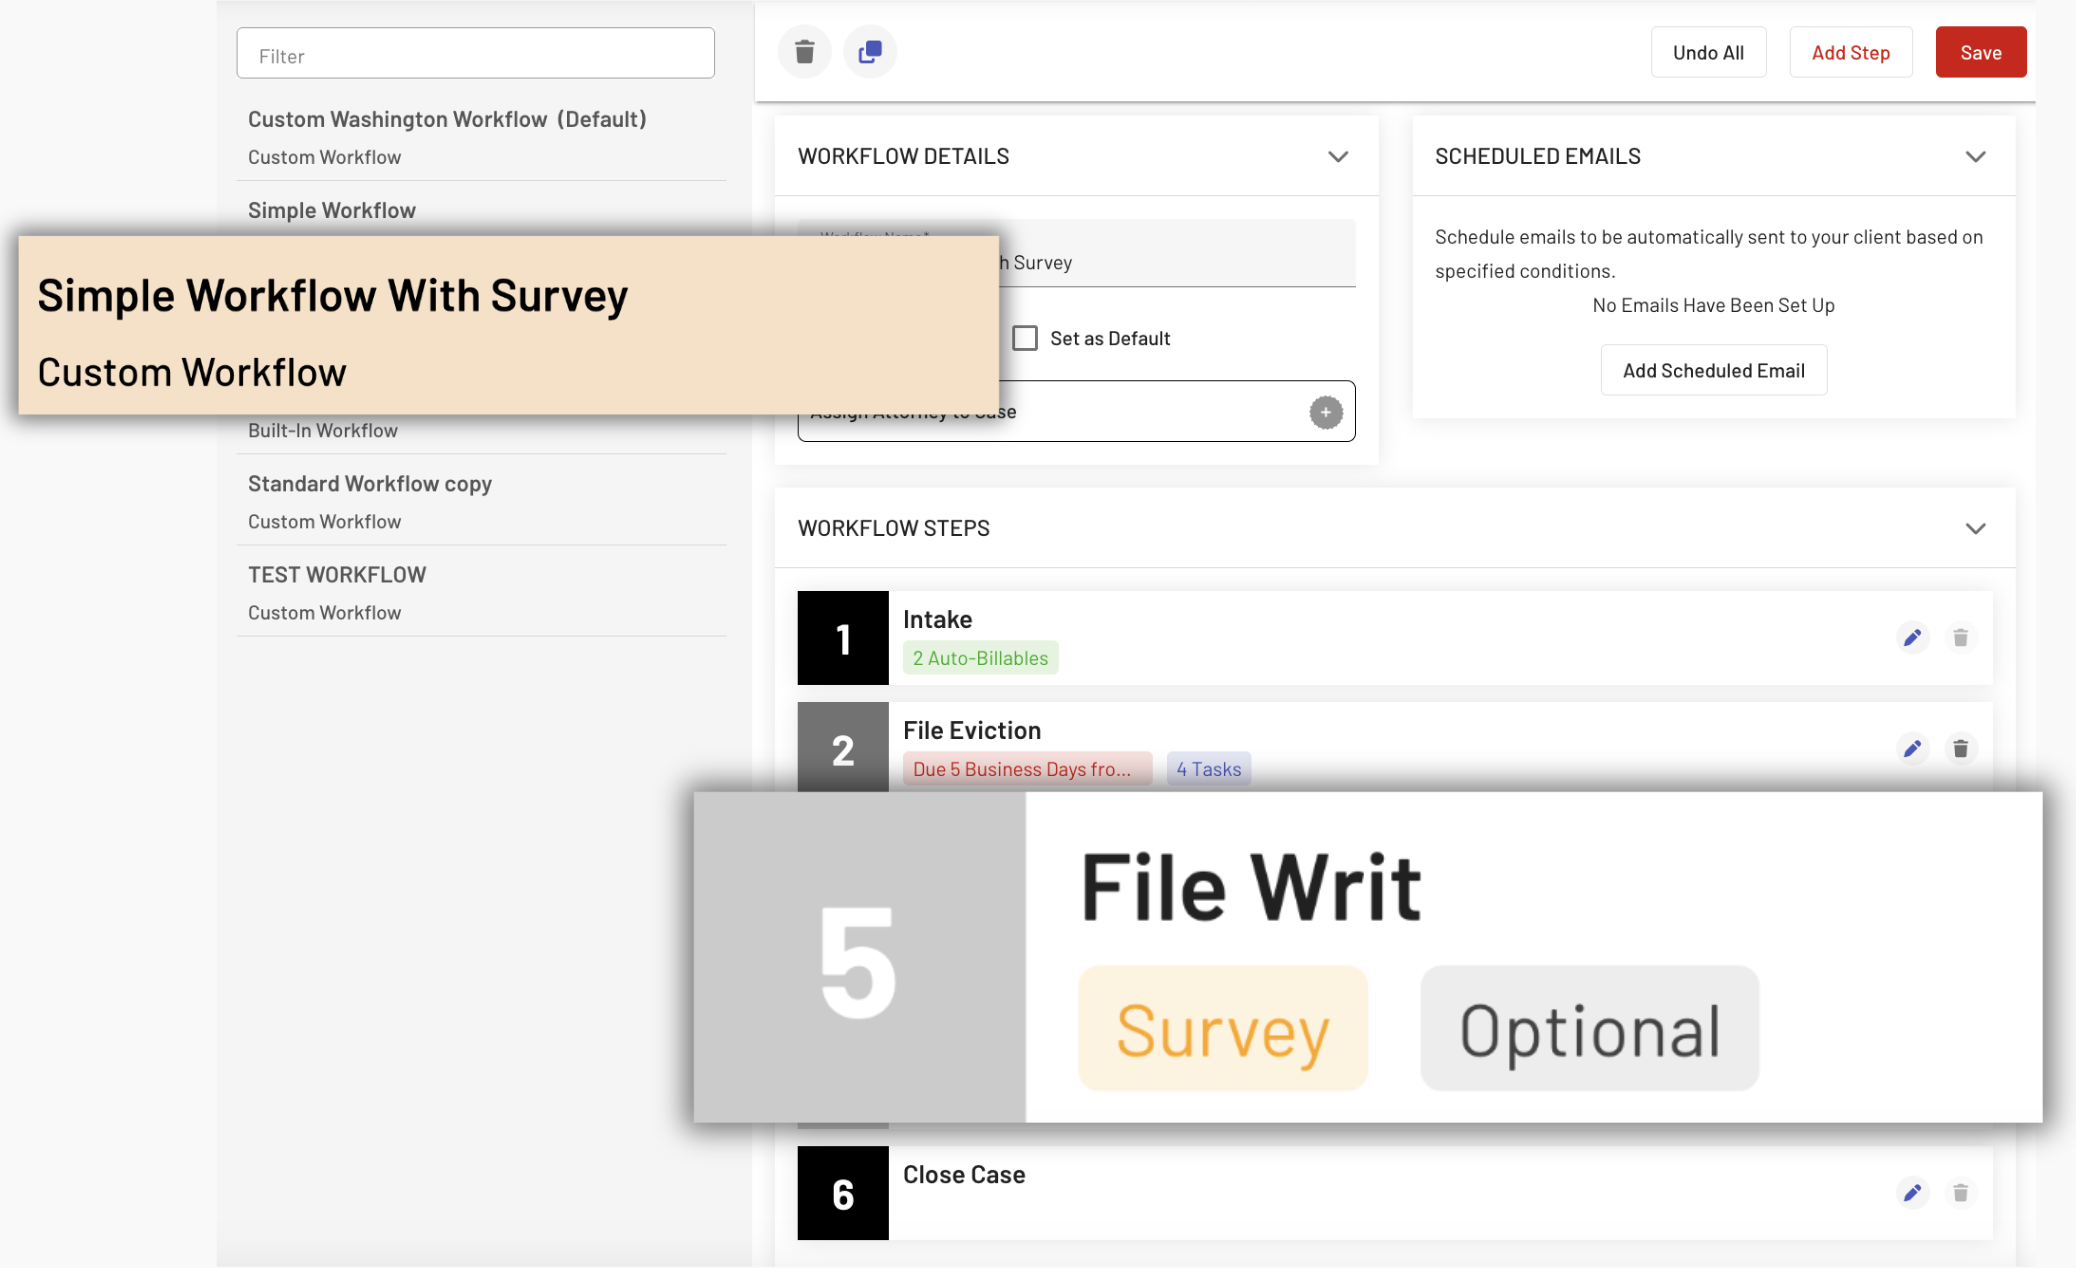
ii. Select the Workflow that has "with Survey".
iii. Edit the Step that has a survey tag (yellow) by clicking the pencil icon.
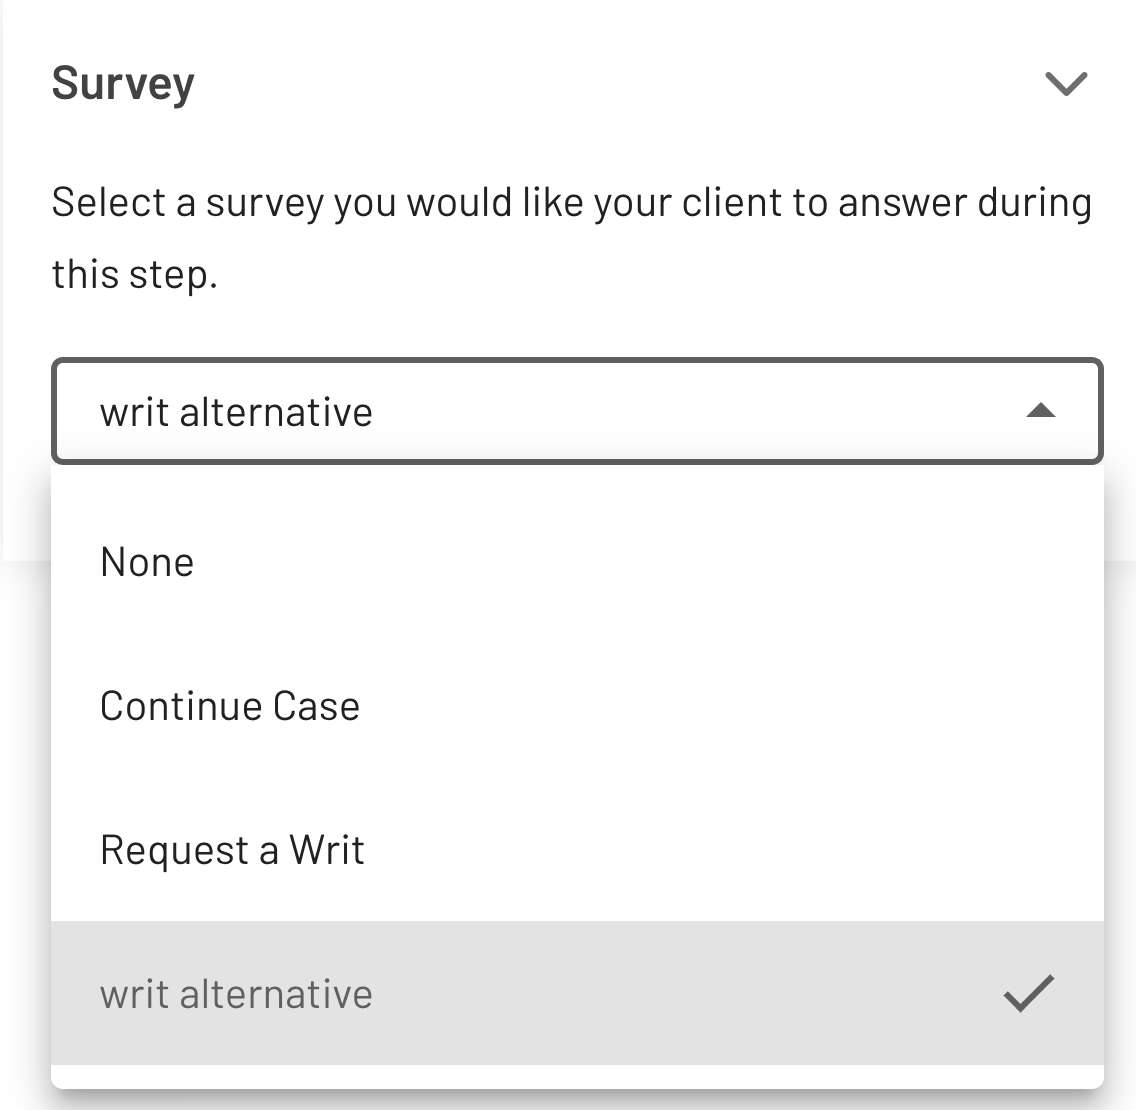
iv. Scroll down and click the Survey dropdown.
v. You'll be prompted to select one of your custom surveys or use one of the built-in surveys available on the platform.
vi. Once added, the survey becomes part of the workflow step, such as a client form or a response collection step.
Previewing a Survey in a Case
1. After creating a new Case in the system.
2. Choose the workflow that includes your new survey.
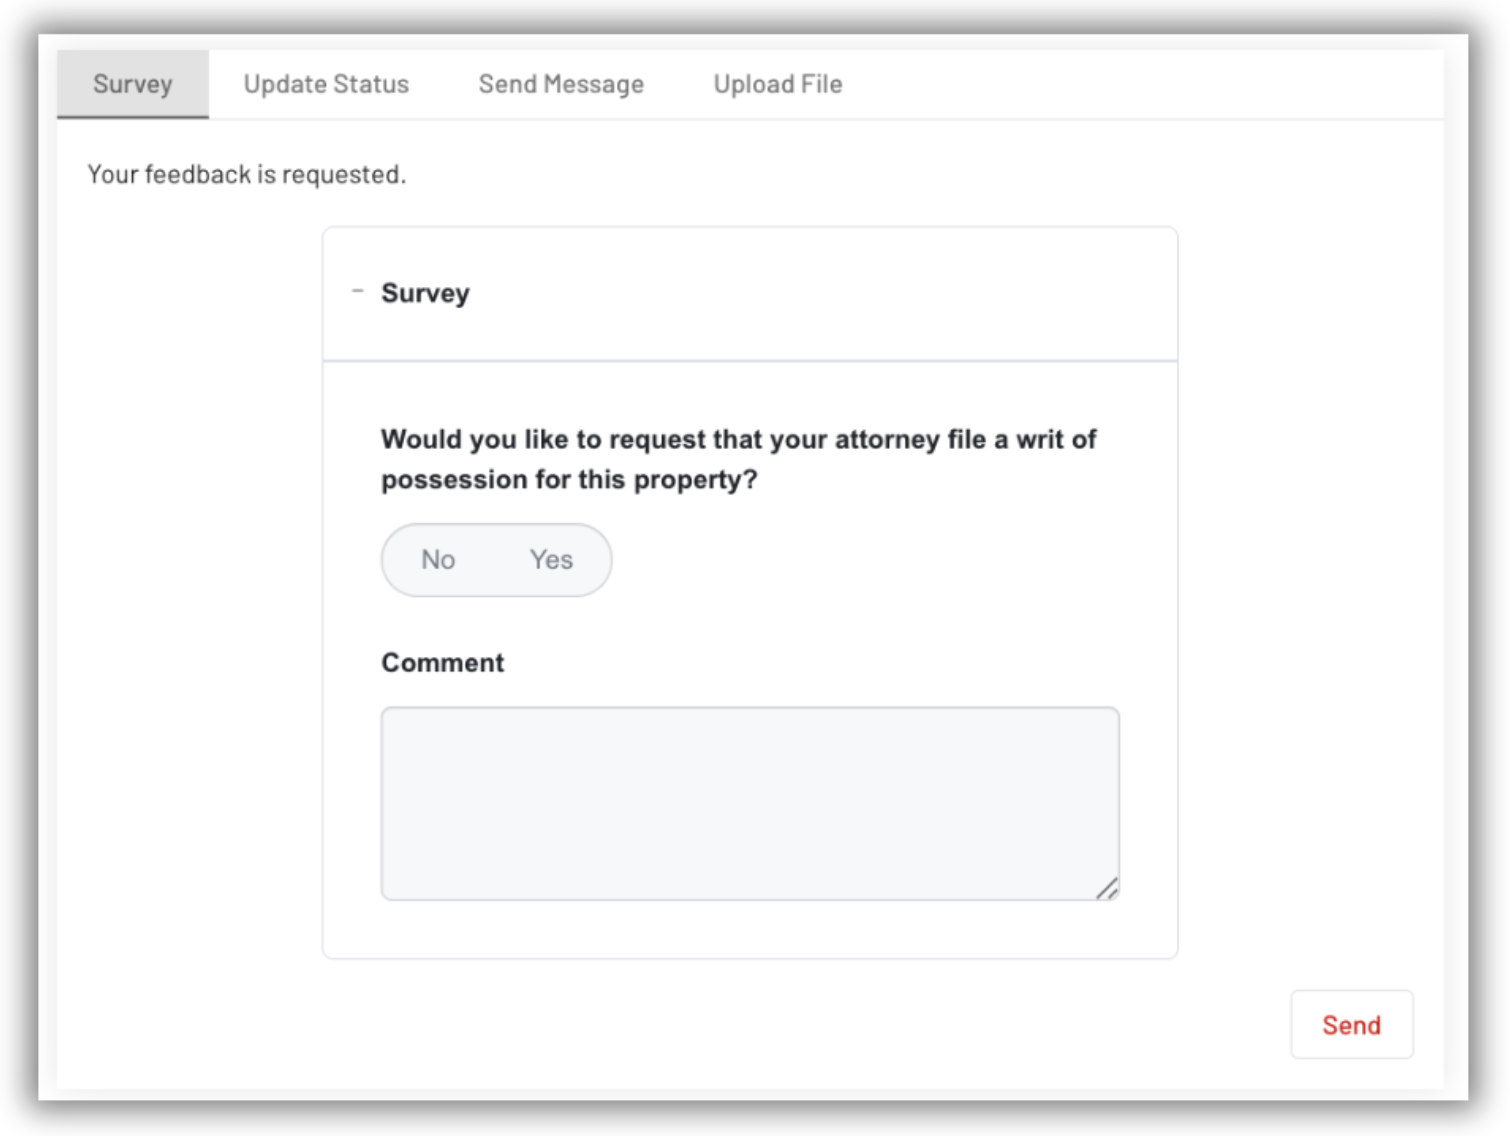
When the survey step is active:
- The client receives an email notification containing a link to the survey.
- The survey email includes the questions and a request to answer.
- Once the client submits their responses:
- Answers are saved in their Activity Log and can be viewed inside the case.
- The attorney receives an email notification with the client's responses.
- Clients can re-answer the survey if needed, and all previous answers remain visible.
The Survey Builder in EasyEviction gives you a simple yet powerful way to collect information and feedback directly within your legal workflows. With full control over layout, field types, and validation, surveys in EasyEviction bring both flexibility and professionalism to your case management process.
For any additional questions or support, feel free to contact our dedicated support team.