
Handling Case Tasks in Cases
For attorneys and property managers, staying organized during eviction cases is essential. EasyEviction simplifies this by allowing users to schedule, reschedule, and remove tasks as needed, ensuring timely court filings, notices, and deadlines are met and keeping you in control throughout the process.
This article will show you how to manage your case tasks effectively, ensuring a smooth eviction process.
1. Scheduling Case Tasks
Scheduling tasks for your eviction case is key to staying organized and meeting deadlines. From generating legal documents to filing with the court, each task is crucial for timely case resolution. Here’s how to schedule tasks in EasyEviction:
Step 1: Go to Eviction Details Page
To access the Eviction Details Page, go to "Open Evictions" on your Dashboard and select a case.
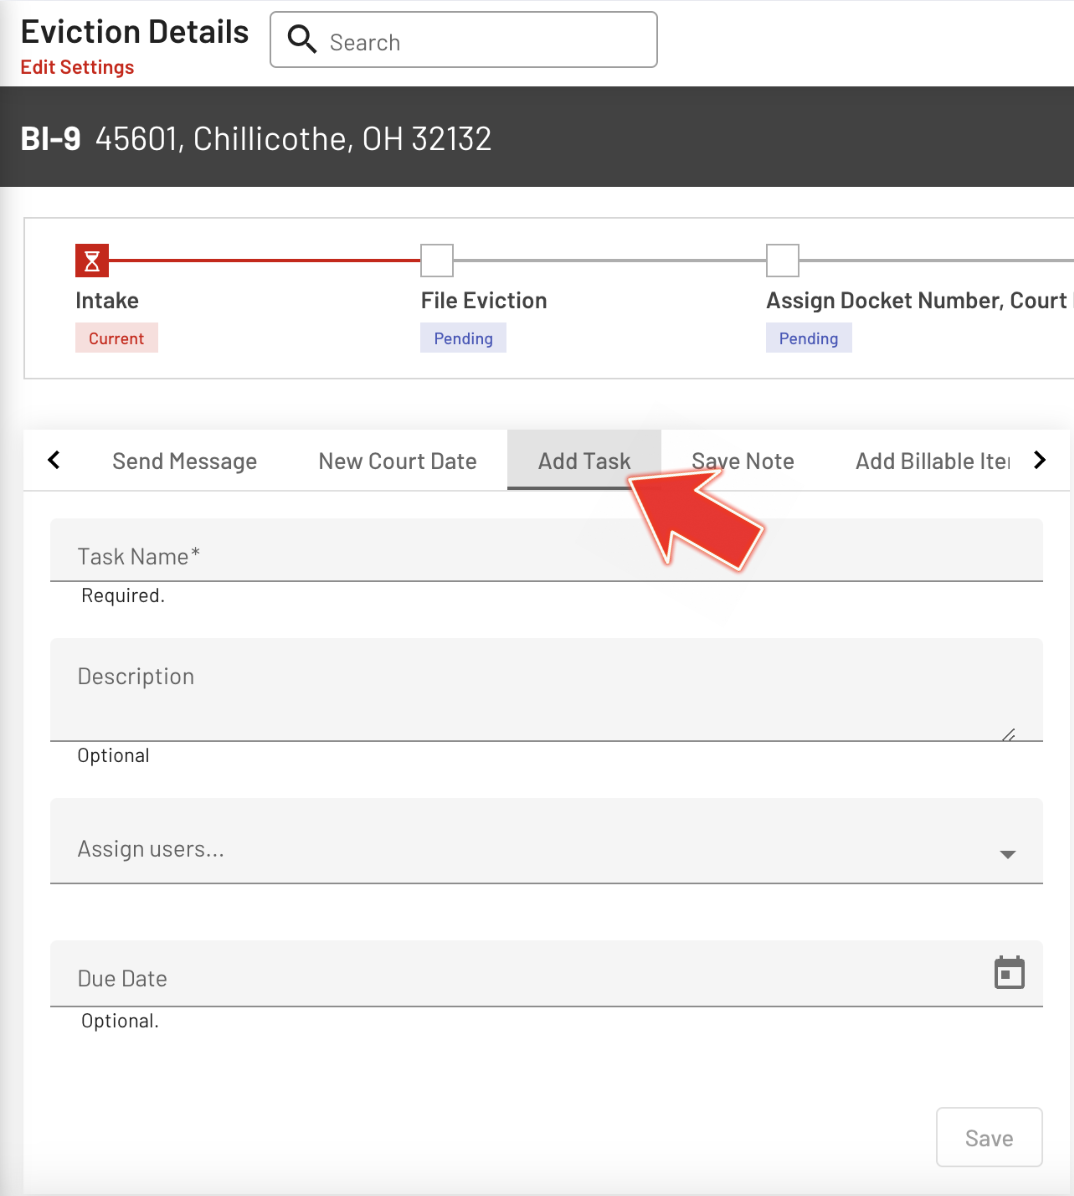
Step 2: Click the "Add Task" tab
Enter the Task Name, fill out the other fields as needed, then click the "Save" button.
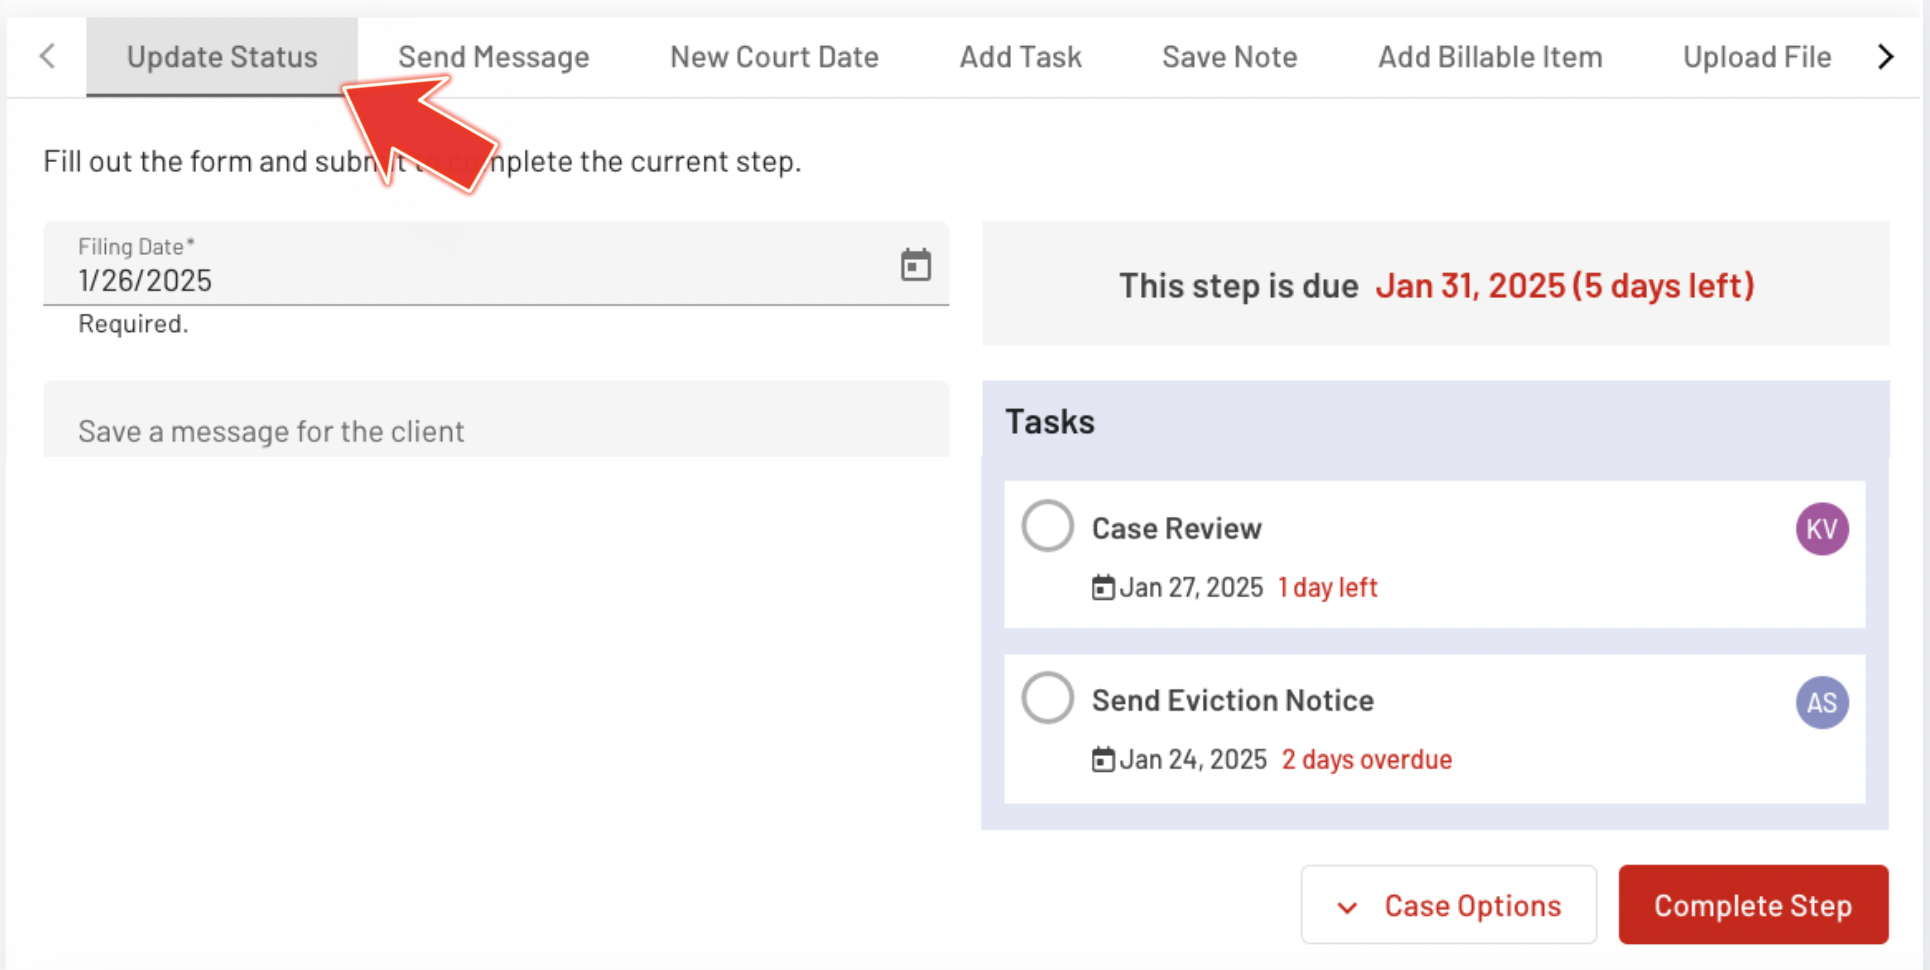
Step 3: View Saved Task in Update Status
Once you save a task, it will be displayed in the Update Status section, allowing you to easily track its progress and any associated deadlines.
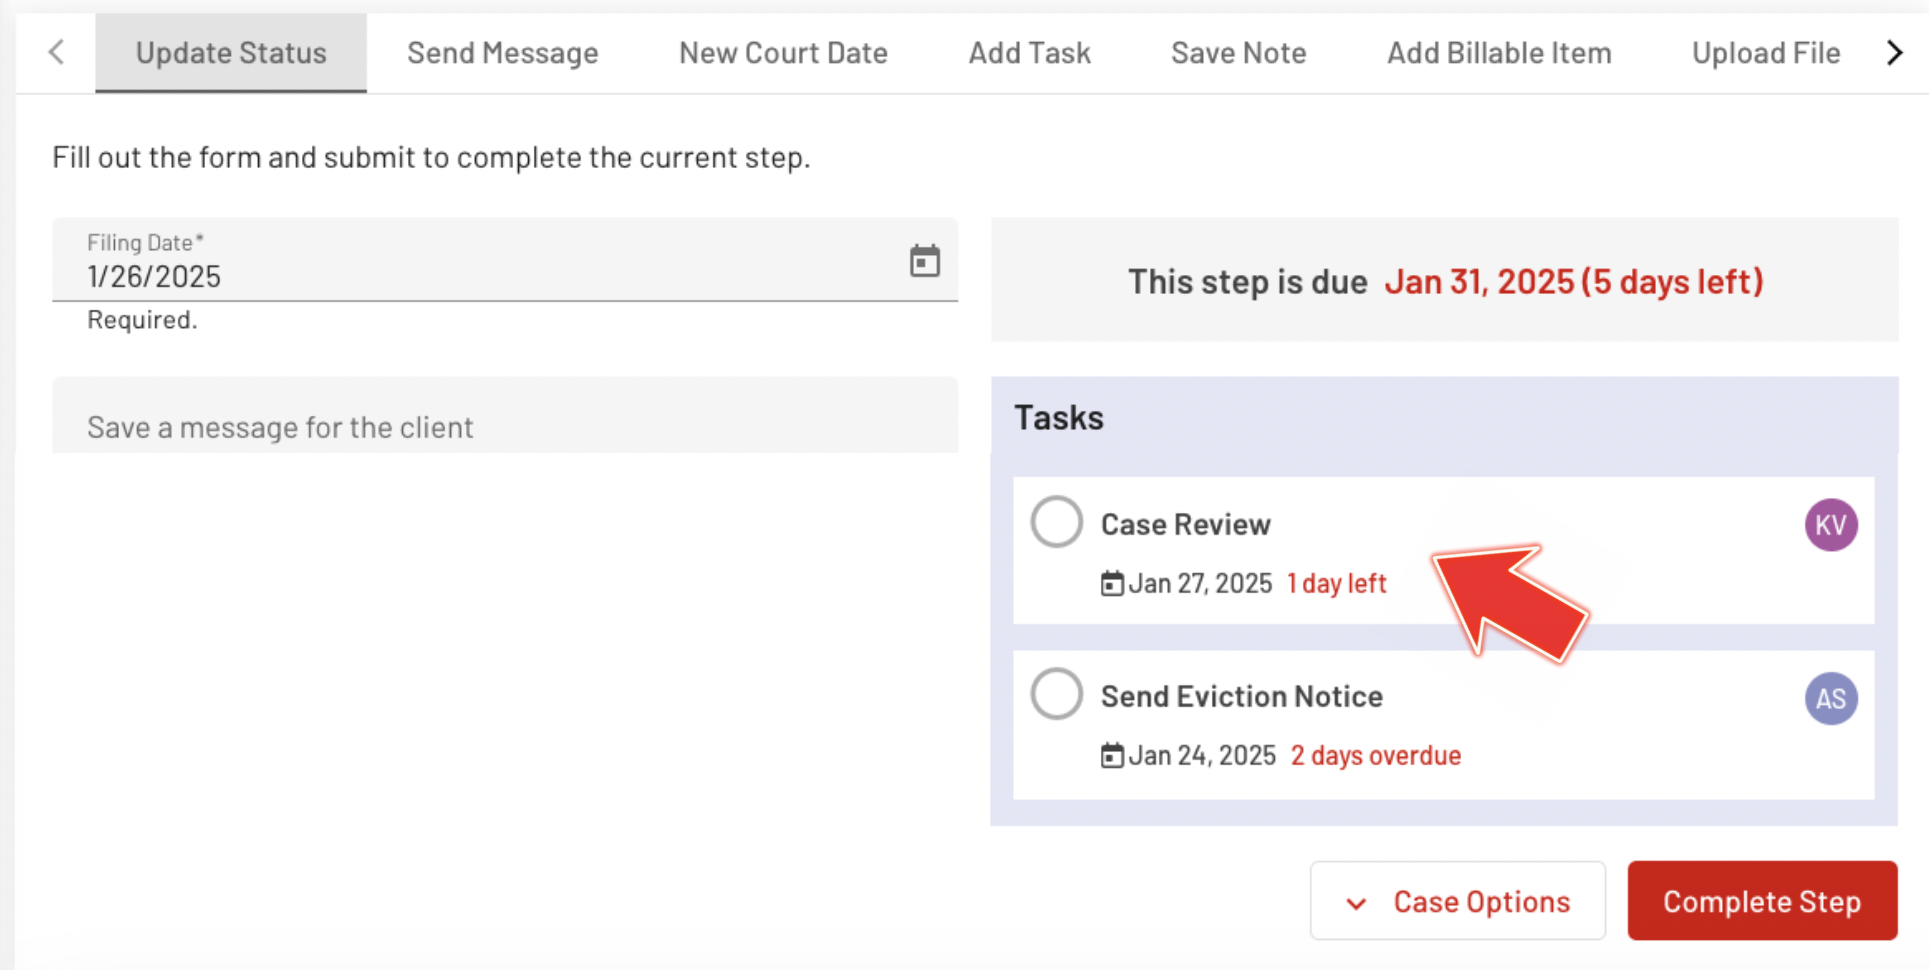
Step 4: Check Deadline Status
To help you stay on top of your tasks, EasyEviction will display a deadline indicator marked in red next to each scheduled task. This will show the current status of the task’s due date, such as “1 day left” or “2 days overdue,” so you can quickly identify any approaching or missed deadlines.
2. Rescheduling Case Tasks
This enables you to update deadlines based on team availability, tenant actions, or other influencing factors.
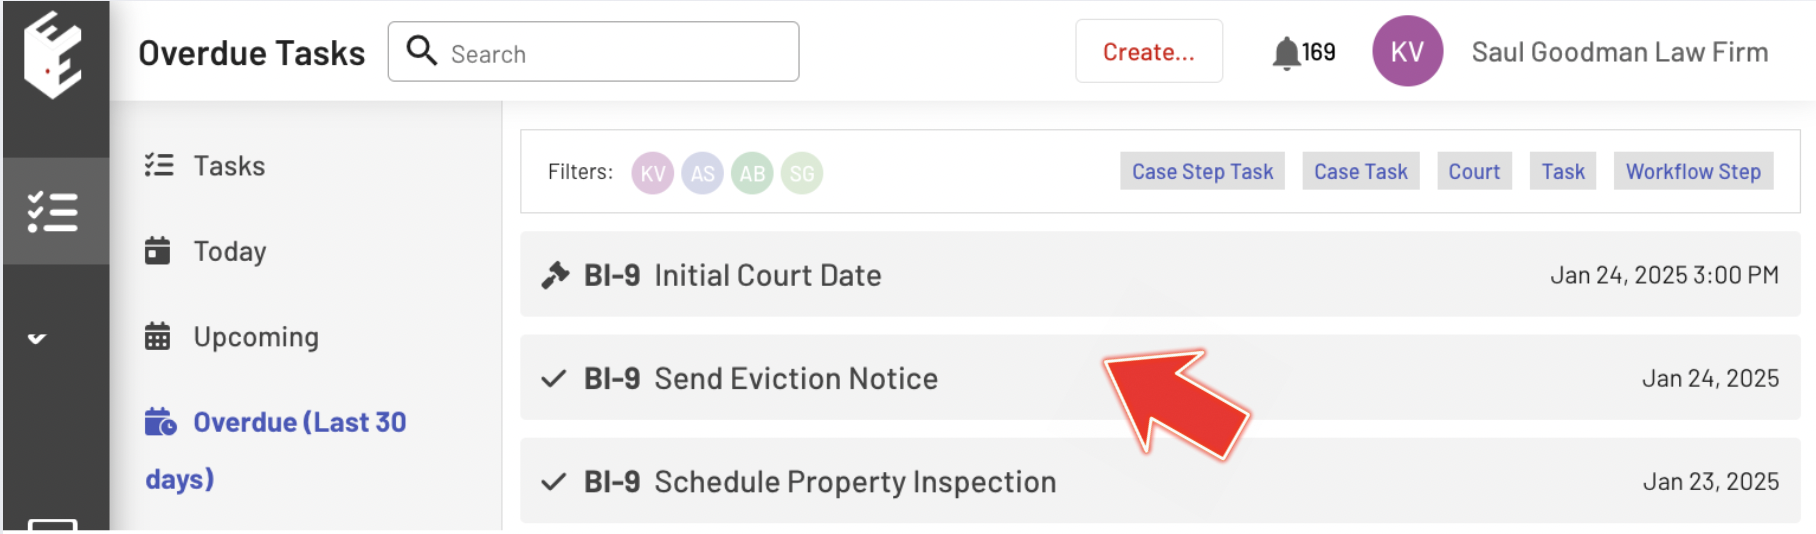
Step 1: Access the Task List
The task list can be accessed from the Task page or the Eviction Details Page under the Update Status section.
Step 2: Select the specific Task
Choose a task from the Task Page, either from the task list or by choosing a category—Today, Upcoming, or Overdue—for easy access. Once you click on the task you wish to edit, you will be directed to the Eviction Details Page.
Step 3: Edit the Task
Once directed to the Eviction Details Page, click on the specific task and complete the Edit Task Form.
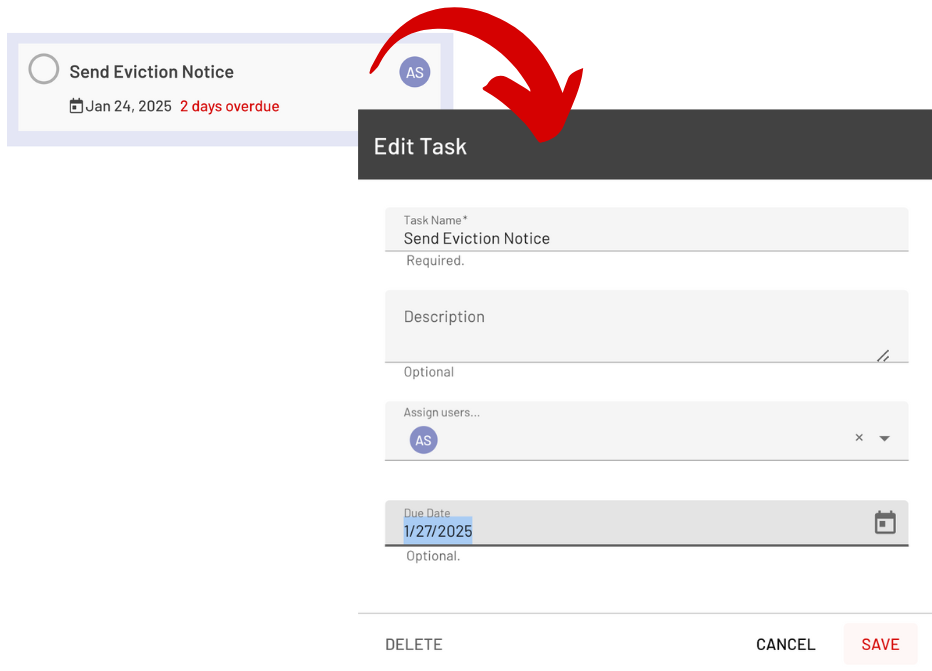
You can choose a new date based on factors such as internal scheduling, tenant response time, or other considerations that may impact the timeline.
Step 3: Confirm and Save Changes After rescheduling, confirm the new date and save your changes. EasyEviction will update your task list.
3. Removing Case Tasks
In some situations, tasks may no longer be necessary. For example, some tasks may no longer apply if a tenant pays overdue rent or settles the case outside of court. Here’s how to remove tasks that are no longer relevant:
Step 1: Review Your Task List
Navigate to your task list on the Task Page or Eviction Details Page. Identify the tasks that you no longer need to complete.
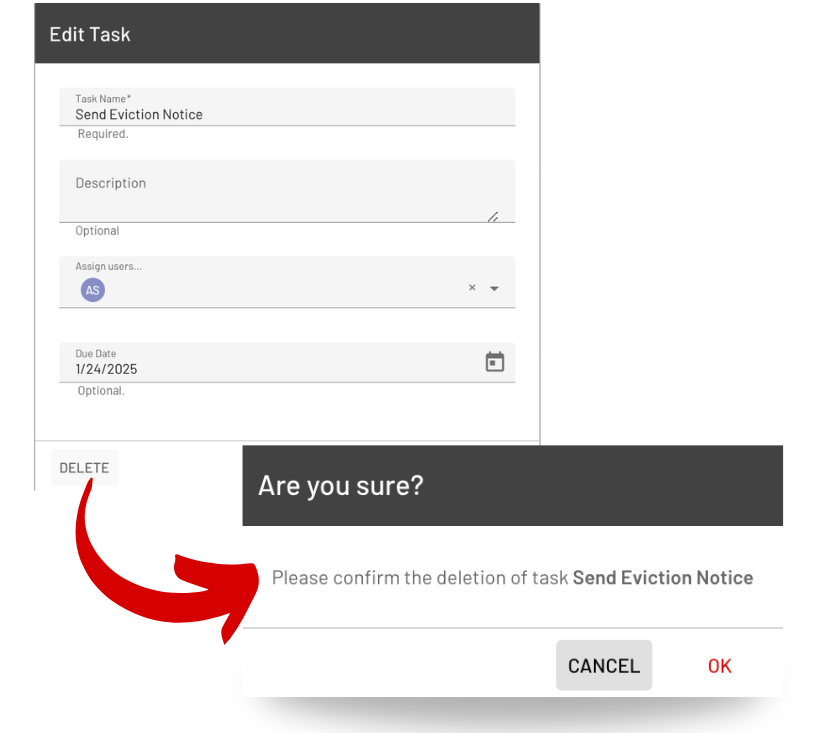
Step 2: Select the Task to Remove
After selecting a specific task, the Edit Task form will appear.
Step 3: Click Delete
You’ll be asked to confirm that you want to delete the task. Once confirmed, the task will be permanently removed from your case.
Why Proper Task Management Matters
Effectively scheduling, rescheduling, and removing case tasks ensures that your eviction process proceeds smoothly, without unnecessary delays or mistakes. By staying on top of the tasks and using EasyEviction’s features to manage your case timeline, you can:
- Avoid missed deadlines and costly delays
- Stay organized throughout the entire eviction process
- Keep your tenant informed about the status of the case
- Save time by automating reminders and notifications
- Have a clear view of your case’s progress
Eviction cases involve many moving parts, but EasyEviction’s task management tools help you stay organized. Whether scheduling, rescheduling, or removing tasks, the platform keeps your case on track and ensures deadlines are met, helping you manage the process with confidence.
For any further assistance or questions, don’t hesitate to contact our support team.