
Invoice Adjustments: Applying Credit Notes, Write-Offs, and Credits
Credit notes, write-offs, and credits are crucial tools for rectifying errors, resolving discrepancies, and ensuring the accuracy and reliability of financial records. Proper application of these adjustment mechanisms is essential for maintaining financial integrity and aligning records with actual transactions.
Follow the steps below to complete financial adjustments in EasyEviction:
Step 1: Go to the Invoice Details Page
Ways to access the Invoice Details Page:
a. On your EasyEviction Dashboard, use the search bar to locate the Invoice Number.
b. Click on the Invoices Widget in the left dock, then select the desired invoice.
c. If you are on the Clients: Open Evictions page, navigate to the Invoices Tab and select the relevant invoice.
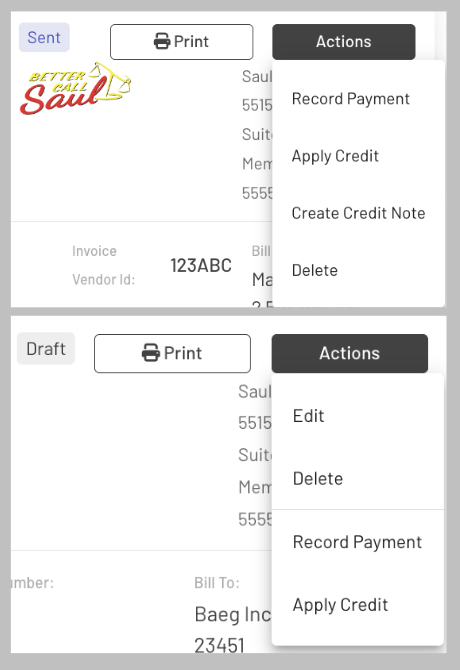
Step 2: Click the Actions button
Note:
All invoices SENT to the client will feature the following options in the "Actions" menu: Record Payment, Apply Credit, Create Credit Note, and Delete.
For invoices still in DRAFT status, the "Actions" menu will instead present the options to Edit, Delete, Record Payment, and Apply Credit.
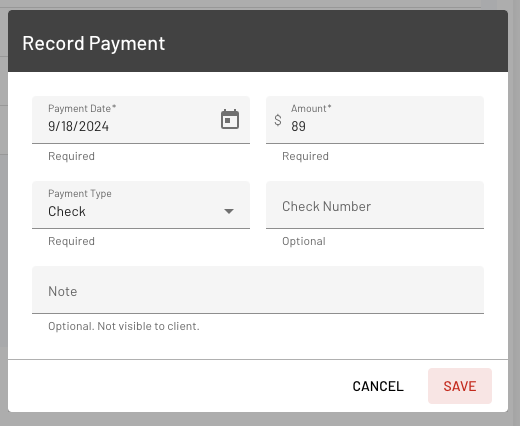
Record Payment
Enter the required details and click "Save." Use the "Note" field to input any relevant information or comments.
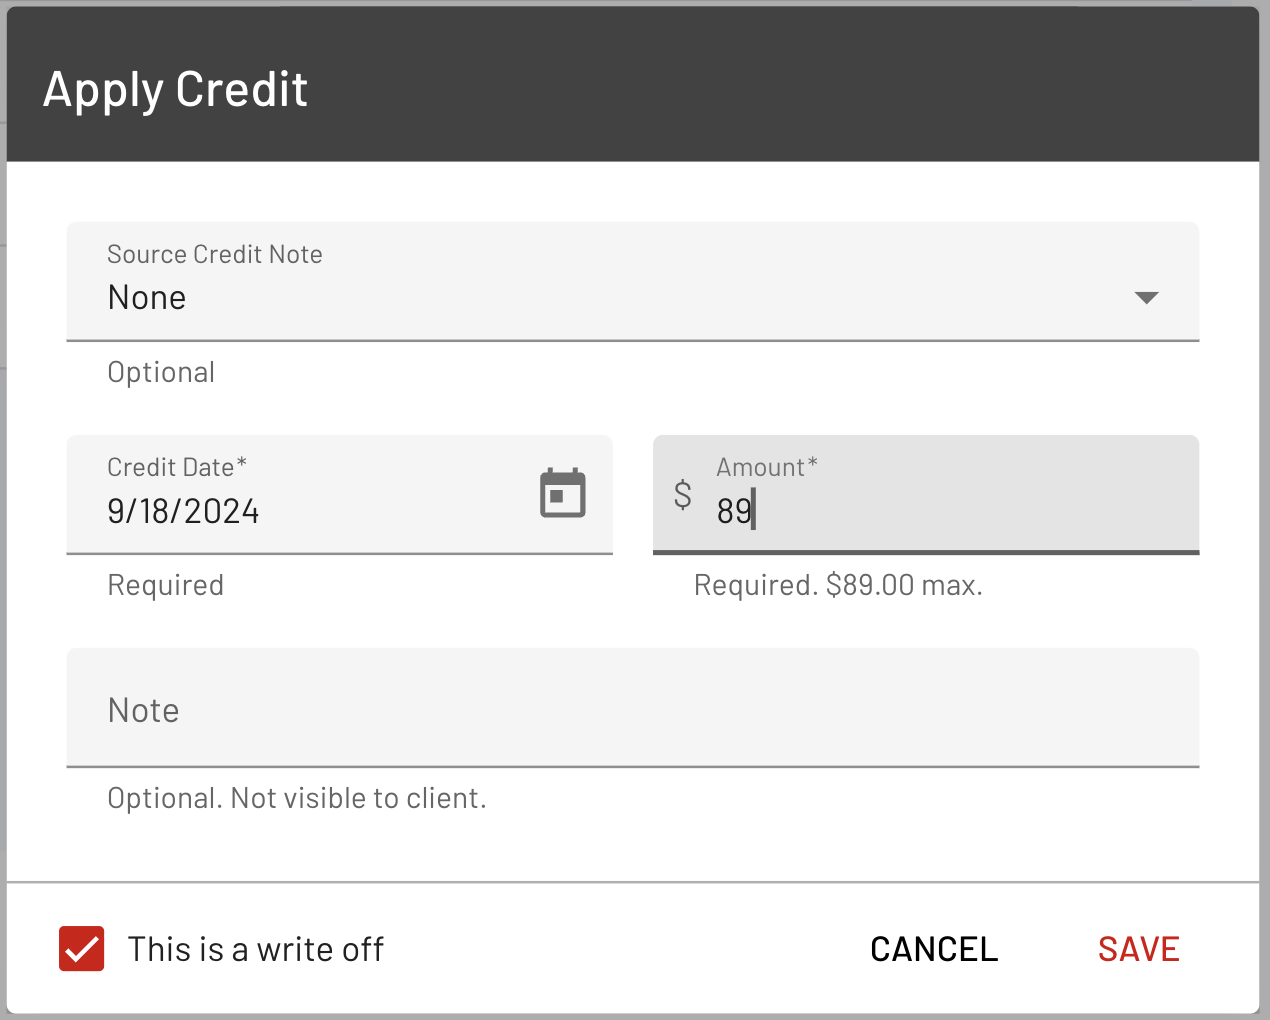
Apply Credit or Write-Off
Provide the required details related to the credit, ensuring the maximum allowable amount is not exceeded, then click "Save."
Use the "Note" field to include any relevant information or comments.
Check the box if the credit is intended as a Write-off.
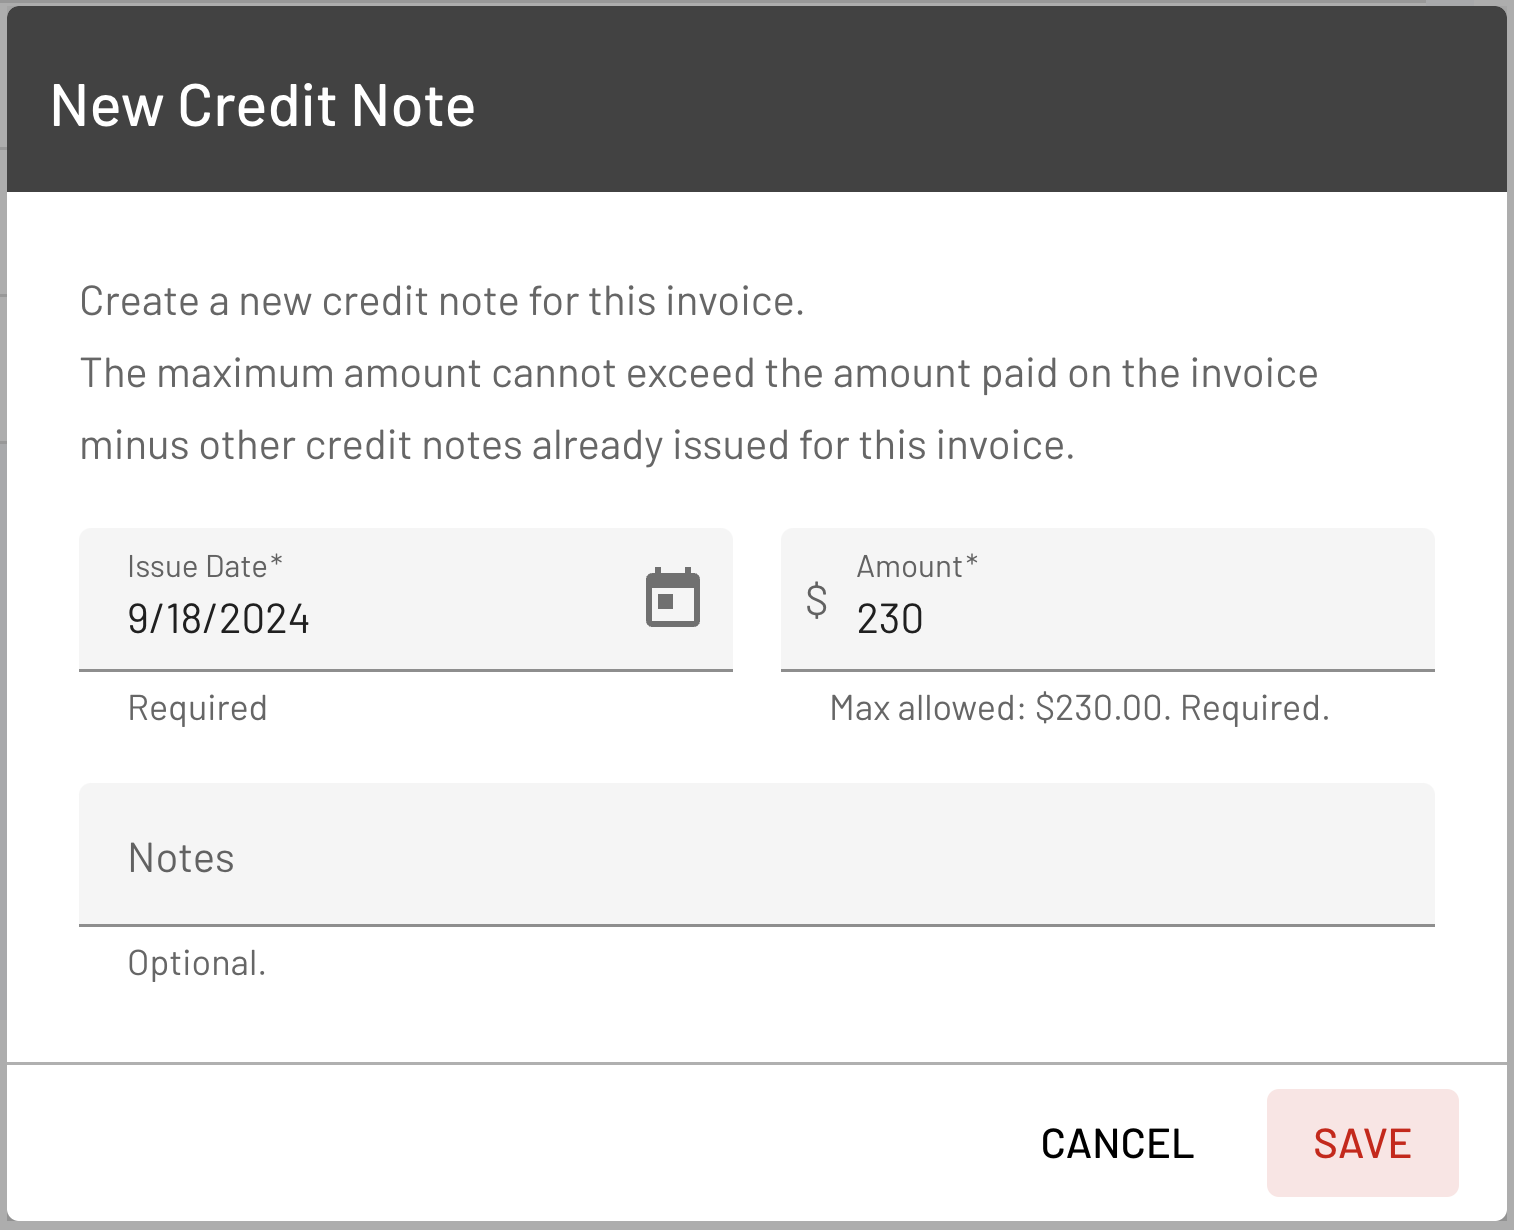
Create Credit Note
Complete the required details related to the Credit Note, ensuring the maximum allowable amount is observed, then click "Save."
You may use the "Note" field to enter any relevant information or comments.
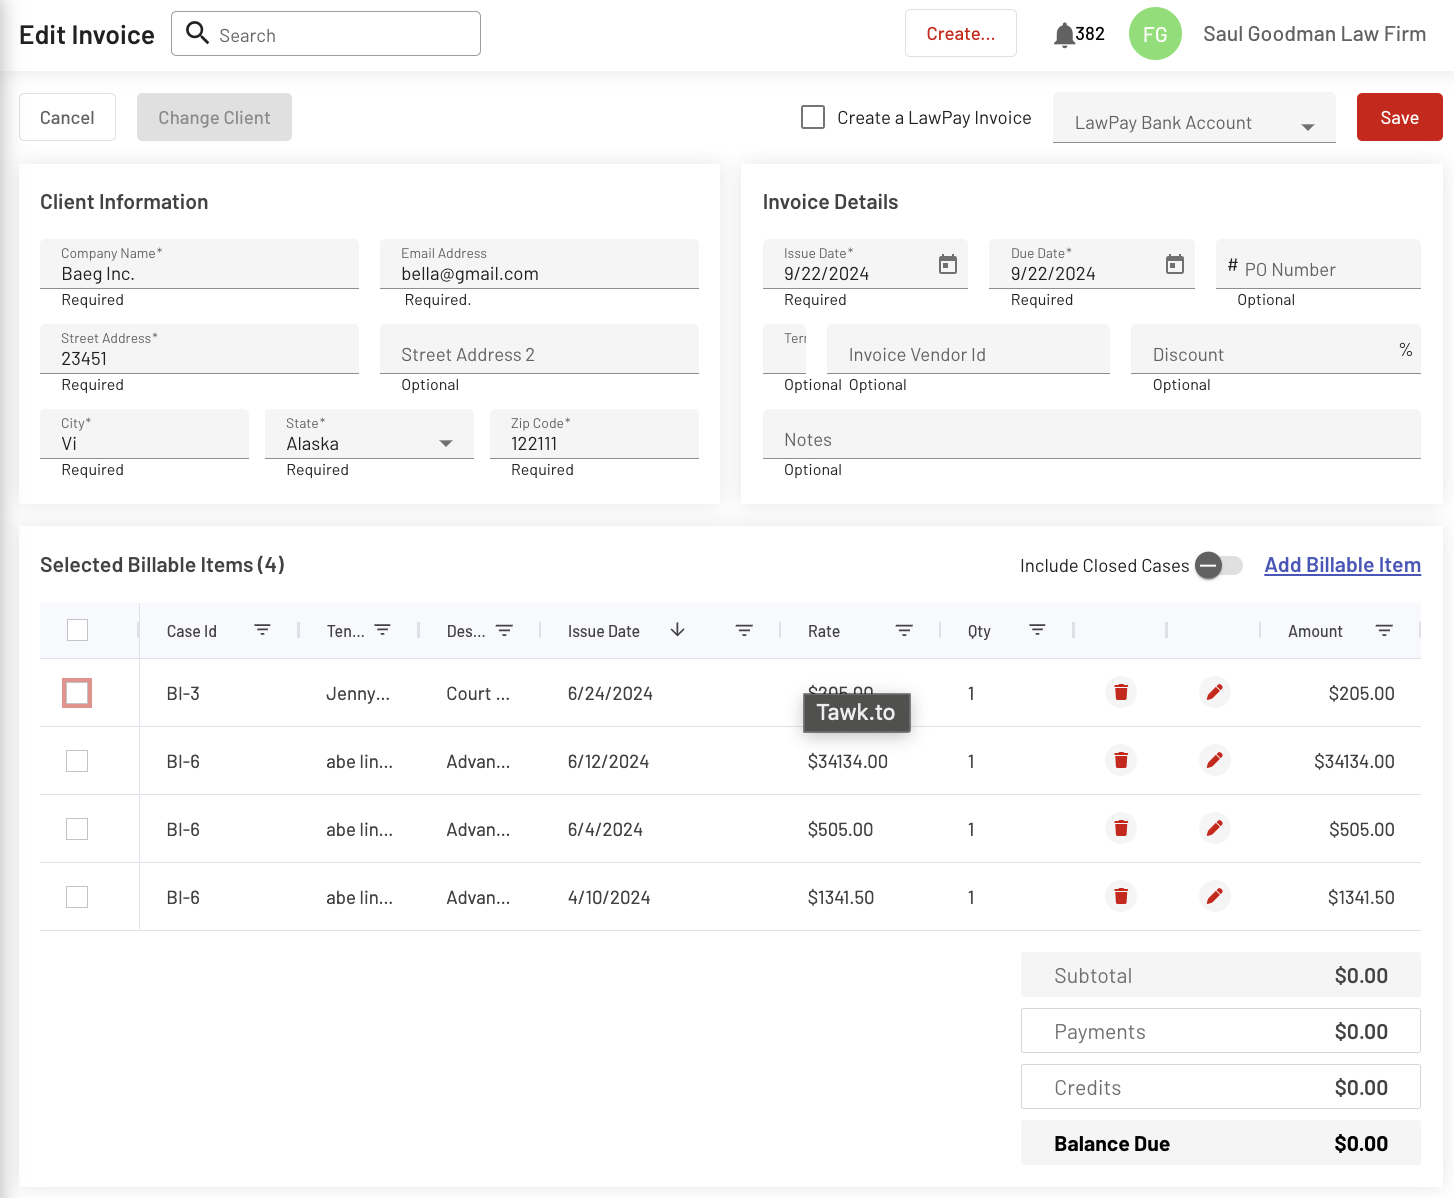
Edit Invoice
Clicking the "Edit" option will redirect you to the "Edit Invoice Page," where you may modify the Invoice Details, select or add billable items, and apply a discount.
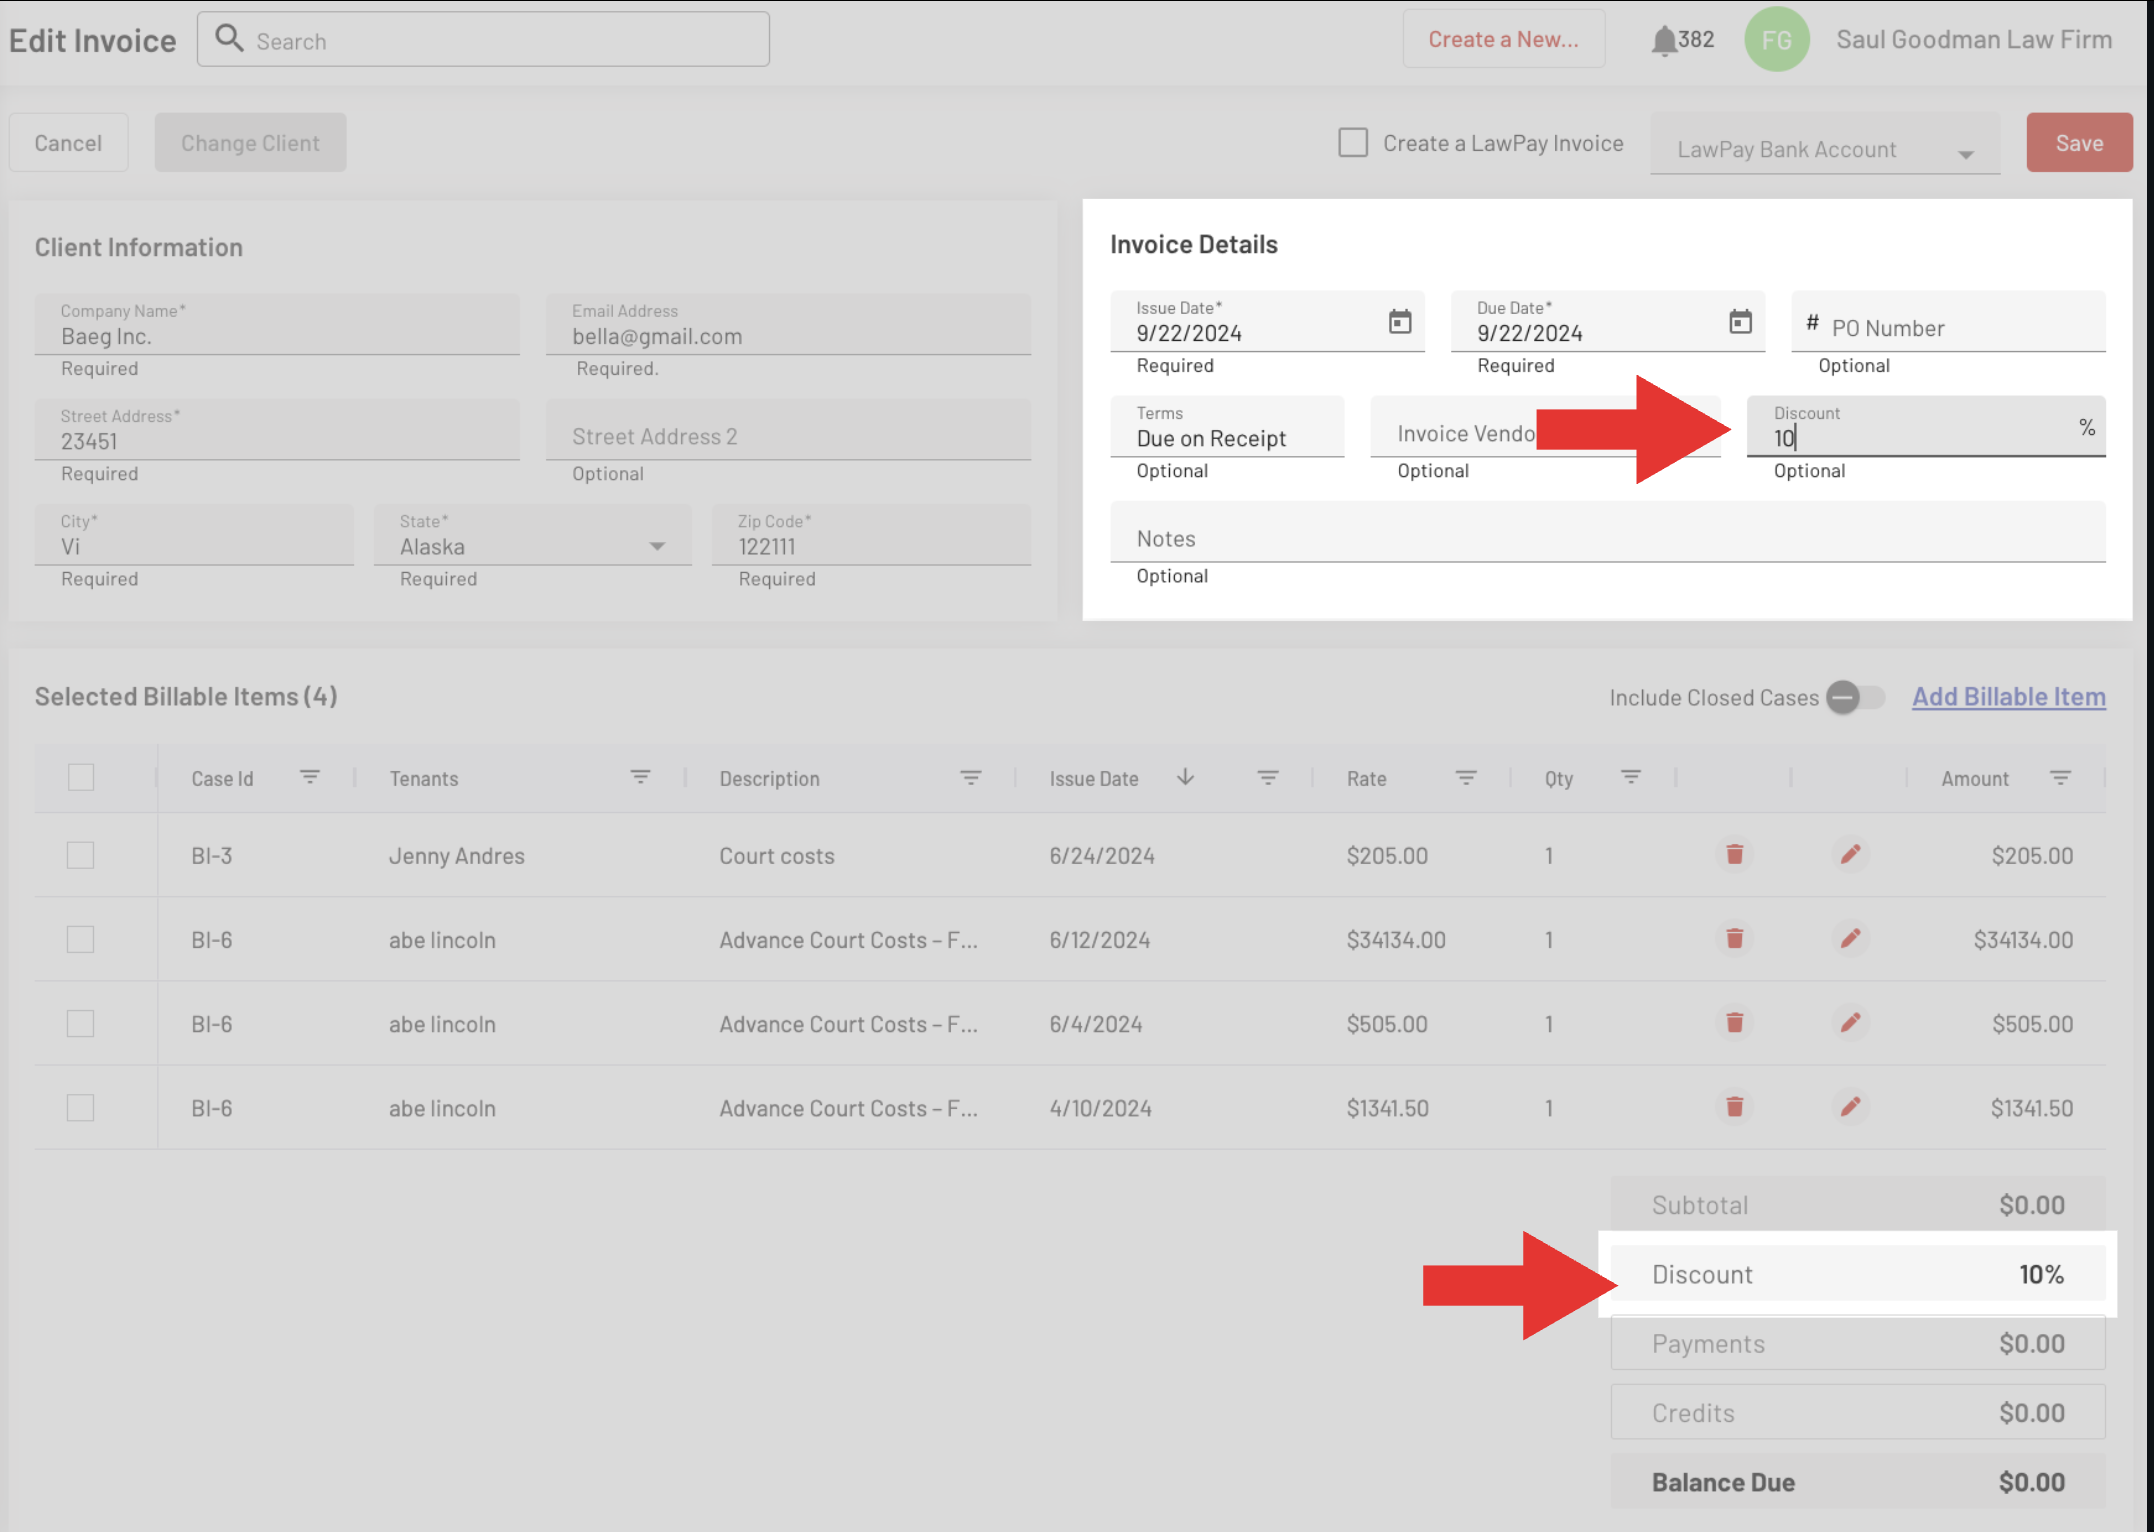
Discount
A discount feature is available in the "Invoice Details Section" on the Edit Invoice Page. Upon entering the percentage of the discount, it will automatically be reflected in the Totals Section.
Click the Save button to apply the changes.
Step 3: Click the Send Invoice button
Once all edits have been made and the details are confirmed accurate, click the "Send Invoice" button.
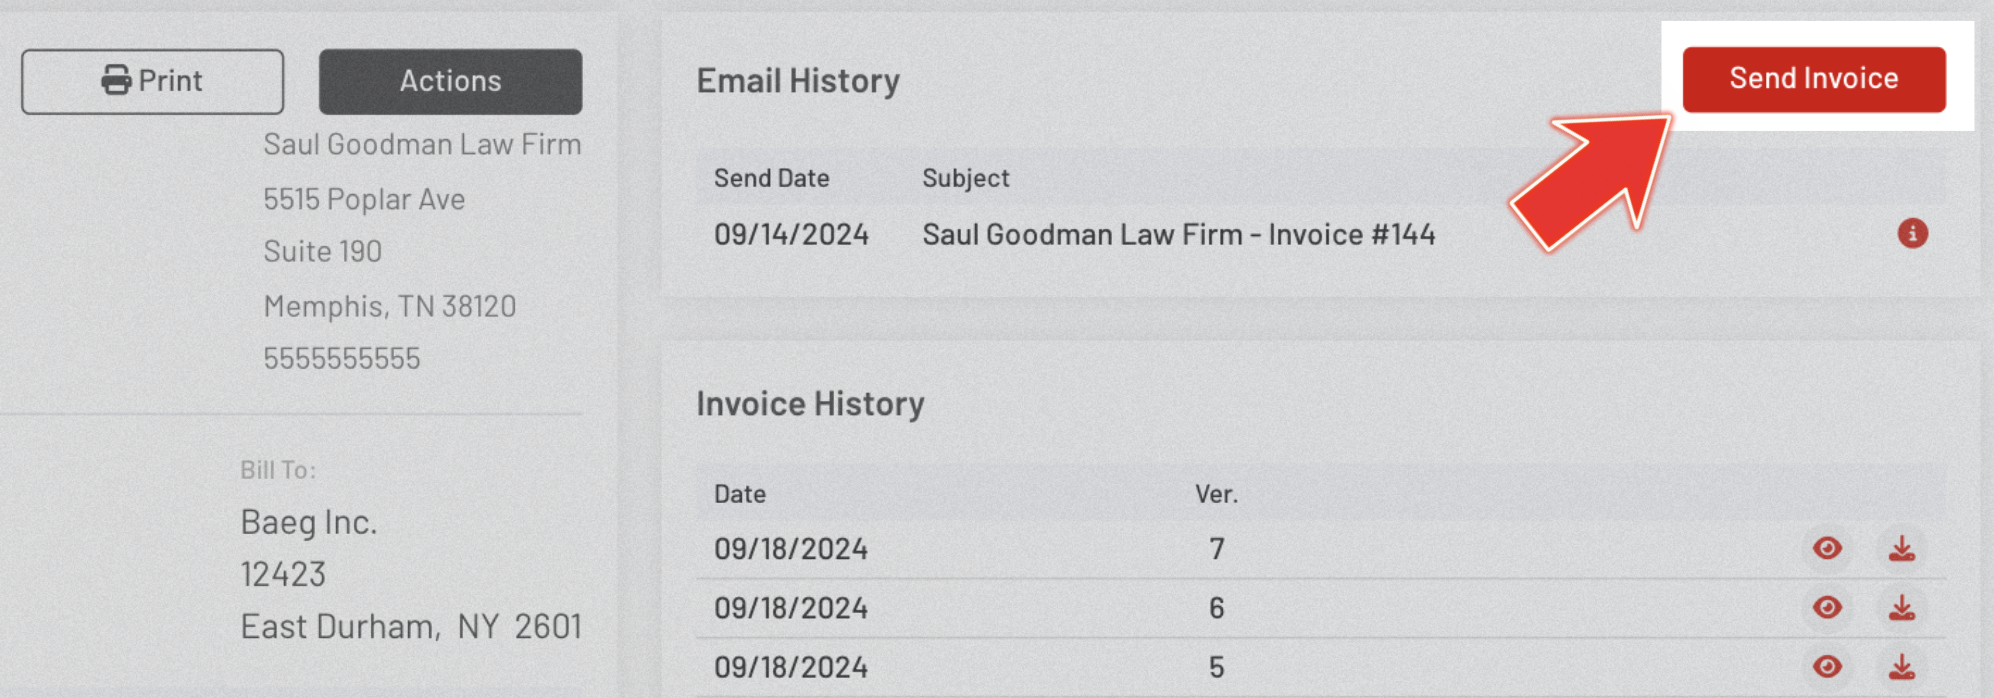
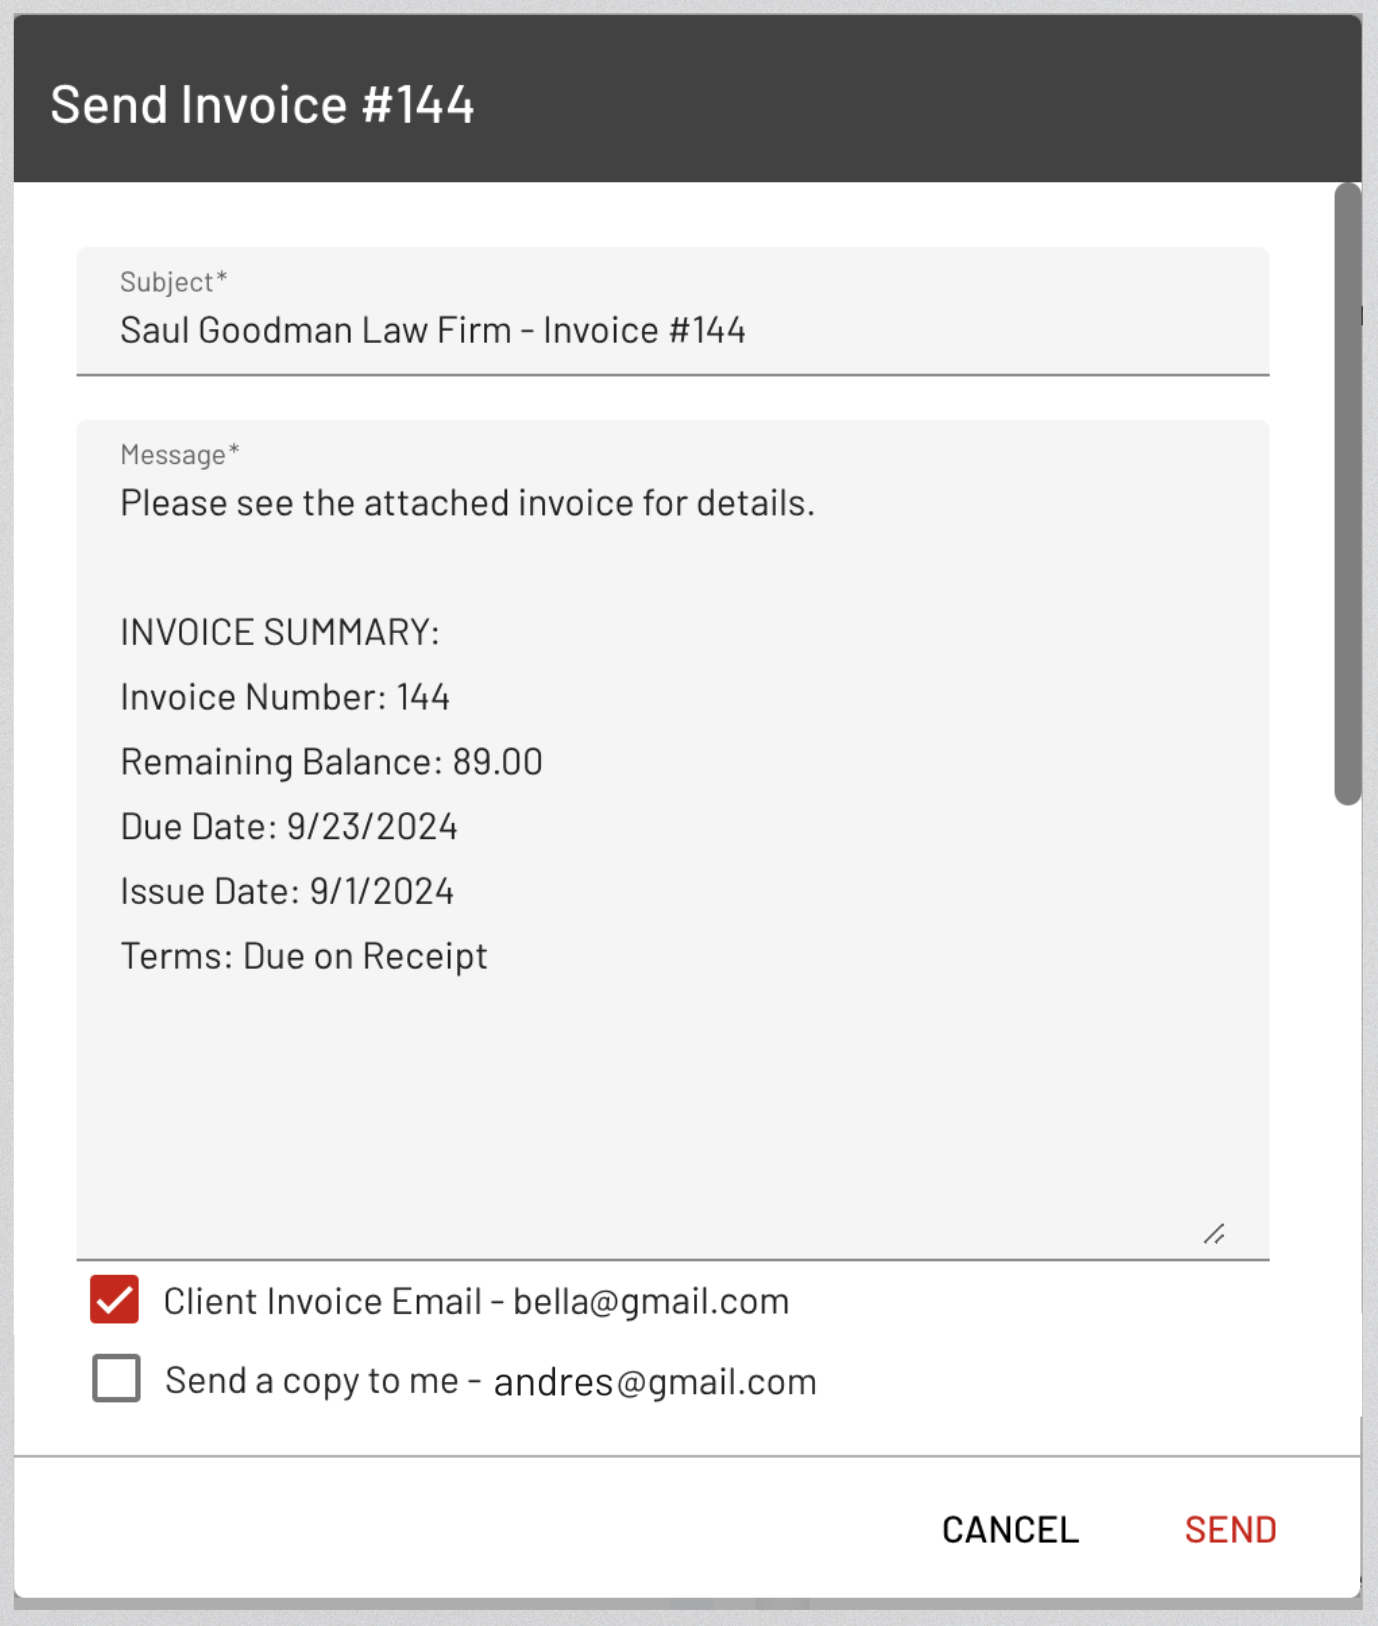
A Send Invoice # pop-up form will appear, allowing you to edit the subject and message that will be sent to the Client's Email.
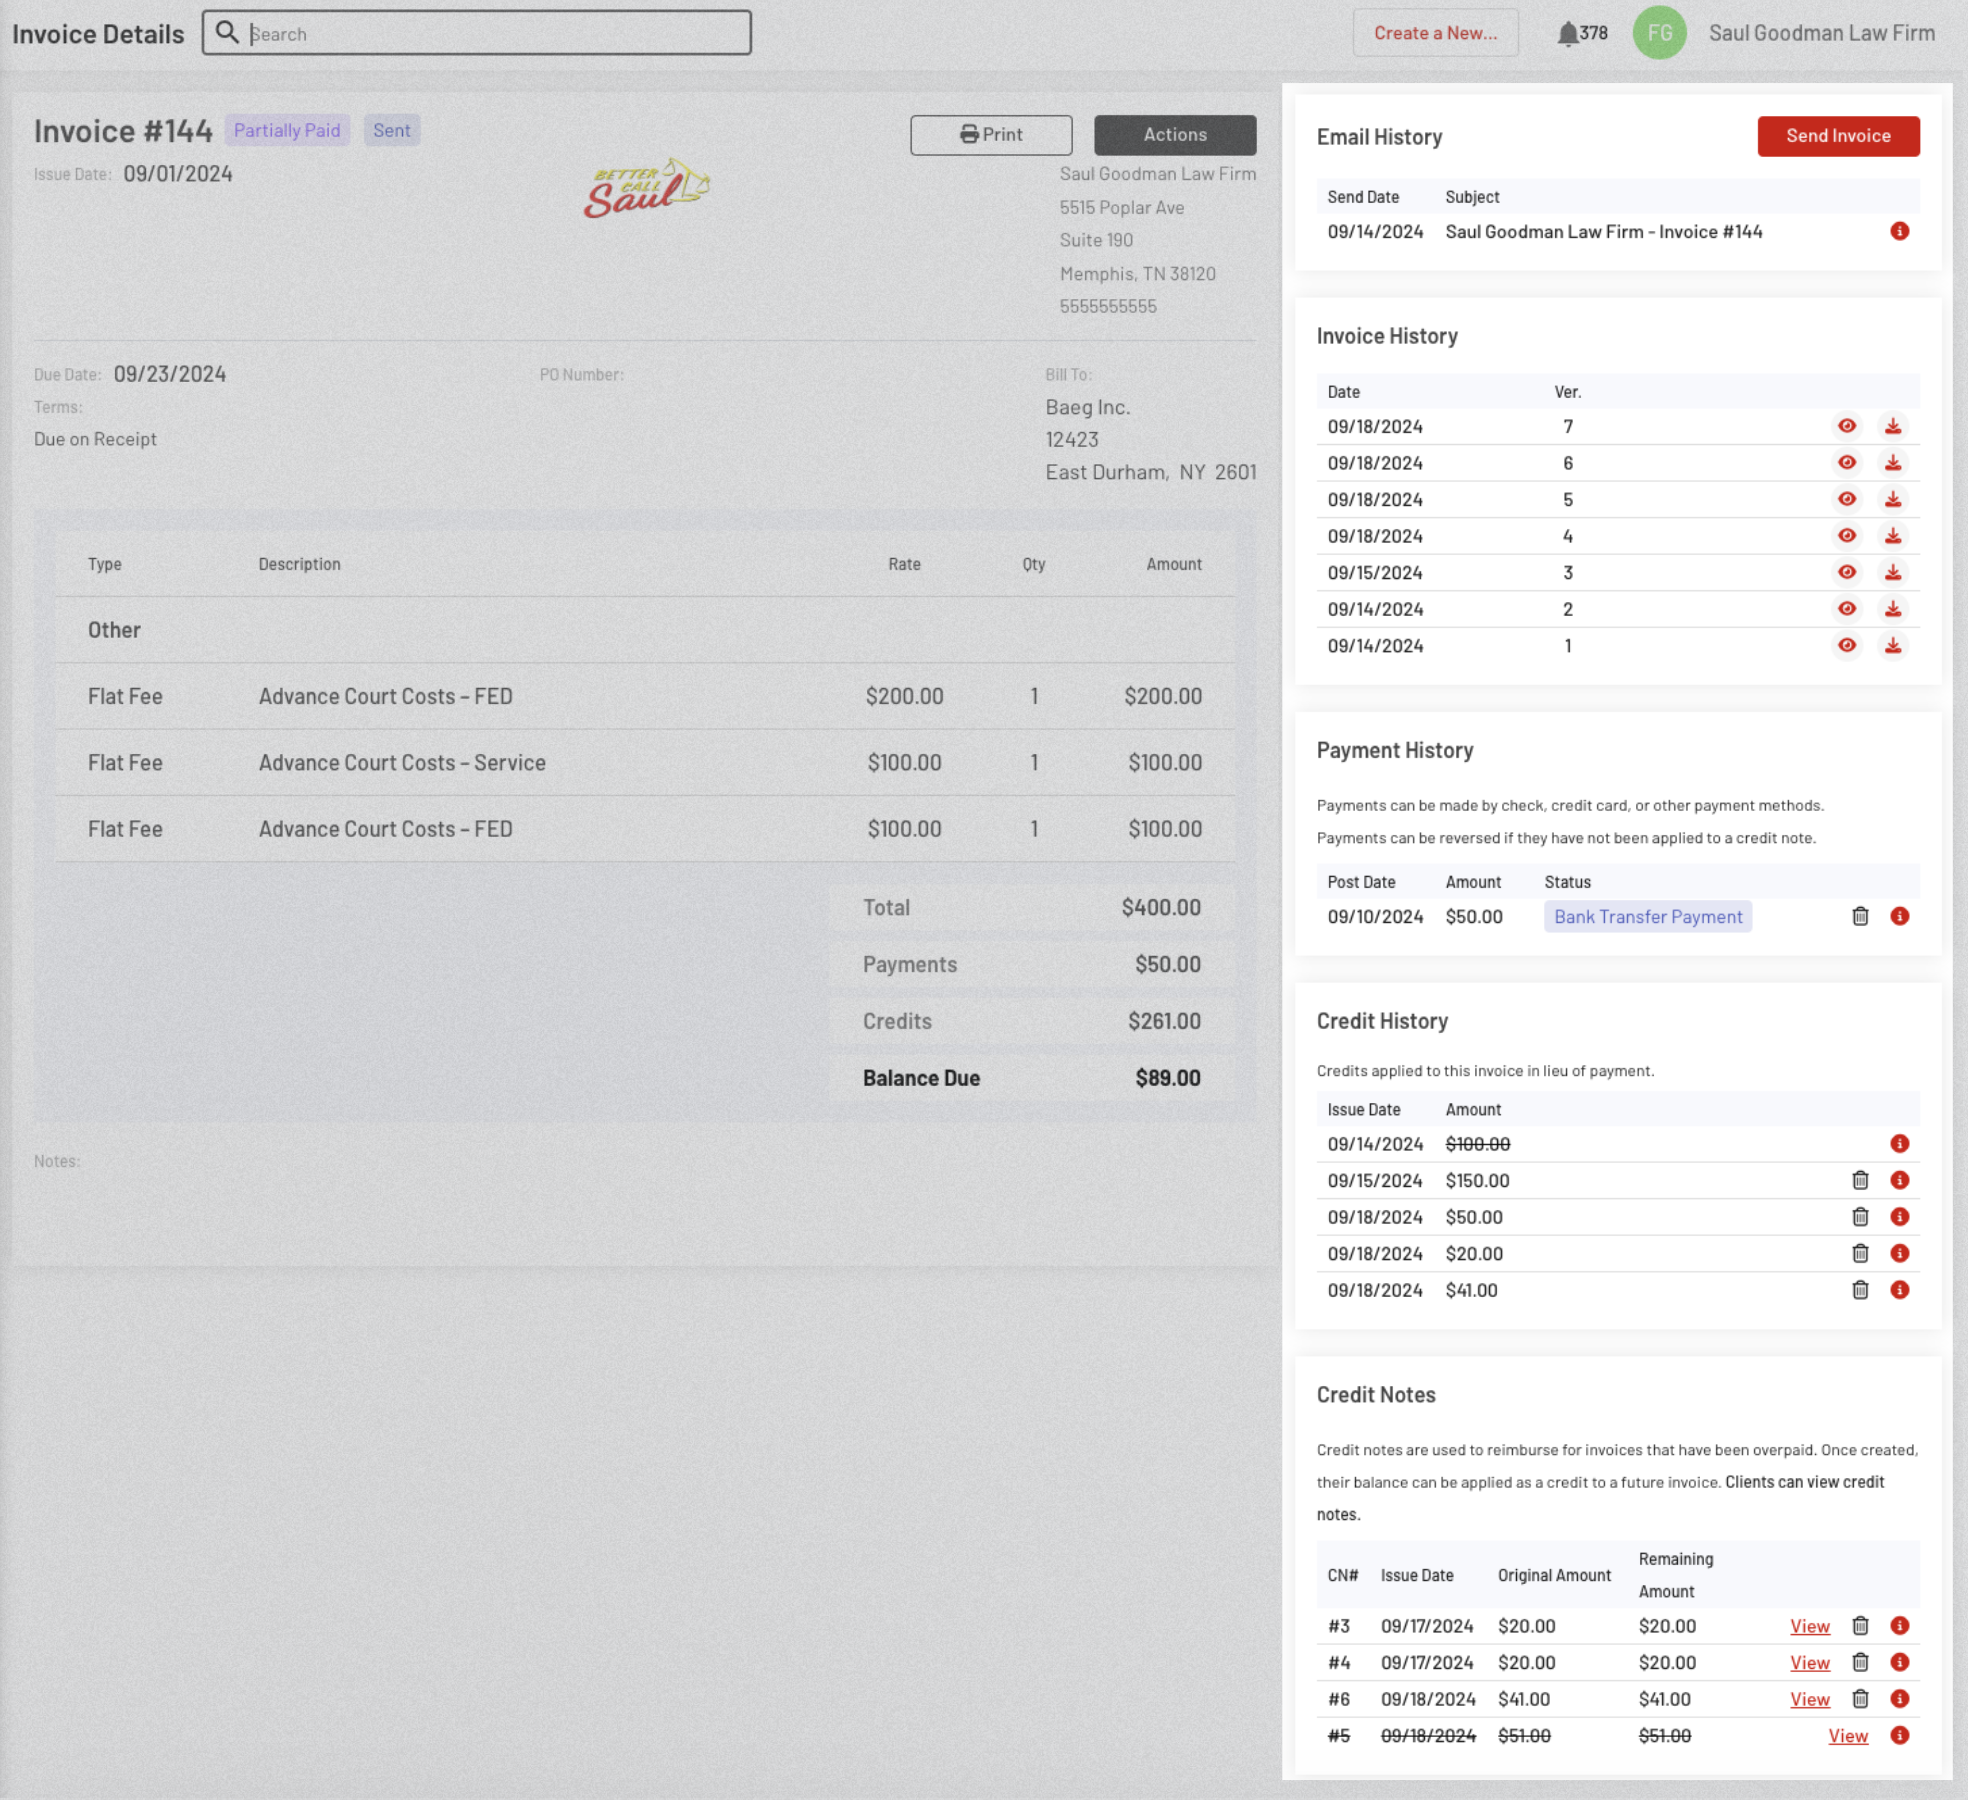
TRANSACTION OVERVIEW PANEL
These sections are positioned within the right panel of the Invoice Details page, where the following records are accessible: Email History, Invoice History, Payment History, Credits History, and Credit Notes details.
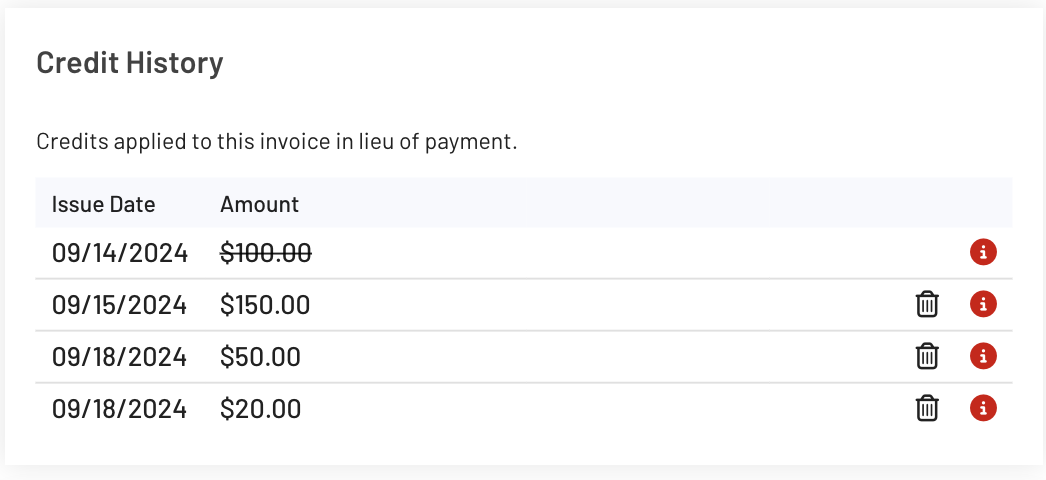
The Credit History displays the amount of the applied credits.
You can delete the credit or view the details of its application.
A deleted credit will appear with a strikethrough.
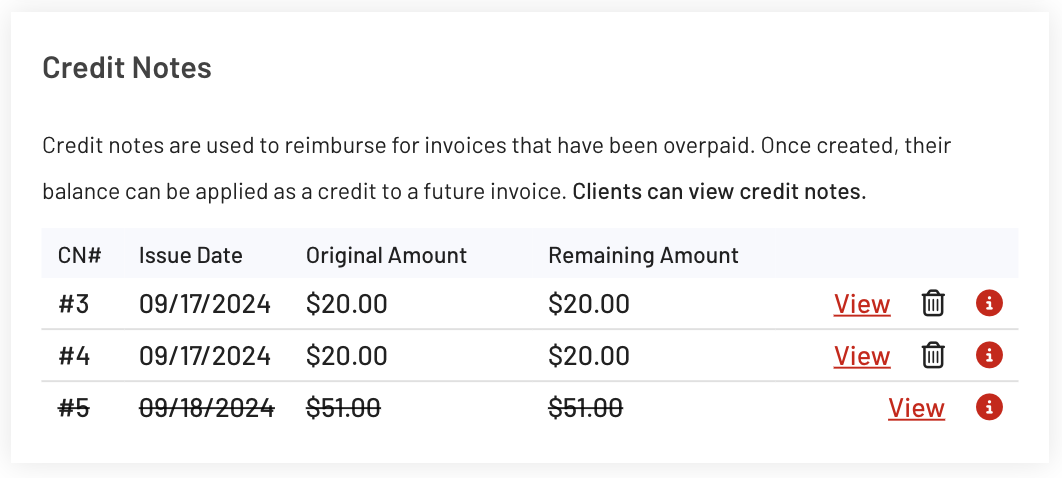
The Credit Notes Section displays all created credit notes, with "View" and "Delete" buttons available on the side for further actions.
Clicking the View button will direct you to another page showing
A reversed credit note will appear with a strikethrough.
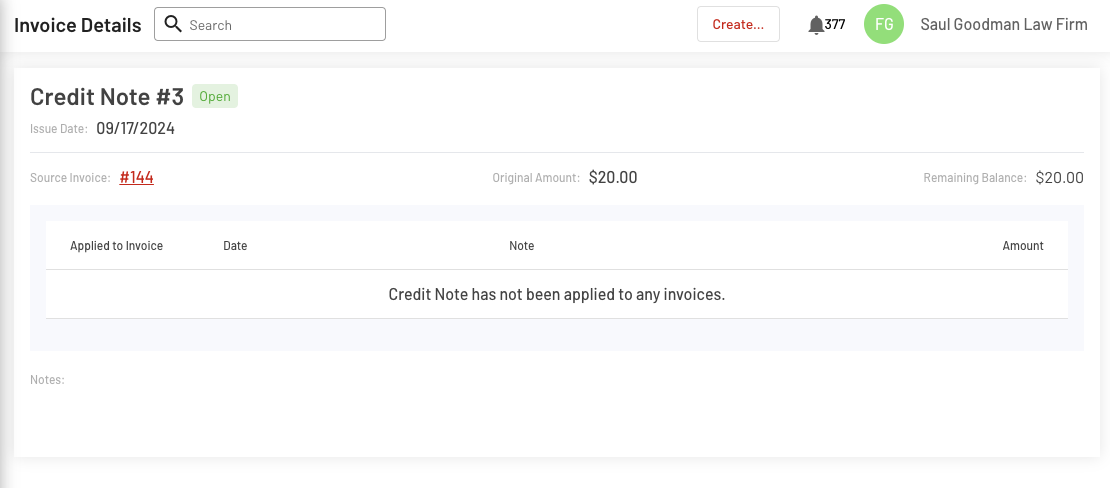
Clicking the View button will redirect you to a new page that provides detailed information about the specific credit note. (See image below)
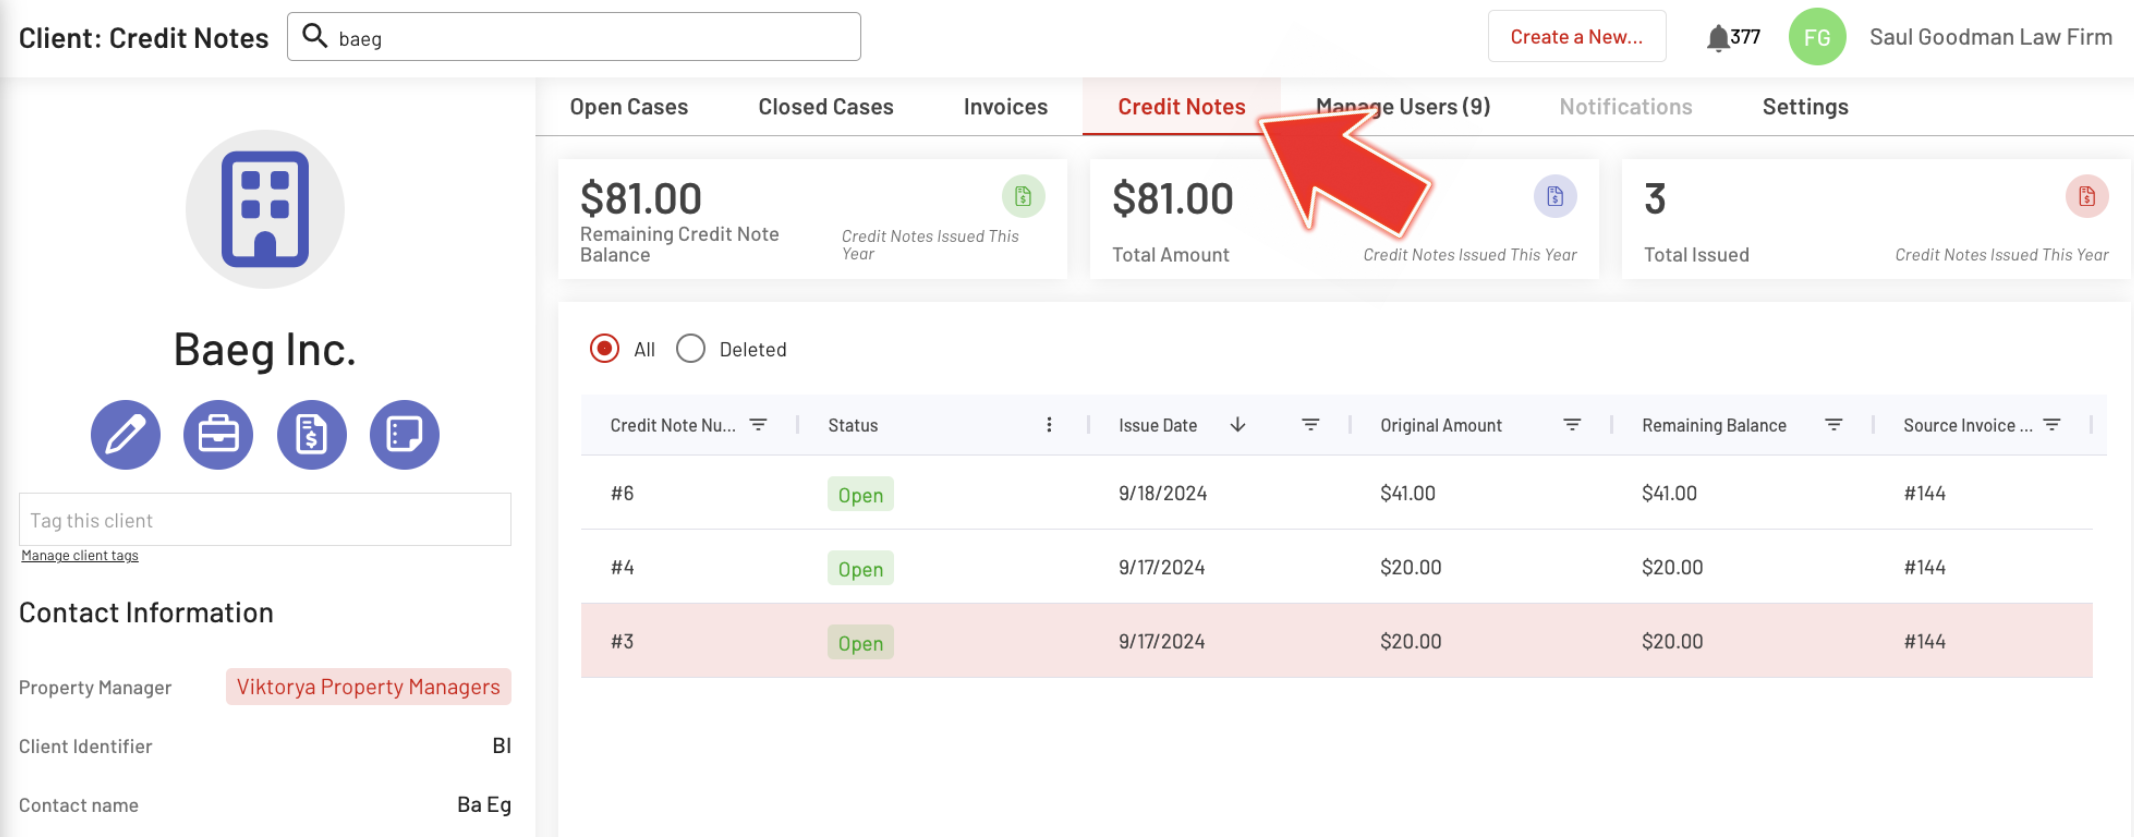
See also: Credit Notes in "Client: Credit Notes" Page
Navigate to the Clients page and select the desired client.
On the client's Evictions page, go to the upper right and click the Credit Notes Tab.
The Credit Notes for this client will also be displayed on this page. Clicking on a specific Credit Note will redirect you to a detailed view of the selected Credit Note #.
And that's it! This is how you can make financial adjustments to a specific Invoice #. Should you require further assistance, please do not hesitate to contact our support team.
For any support or questions, don't hesitate to reach out to our team.